61
CHANGING THE FILE FORMAT
The file format (file type and compression method) for sending a scanned image is specified when the destination
is stored in a one-touch key; however, you can change the format at the time of transmission.
The procedure below explains how to send a scanned image in full colour TIFF format.
1
Place the original.
When using the document glass, place the original
with the side to be scanned face down.
2
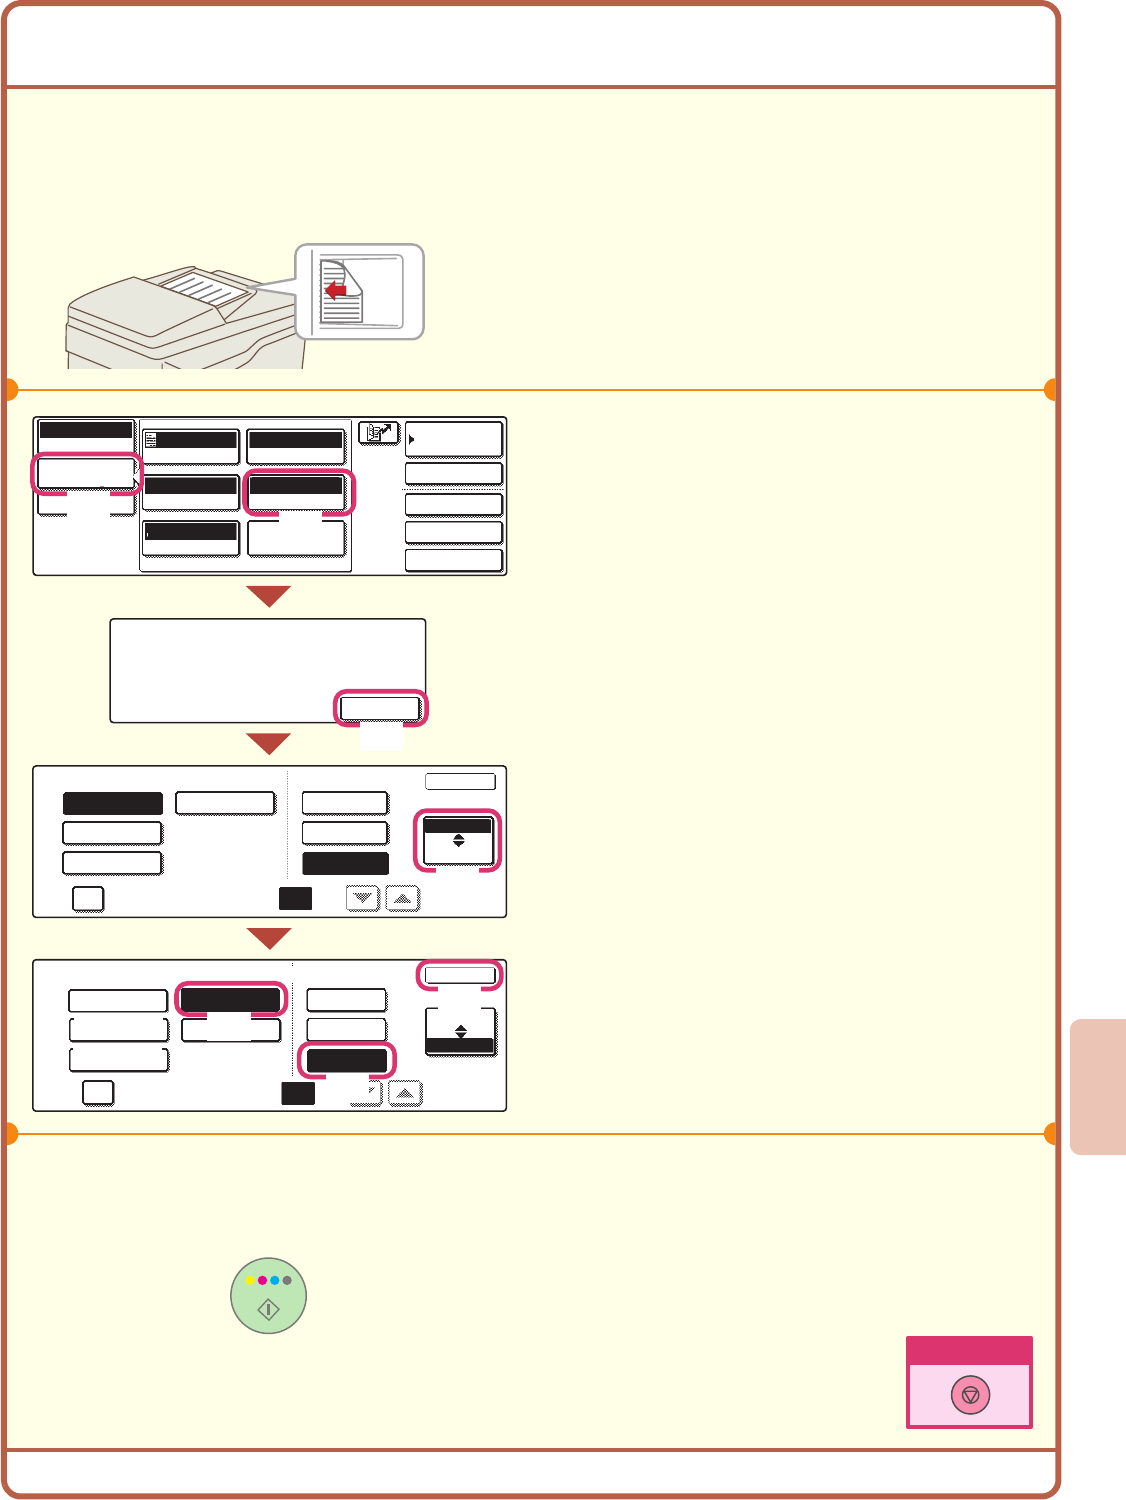
Select format settings in the touch panel.
(1) Touch the [Image Settings] key.
(2) Touch the [File Format] key.
(3) Read the displayed message and touch
the [OK] key.
(4) Change the mode to Colour/Greyscale
mode.
(5) Touch the [TIFF] key.
(6) Touch the [High] key.
This sets the compression to high.
A higher compression ratio creates a smaller file
size.
(7) Touch the [OK] key.
3
Select the destination and press the
[COLOUR START] key.
If the file type is set to [Encrypt PDF], you will be
prompted to enter a password when you start
transmission.
The side to be scanned must be face up!
File Type Compression Mode
OK
Colour/Grey
B/W
TIFFPDF
Encrypt PDF
Programmed
Specified Pages per File
None
MH (G3)
(1-99)
MMR (G4)
File Type Compression Ratio
OK
Colour/Grey
B/W
TIFF
JPEG
PDF
Encrypt PDF
Programmed
Specified Pages per File
Low
Medium
(1-99)
High
Quick File
File
Special Modes
Address Entry
Address Book
Scan
Mode Switch
Image
Settings
Send Settings
Auto
Exposure
200X200dpi
TIFF/JPEG
Mono2/Auto
Resolution
File Format
Colour Mode
Original
Special Modes
Select a file format to apply it to
all scan destinations.
OK
Auto A4
(2)
(3)
(7)
(6)
(4)
(1)
(5)
Cancel scanning
