4-70
FACSIMILE
Contents
3
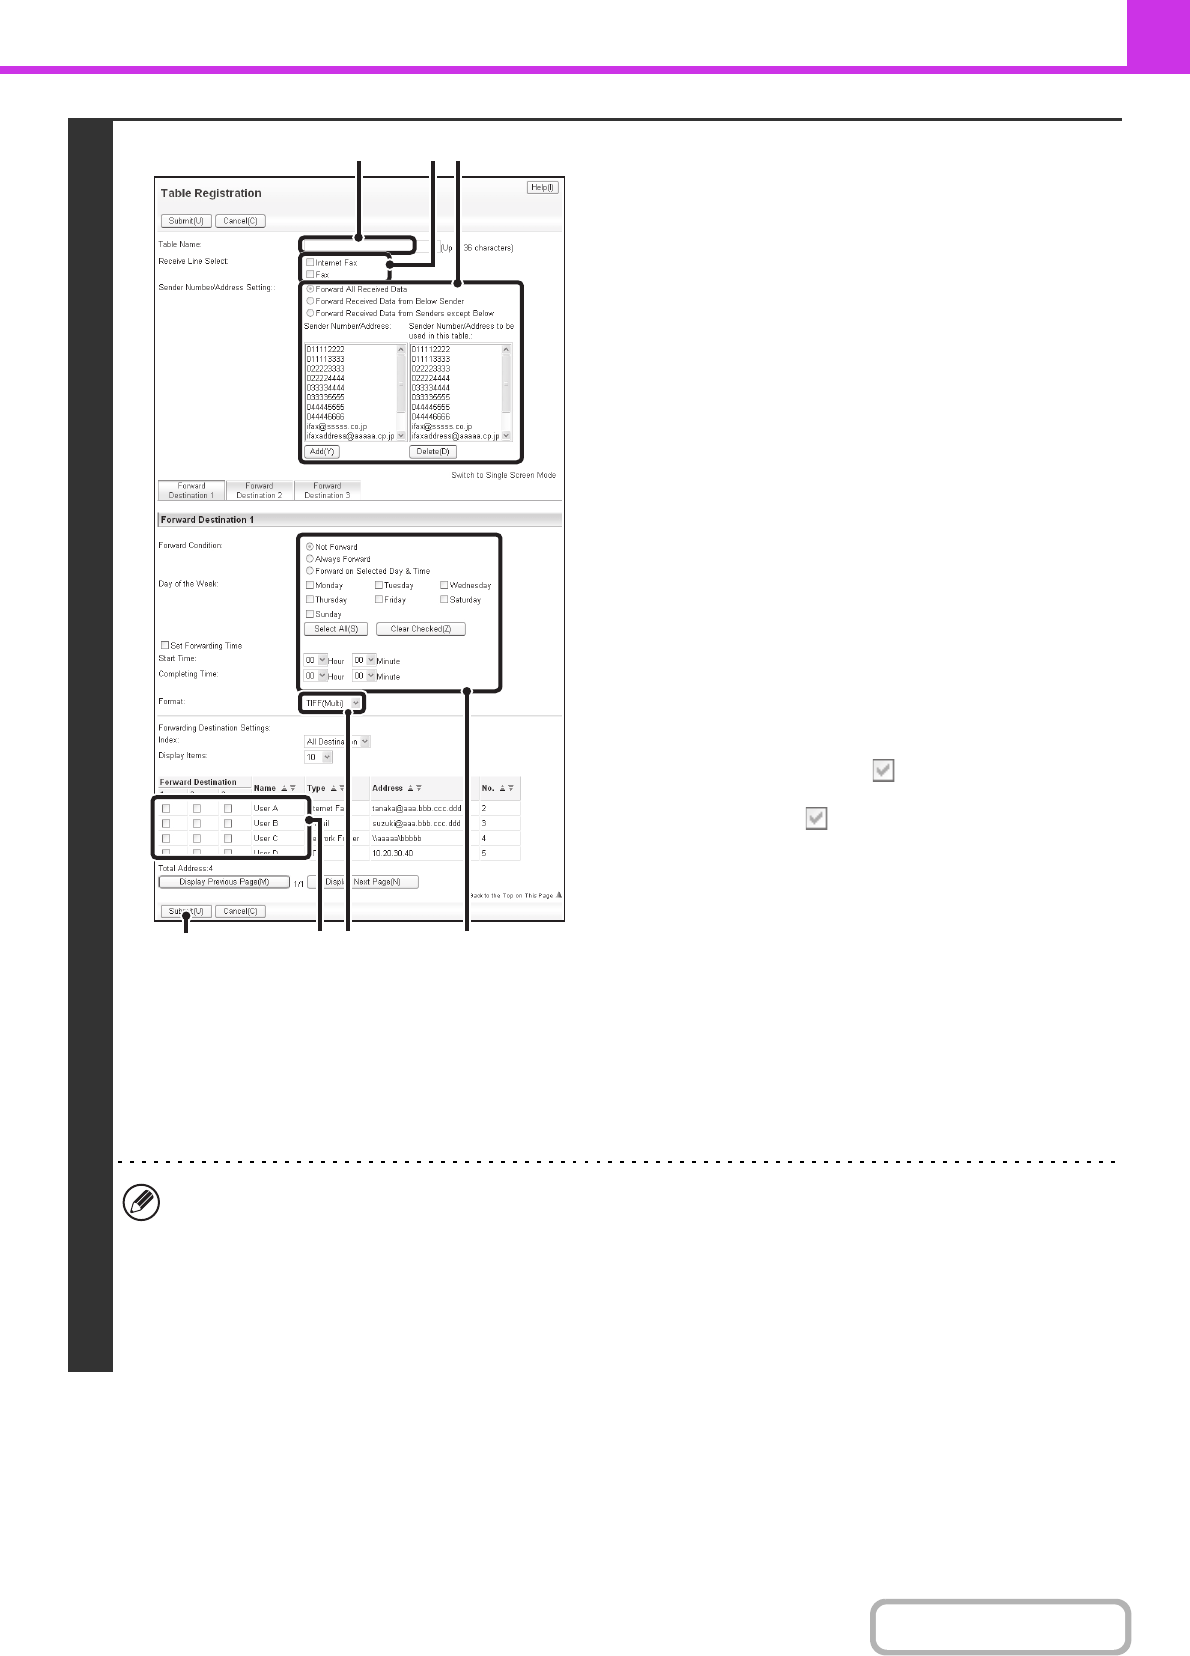
Store a forwarding table.
Follow the steps below to store a forwarding table that
combines a specified sender and forwarding address.
(1) Click [Inbound Routing Settings] in the Web
page menu and click the [Add] button.
(2) Enter a "Table Name".
(3) Select the line used for reception.
(4) Select the sender whose faxes will be
forwarded.
• To forward all received faxes, select [Forward All
Received Data].
• To forward only data received from specific senders,
select [Forward Received Data from Below Sender]. To
forward all data except data from specific senders,
select [Forward Received Data from Senders except
Below]. Select the appropriate senders from the list and
click the [Add] button.
(5) Select the forwarding conditions.
• To always forward received data, select [Always
Forward].
• To specify a day and time on which received data will
be forwarded, select [Forward on Selected Day & Time]
and select the checkbox of the desired day of the
week. To specify a time, select the [Set Forwarding
Time] checkbox and specify the time.
(6) Select the file format.
The format can be set separately for each forwarding
address (for each of forwarding addresses 1, 2, and 3 in
the table).
(7) Select the forwarding address.
Forwarding addresses can be selected from the
machine's address book. (Multiple addresses can be
selected.) A maximum of 1000 forwarding addresses can
be stored (a combined maximum of 100 file server,
desktop, and network folder addresses can be stored).
(8) Click [Submit].
• When selecting senders from the "Sender Number/Address Setting" list, you can use the [Shift] key or the [Ctrl] key
on your keyboard to select multiple senders.
• A maximum of 50 forwarding tables can be stored.
• Images sent in TIFF format may not display correctly in some recipient environments. In this event, change the file
format to PDF.
• Up to three forwarding day and time settings can be set for one forwarding table, and a forwarding destination can
be set for each set time. To configure these settings, use the forwarding list tabs to access each setting.
(8)
(7)
(3)
(2)
(4)
(6)
(5)
