


7 En
Placing
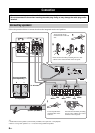
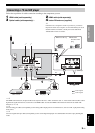
PREPARATION
English
y
• Aim the TV remote control toward the top of TV remote signal
receptor.
• You can operate the TV remote control by using the TV remote
signal receptor even if the unit is in standby mode.
• Some TV remote controls may not work.
• You can attach the TV remote signal receptor in an area where
there are projections, such as the rear of speaker stand, etc.
• Clean the attachment area on the speaker, using a soft, dry
cloth, such as one for cleaning glasses.
• Clean the signal receiver and signal emitter of the TV remote
signal receptor, using a soft, dry cloth, such as one for cleaning
glasses.
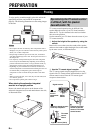
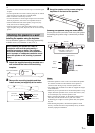
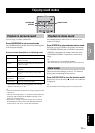
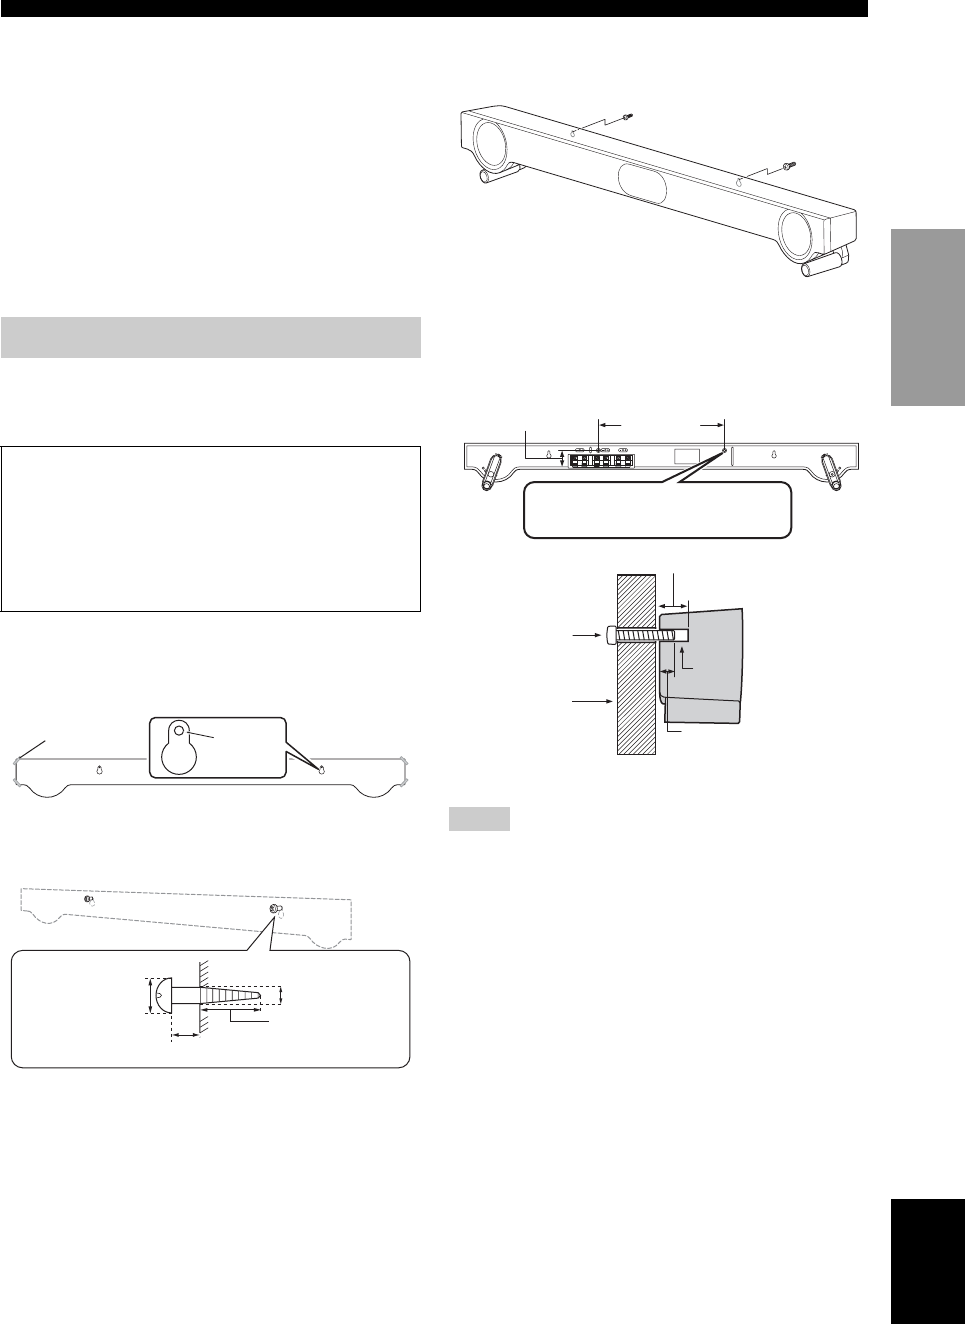
Installing the speaker using the keyholes
You can attach the speaker to a wall using commercially
available screws (#8, Diameter: 4 mm (3/16”)).
1 Attach the supplied mounting template on a
wall and mark the holes of the mounting
template.
2 Remove the mounting template and then
install screws (not supplied) at the marks.
3 Hang the speaker on the screws using the
keyholes on the back of the speaker.
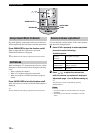
Installing the speaker using the screw holes
You can also use the screw holes on the rear of the speaker
for installing the speaker using a commercially available
rack etc.
• Attach the speaker to a rack or wall. Do not attach the speaker
to a wall that is made of weak materials such as plaster or
veneered woods. Doing so may cause the speaker to fall.
• Use commercially available screws that can support the weight
of the installation.
• Make sure you use specified screws to attach the speaker. Using
clamps other than specified screws, such as short screws, nails,
or two-sided tape, may cause the speaker to fall.
• When connecting the speaker, fix the speaker cables in place
where they will not become loose. If your foot or hand
accidentally gets caught on a loose speaker cable, the speaker
may fall.
• After attaching the speaker, check that the speaker is fixed
securely. Yamaha will bear no responsibility for any accidents
caused by improper installations.
Attaching the speaker to a wall
When installing the speaker on a wall, all
installation work must be performed by a
qualified contractor or dealer. The customer
must never attempt to perform this installation
work. Improper or inadequate installation could
cause the speaker to fall, resulting in personal
injury.
Tapes or thumbtacks
Mark
2 to 4 mm (1/16” to 3/16”)
7 to 9 mm
(1/4” to 3/8”)
Minimum
20 mm (3/4”)
4 mm (#8)
Notes
Screw holes
Hole depth: 14 mm (9/16”)
Diameter: 6 mm (1/4”)
256 mm
(10-1/16”)
38.5 mm (1-9/16”)
Rack etc.
14 mm (9/16”)
Screw
(M6)
Screw
hole
Min 7 mm (1/4”)
NS-BR301