


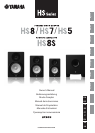

HS8/HS7/HS5/HS8S Owner’s Manual
7
English
Rear Panel
The HS8/HS7/HS5/HS8S switches and connectors are located on the rear panel, as described below.
HS8/HS7/HS5
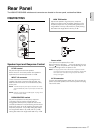
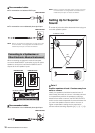
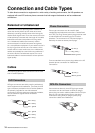
Speaker Input and Response Control
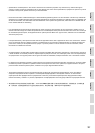
Power switch
Turns power to the speaker ON or OFF.
Rock the switch to the right [ ] to turn the power ON, or to
the left [ ] to turn the power OFF. The Yamaha logo on the
front panel will light when the power is ON.
NOTE Turning the power switch ON and OFF in rapid succession
can cause the device’s electronics to malfunction. Please wait
for 3 seconds or more after turning the power OFF before
turning it ON again.
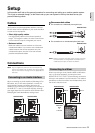
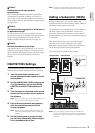
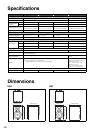
AC IN connector
Connect the supplied power cable here. First connect the
power cord to the speaker, then insert the power cord plug
into the AC outlet.
LEVEL control
Adjusts the output level of the speaker.
When set to the 12-o’clock position the speaker is
optimized for a nominal input level of +4 dB.
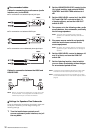
INPUT 1/2 connector
These connectors receive the input signal to the
speaker. Two input connectors are provided: one
balanced XLR connector, and one balanced (TRS)
phone jack.
NOTE The XLR and phone jack input connectors can not be
used simultaneously. Use only one input connector at a
time.
NOTE Refer to “Connection and Cable Types” on page 14 for
more connector details.
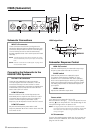
ROOM CONTROL switch
Adjusts the speaker’s low-frequency response.
This switch can be used to compensate for
exaggerated low-frequency response that can be
caused by reflections in some listening environments.
Setting the switch to the [0] position produces a flat
frequency response. The [-2 dB] setting attenuates
the range below 500 Hz by 2 dB, and the [-4 dB]
setting attenuates the range below 500 Hz by -4 dB.
HIGH TRIM switch
Adjusts the speaker’s high-frequency response.
Setting the switch to the [0] position produces a flat
frequency response. The [+2 dB] setting boosts the
range above 2 kHz by 2 dB, while the [-2 dB] setting
attenuates the range above 2 kHz by -2 dB.