


8
7
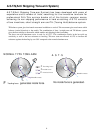
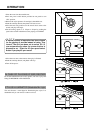
CONNECTION OF PHONO TERMINAL AND PLUG
INSTALLATION
1
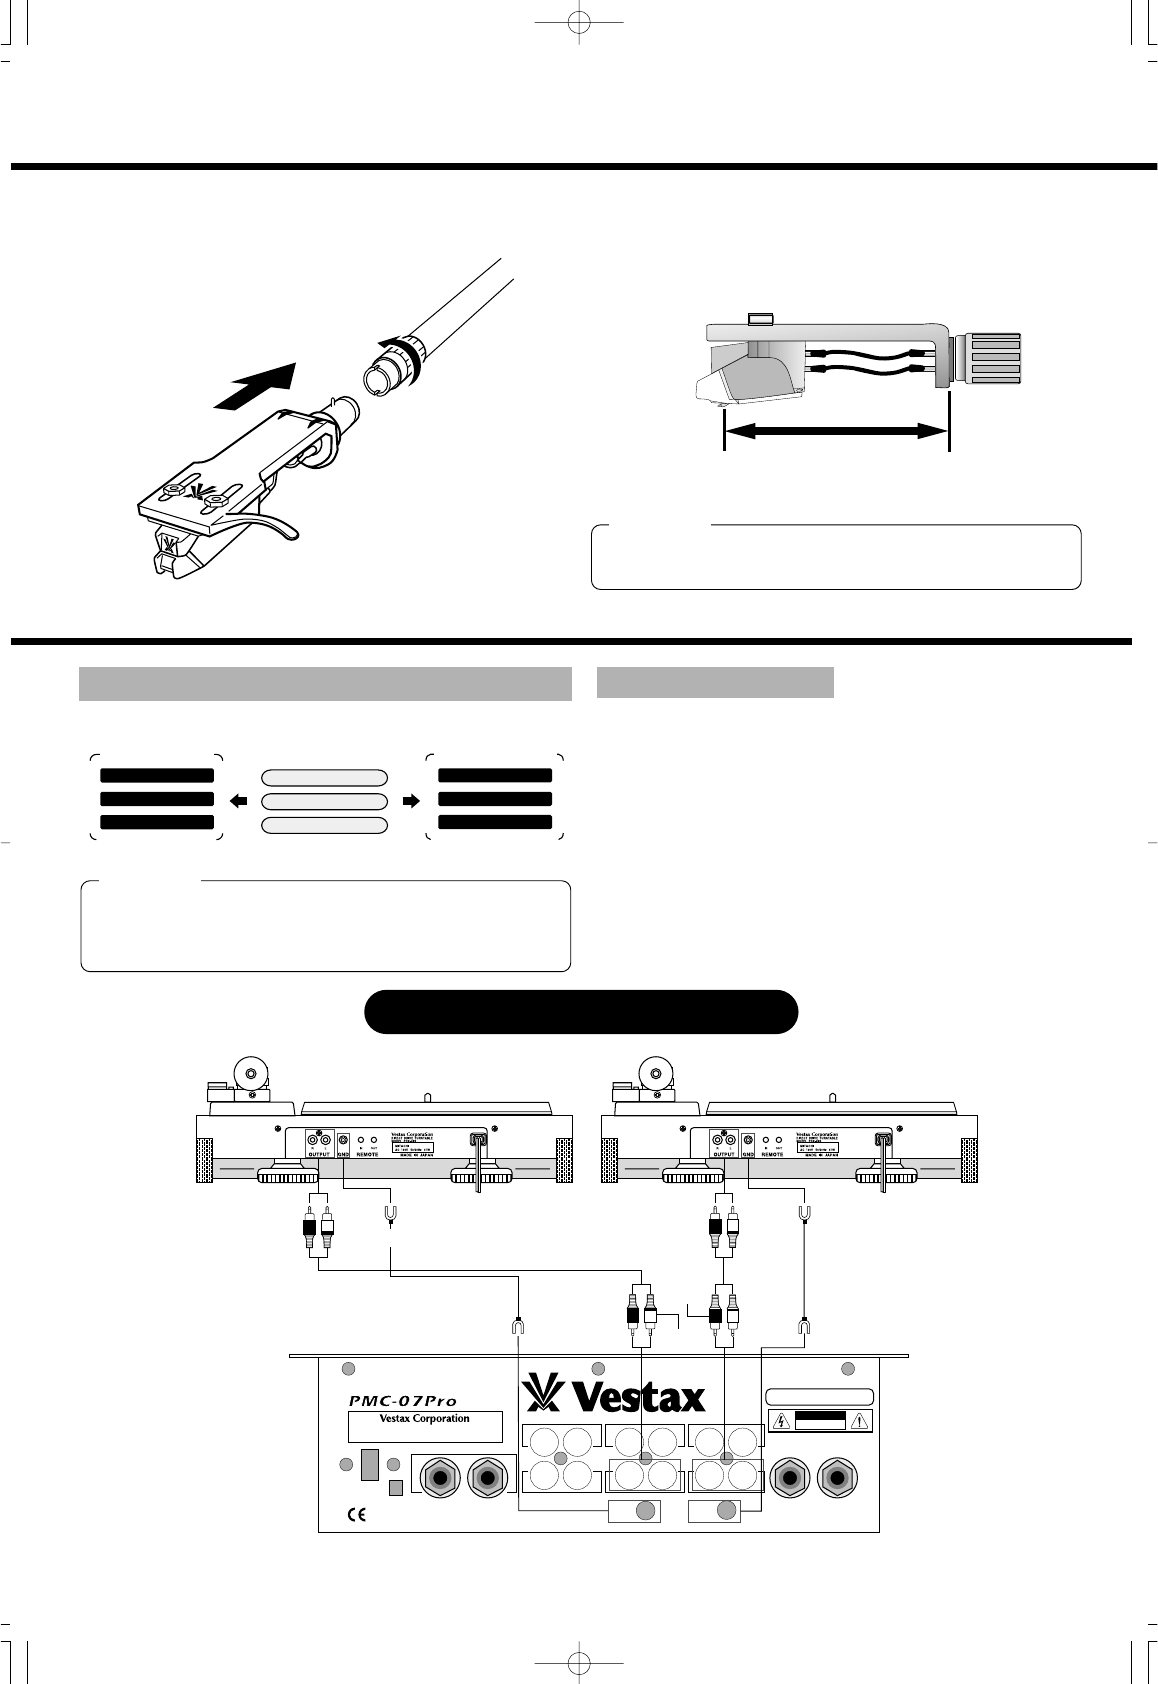
Connect the output to inputs of amplifier or mixer.
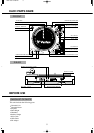
PDX-d3S REAR PANEL
RCA CABLE WHITE/L
RCA CABLE RED/R
PHONO L Channel
PHONO R Channel
GND TERMINAL
AMP/AUDIO M
GND CABLE BLACK
RCA JACK WHITE L
RCA JACK RED R
GND TERMINAL
SUB
LRLRLR
LR
GND 1GND 2
MAIN
PROFESSIONAL MIXING CONTROLLER
LINE 2 LINE 1
PHONO 2MASTER OUT 2 PHONO 1
SESSION IN
MASTER OUT 1
AC 12V
POWER
SERIAL NO.
MADE IN JAPAN
CAUTION
RISK OF ELECTRIC
SHOCK. DO NOT OPEN
WARNING;SHOCK HAZARD-DO NOT OPEN.
AVIS;RISQUE DE CHOC ELELCTRIQUE -NE PAS OUVRIR.
R/RED
L/WITHE
R/RED
L/
WITHE
R/RED L/
WITHE
R/RED L/
WITHE
PDX-d3S
DJ MIXER
PMC-07Pro
PDX-d3S
50mm
3
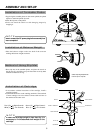
Insert the headshell into the front part of the tone-arm. Turn thr
LOCK RING to the directoin of the arrow shown the fig until
fixing the headshell.
4
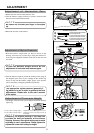
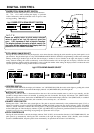
Adjustment of Overhang
As shown in the illustration, overhang indicates the distance
from the stylus to end of headhshell. Please set the distance to
50mm. If the overhang adjustment is not properly made, the
stylus will not be able to trace the record grooves correctly.
Be share not to touch stylus during adjustment
with finger.
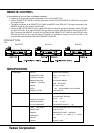
NOTE
Be sure to connect firmly the GND terminal to
the amplifier or mixer, or a power source HUM
will result.
NOTE
Do not place the unit where it is exposed to direct sun light,
high temperature of humidity to prevent possible troubles.
Place the unit in a stable and horizontal position, where there is
little or no vibration.
Locate the unit as far away from the speakers as possible and
isolate the unit from sound radiation from them.
If the unit is placed too close to the radio, interference to
AM/FM reception may result
INSTALLATION AND CONNECTION
ILLUSTRATION OF CONNECTION
d3S/E 02.5.16 2:08 PM 7