4. INSTALLATION PROCEDURE
EO1-12030
4.1 Environment for Installation
4- 1
4. INSTALLATION PROCEDURE
4.1 Environment for Installation
1. Provide a space of minimum 80 mm to the left, right, front, rear, and top of the main unit for proper
cooling. (The main unit has air vents on the front, rear, right and left, and a fan. Spaces should be
provided to prevent the air vents in the main unit from being closed and the air flow from being
obstructed.)
2. Attaching the cable cover:
The cable cover must be attached to protect the interface cables or connectors. Be sure to turn off
the power before connecting or disconnecting the cables.
3. Notes on installing the display unit on the top of the enclosure:
When installing the display unit on the top of the enclosure, the following conditions must be
satisfied. (Except for the standard display unit)
1) Display unit weighing 12Kg or under
2) The base of the display unit has no projections that might damage the enclosure.
3) The base of the display unit does not protrude beyond the steel plate at the top of the main
unit.
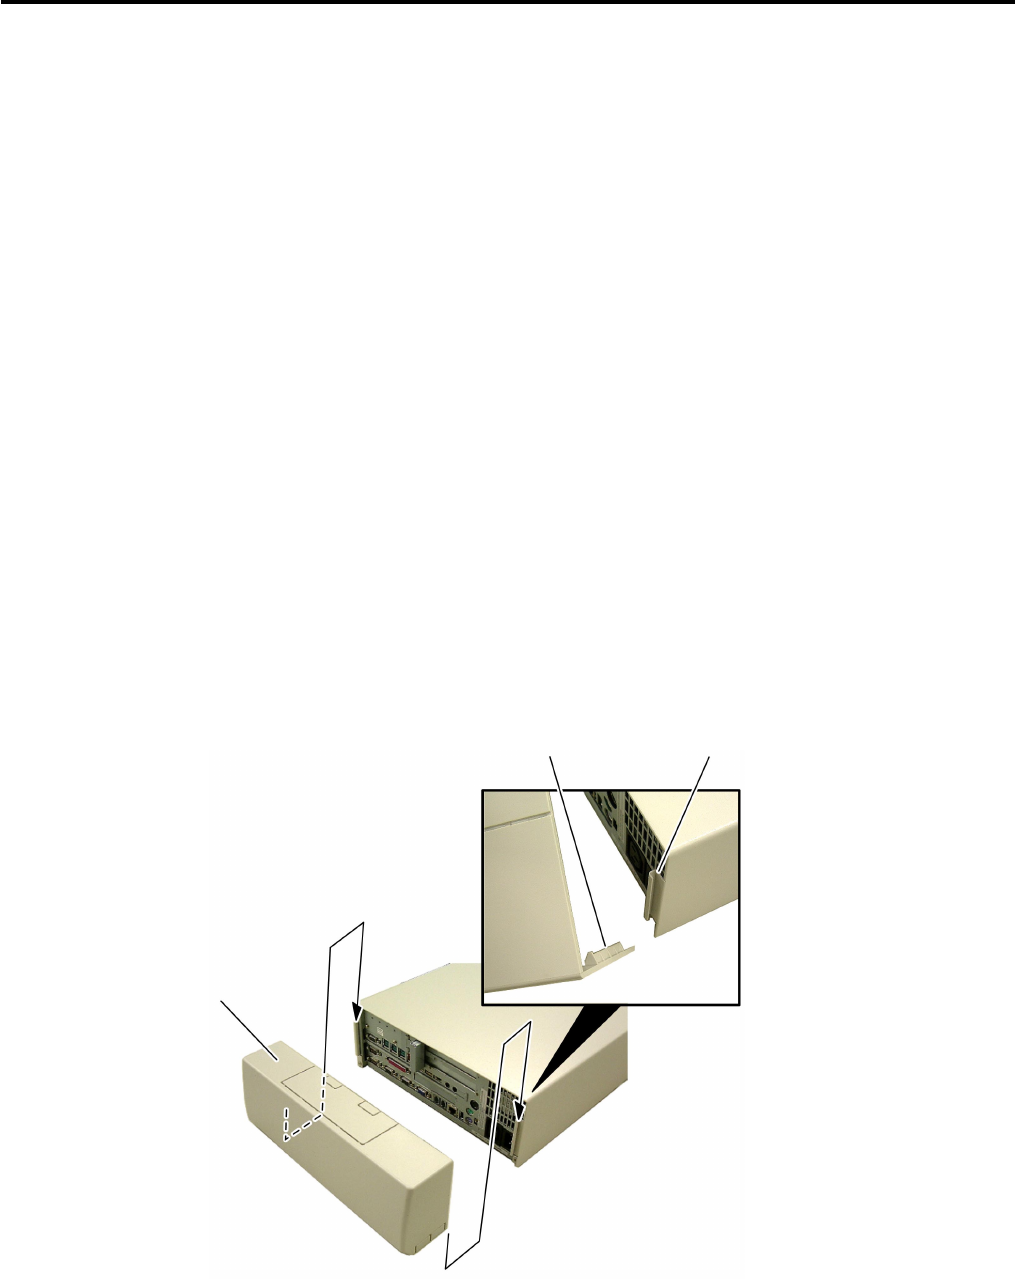
4.2 Attaching the Cable Cover
1. Insert the guides on both sides of the cable cover into the slits provided on the POS terminal, then
slide down the cable cover to the bottom.
NOTE:
Be sure to attach the cable cover for protecting the cables.
2. When detaching the cable cover, hold both sides by hands, then pull it up.
Cable Cover
Guide
Slit


