


8
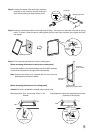
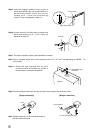
6.3. Suspending the Unit in the Ceiling
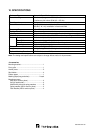
When suspending the HB-1 speaker in the ceiling, remove
the lock tabs and suspend the unit using bolts or wires at the
resultant 12 mm-diameter holes. The front grille can be
mounted directly to the ceiling panel using the supplied
mounting bracket.
6.3.1. Suspending the unit
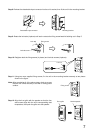
6.3.2. Front grille installation
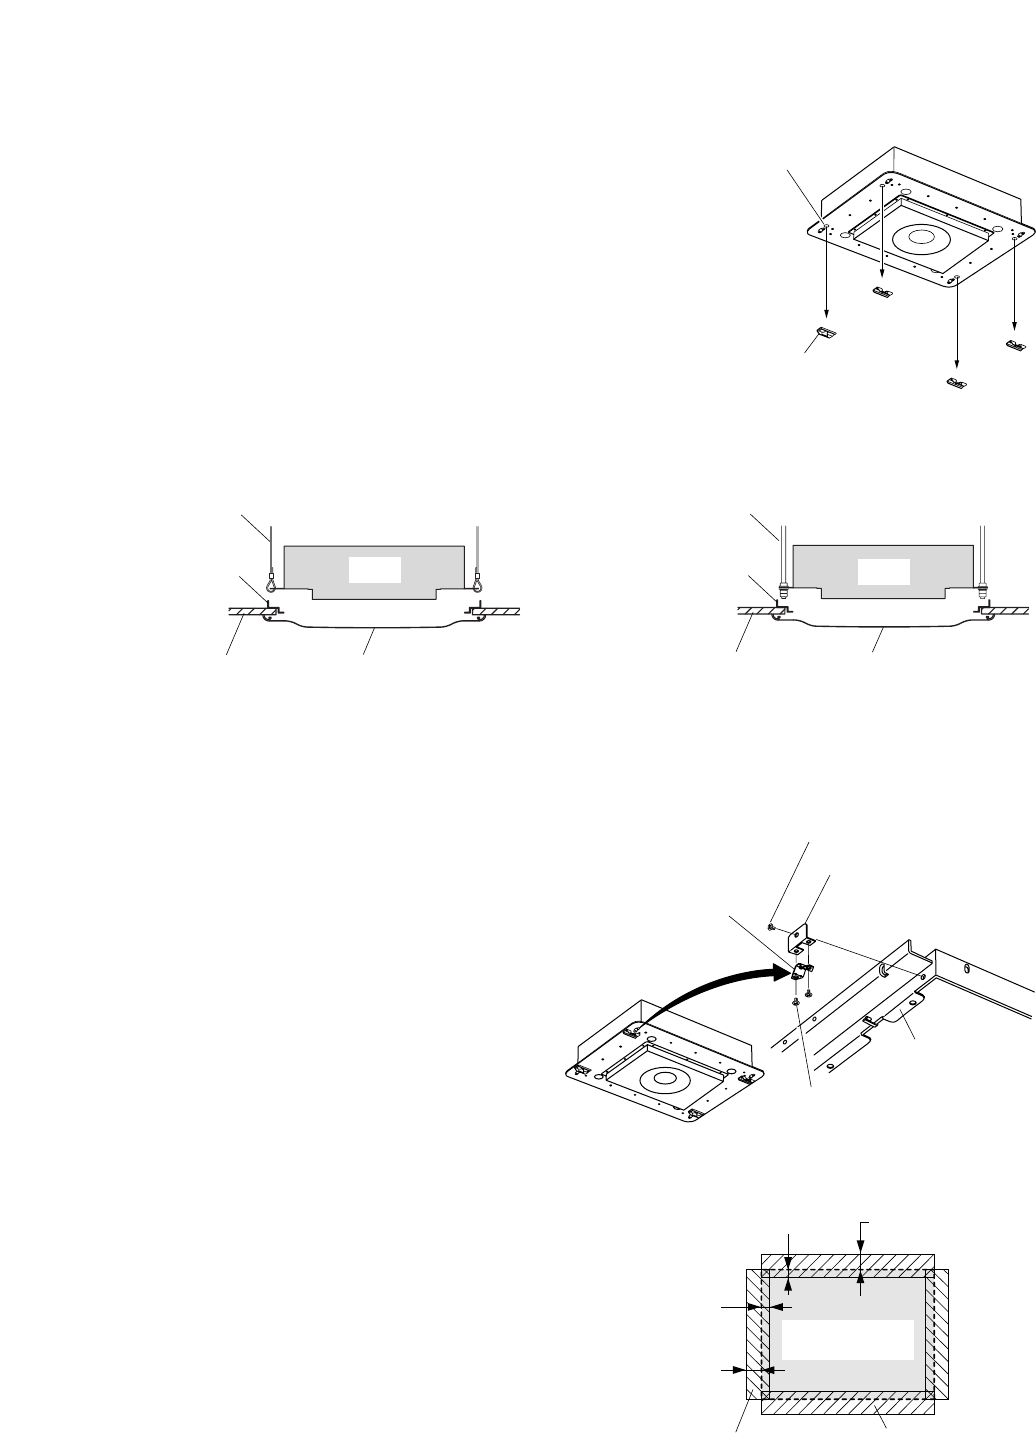
Step 1. Before mounting the front grille directly to the ceiling panel,
Step 1-1. Attach the four supplied stud holders to
the mounting bracket using the four
supplied tapping screws.
Step 1-2. Detach the stud receptacles from the
main speaker unit and attach them to
the stud holders.
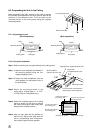
Step 2. Mount the mounting bracket to the
ceiling panel. (Follow Steps 1.– 4. on P.
4 "Flush Wall or Ceiling Mounting.")
Step 3. Attach the masking tapes to the ceiling
panel as shown on the right to prevent
the white ceiling panel from being seen
through the front grille meshes.
Step 4. Align the front grille with the speaker so
that the four stud screws align with the
unit's corresponding stud receptacles,
then push the grille onto the speaker.
12 mm-diameter hole
Remove lock tabs.
[Wire Suspension]
Wire
Ceiling
Mounting bracket
HB-1
Ceiling panel Front grille
[Bolt suspension]
Bolt
Ceiling
HB-1
Mounting bracket
Ceiling panel
Front grille
1-1
1-2
Use the screws removed when
detaching the stud receptacles.
Mounting bracket
Stud holder
(supplied with the unit)
Tapping screw (supplied with the unit)
Stud receptacle
(Remove from the unit)
10 mm to the inside of
the mounting hole
10 mm to the inside of
the mounting hole
20 mm to the outside of
the mounting hole
20 mm to the outside of
the mounting hole
Mounting hole
(shadowed area)
Masking tape (shorter)
Masking tape (longer)