


EN
23
22
Advance Sound ControlAdvance Sound Control
Advanced Setting
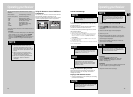
Factory defaulted Advance setting
indication from VFD
The receiver has defaulted the following distances:
Front speakers (FRNT) 4.5 m
Center speaker (CNTR) 4.5 m
Rear speaker (SURR) 3 m
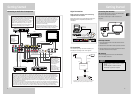
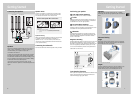
Speaker Configurations
You can also change the setup of the speakers.
Use a subwoofer to enjoy optimum sound.
• Speaker distance: For optimum surround experience
measure the distance between the speaker and your
favorite listening position.
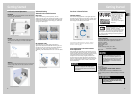
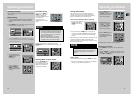
1. Press the SETUP button to
show setup options.
2. Press the LEFT or RIGHT
adjustment buttons until
the speaker you want to
change is displayed.
3. Press the UP or DOWN
arrow buttons to change
the speaker settings.
Your selection will be
stored automatically.
4. Repeat step 2 and 3 to set up the next speaker
5. When set up is done, wait for 5 seconds to
automatically save your settings or press any key to
save your selection and set up mode.
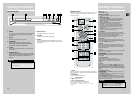
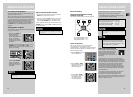
Displaying Program Formats
When a digital source starts playing, the
receiver automatically switches to the
proper surround mode and provides
setting information via the speaker
icons located on the right-hand side of
the display.
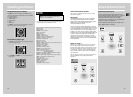
It is important to note, however, that not all Dolby
Digital sources are encoded with the full complement of
five channels plus LFE*. Speaker icons show how many
and which speaker you have enabled (See “Fine Setting
of the Speakers”) and the letters inside the speaker
icons show which channel is present in the source
information. For example, the diagram shown means
you have all five speakers and subwoofer enabled and
the digital sources you played have five channels plus
LFE complemented.
* LFE stands for Low Frequency Effect. The indication
“LFE” appears if the digital source contains LFE
information. In this case, the bass signal will be
delivered to the subwoofer, offering more dynamic deep
bass sound effects. If the letter is flashing, the signal is
either too weak or just gone.
LS RS
LFE
R
C
L
Center Speaker selection (CTR) YES / NO
Surround Speaker selection (SURR) YES / NO
Front Speaker distance (FRNT) 0.9m - 9m
Center Speaker distance (CNTR) 0m - 9m
Rear Speaker distance (SURR) 0m - 9m
NOTE
By default, the Center and Surround Speakers
are set to YES. If you decide not to use them, set
the ones you do not intend to use to NO so the
sound performance is not affected.
Fine Setting of the Speakers
All the basic settings have already been preset for the
speakers included in the box.
Also, to make the surround sound more effective and
suit the acoustic conditions in your listening room, you
may need to delay the signal coming from some of the
speakers. Channel delay compensates for center or
surround speakers that are closer to the listening
position than the front speakers. You can make use of
the SETUP button to adjust the speakers’ relative
loudness.
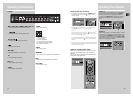
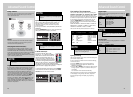
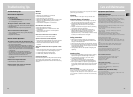
Testing Speaker Loudness
You can listen to the loudness of the individual speakers
by doing the following:
1. Press and hold LEVEL on
the remote control.
A short noise will be
heard in the speakers one
by one. The speaker
having the noise at that
moment will be shown in
the display.
2. To adjust the volume level of the test tone, turn the
VOLUME knob or press the VOL + or VOL -
buttons on the remote control to adjust the master
volume (if necessary).
Press the UP or DOWN
buttons to adjust the
individual channel noise
level while it is shown in
the display.
Adjust Individual Speaker Volume
1. To adjust individual speaker volume level, press the
LEVEL button on the remote control.
2. Continue to press the LEVEL button on the remote
control to select the channel to be adjusted, then
press the UP or DOWN buttons to adjust the level.
You can adjust the master volume level by turning the
VOLUME knob or press the VOL + or VOL - buttons on
the remote control.
R/S
L/S
Rch
Cch
Lch
Front
Left
Rear
Right
Rear
Left
Front
Right
Center
PRESET
VOLUME
PHONES
NOTE
This function will not be available in 6 channel
input mode
NOTE
This function will not be available in 6 channel
input mode
NOTE
This function will not be available in 6 channel
input mode