


20
EN
19
EN
Radio
Tuning to an RDS Station
1. Press SKIP BACKWARD or SKIP
FORWARD to go to your desired
frequency.
2. If a RDS station found, RDS lights on display
with station name shown.
Displaying RDS Station Information
Press REPEAT•RDS on the remote control
repeatedly to display the following:
• frequency,
• station name (PS),
• station type (PTY),
• clock time (CT), or
• radio text (RT).
In CT mode, press the INTRO•CT key to replace
the displayed time with RDS station time.
Searching by Program Type (PTY)
(Remote Only)
1. Press • PTY to enter PTY selection
2. Press • PTY repeatedly to select a PTY
mode.
3. Within 5 seconds, press SKIP BACKWARD
or SKIP FORWARD to search for a
station broadcasting the selected type of
program.
You can search for stations using one of the
following program types:
•NEWS (news),
• AFFAIR ( news and documentaries),
•INFO (weather, medical),
• SPORT (sports),
• EDUCAT (education),
•DRAMA (series and plays),
• CULTUR (religion),
•SCIENC (science and technology),
•VARIED (miscellaneous),
• POP M (pop music),
• ROCK M (rock music),
• MOR M (middle-of-the road music),
•LIGHTM (light music),
• CLASS (classical music),
•OTHERM (unclassified music),
• WEATHE (weather, medical),
• FINANC (stock market reports),
• CHILD (children’s programs),
•SOCIAL (sociology, history, geography,
psychology, society),
• RELIGI (any aspect of beliefs, faith and God or
Gods),
• PHONE (public forum b phone),
• TRAVEL (feature and programs concerning
travelling),
• HOBBY (recreational activities and leisure),
• JAZZ (jazz music),
• COUNTR (country music),
•NATION (national music),
•OLDIES (oldies music),
•FOLK M (folk music),
• DOCUME (documentaries),
• TEST,
• ALARM (alarm).
Recording
Note:
RDS stations broadcast on FM only. When
the tuner detects an RDS signal, the RDS
icons turns on.
You can record CD, Tuner or AUX files to USB
device (e.g. mp3 player).
Recording CD to USB Device
Recording Standby
1. Connect the USB device to the USB port, “USB
Connected” will show on the display.
2. In CD stop mode, CD navigation mode or CD
pause mode, press RECORD to enter recording
standby.
The RECORD icon flashes on the display.
3. Press PLAY / PAUSE to start playing the CD.
Recording will start automatically.
The RECORD icon lights on the display.
Recording
Example (Record one CD):
1. Press RECORD to enter recording standby, then
press DISC 1 to DISC 5 to record the correspon
ding disc.
Example (Record all 5 CDs):
1. Press RECORD to enter recording standby, then
press PLAY/PAUSE to start recording (Make
sure “All Disc” mode is selected)
Example:
1. Create a CD program by following instructions
under “Setting Up a CD Program” on page 15.
2. In CD stop mode or navigation mode, press
RECORD to enter recording standby. The
RECORD icon flashes on the display.
3. From normal playback mode, press PROG to
enter program play mode. Playback and
recording begins automatically. The PROGRAM
and RECORD icons light on the display.
4. Press STOP to stop recording.
Instant Recording
1. In CD playback mode, press RECORD to start
recording.
The RECORD icon lights on the display.
In CD playback mode Recording
Example:
1. Start CD program playback.
From normal playback mode, press PROG to
enter program playback mode.
2. Press PLAY / PAUSE to begin program
playback.
3. Press RECORD to begin recording instantly.
4. Press STOP to stop recording.
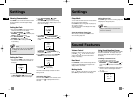
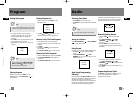
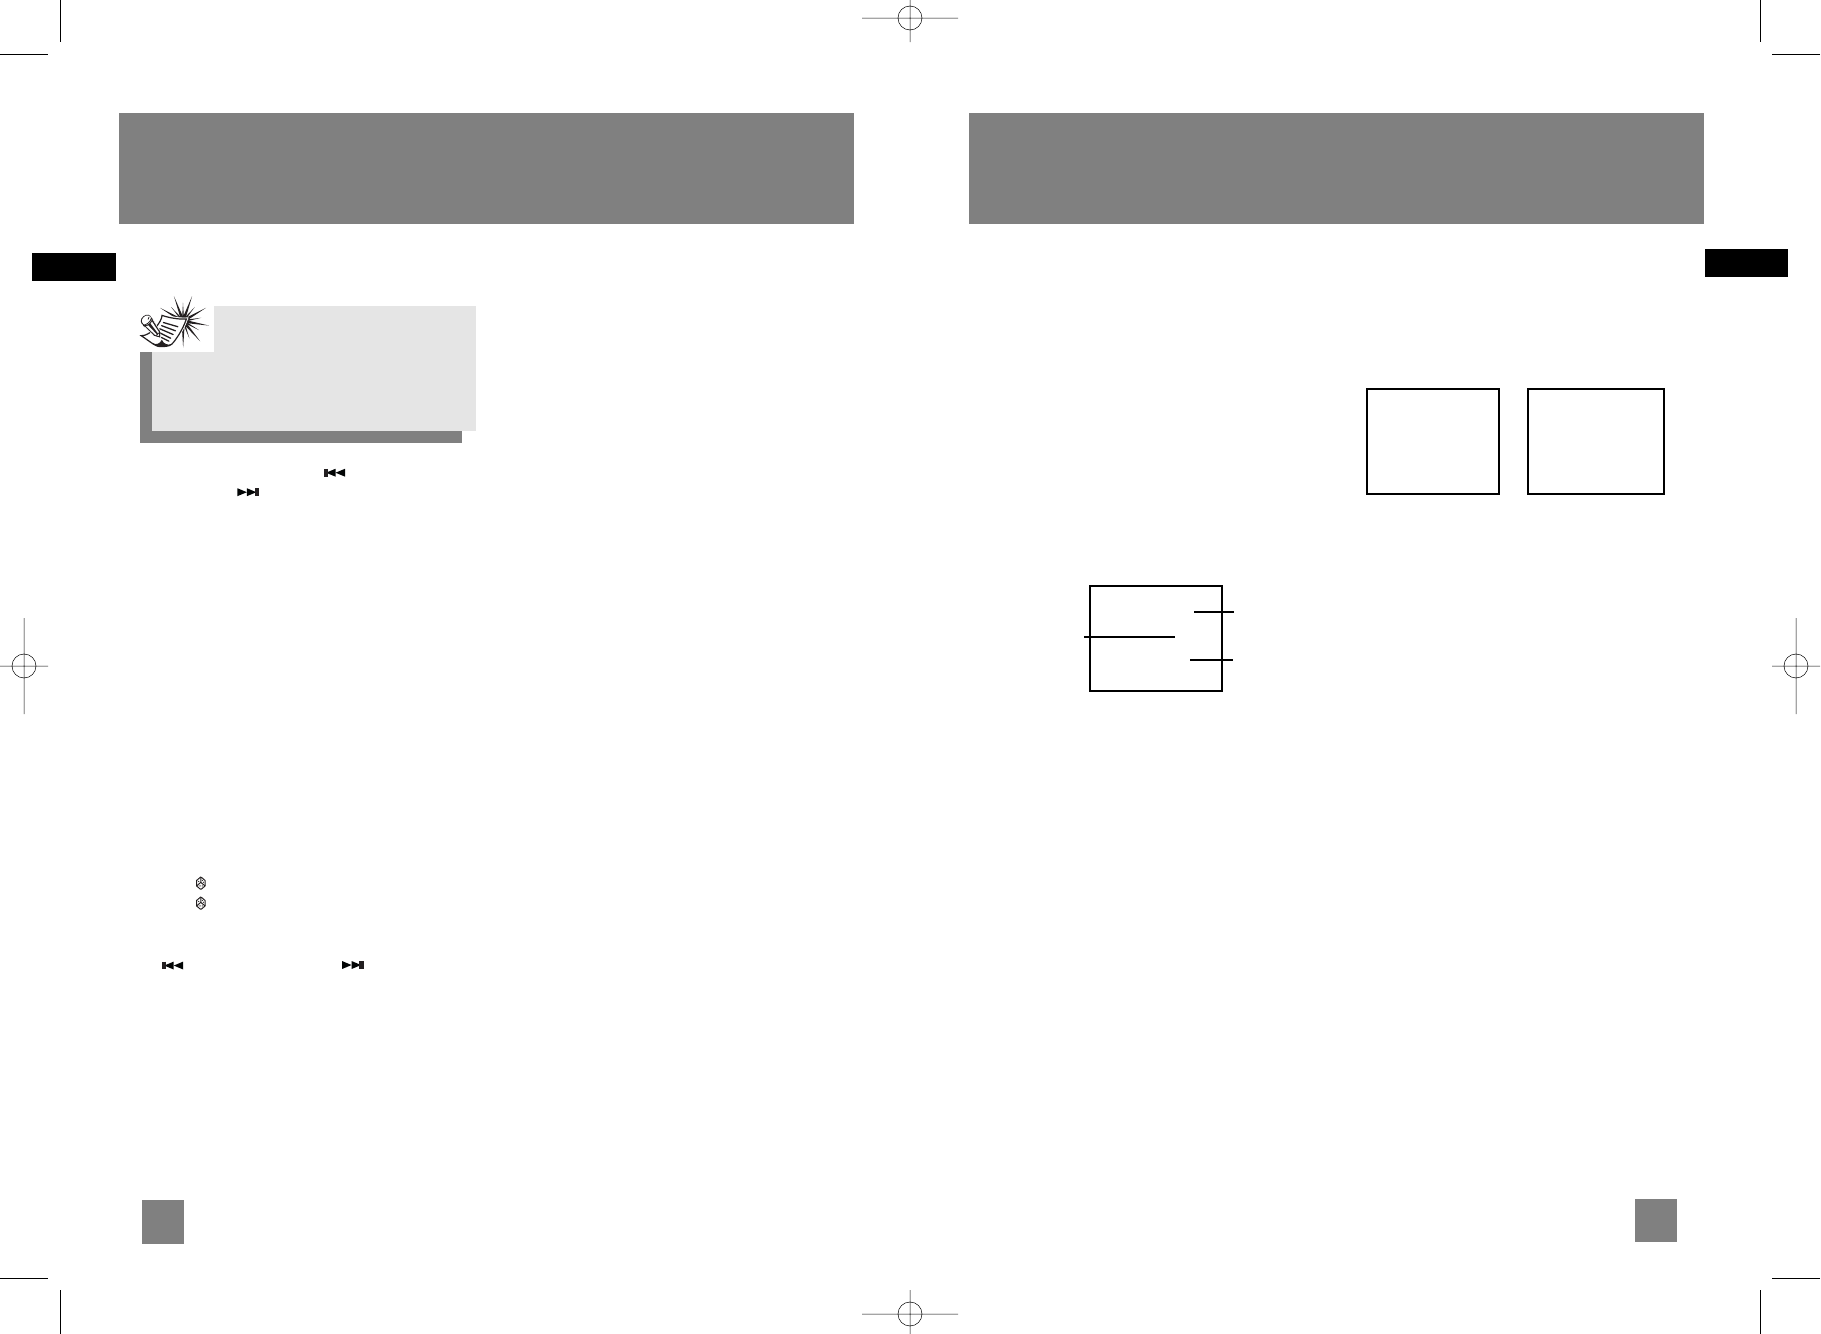
01-D01T01
0:00
Rem: 12:34:54
01-D01T01
0:00
Rem: 12:34:54
Recording File
name
Elapsed recording
time
Remaining
Time
01 0:20
CS600 EN 5/3/05 4:17 PM Page 26