29
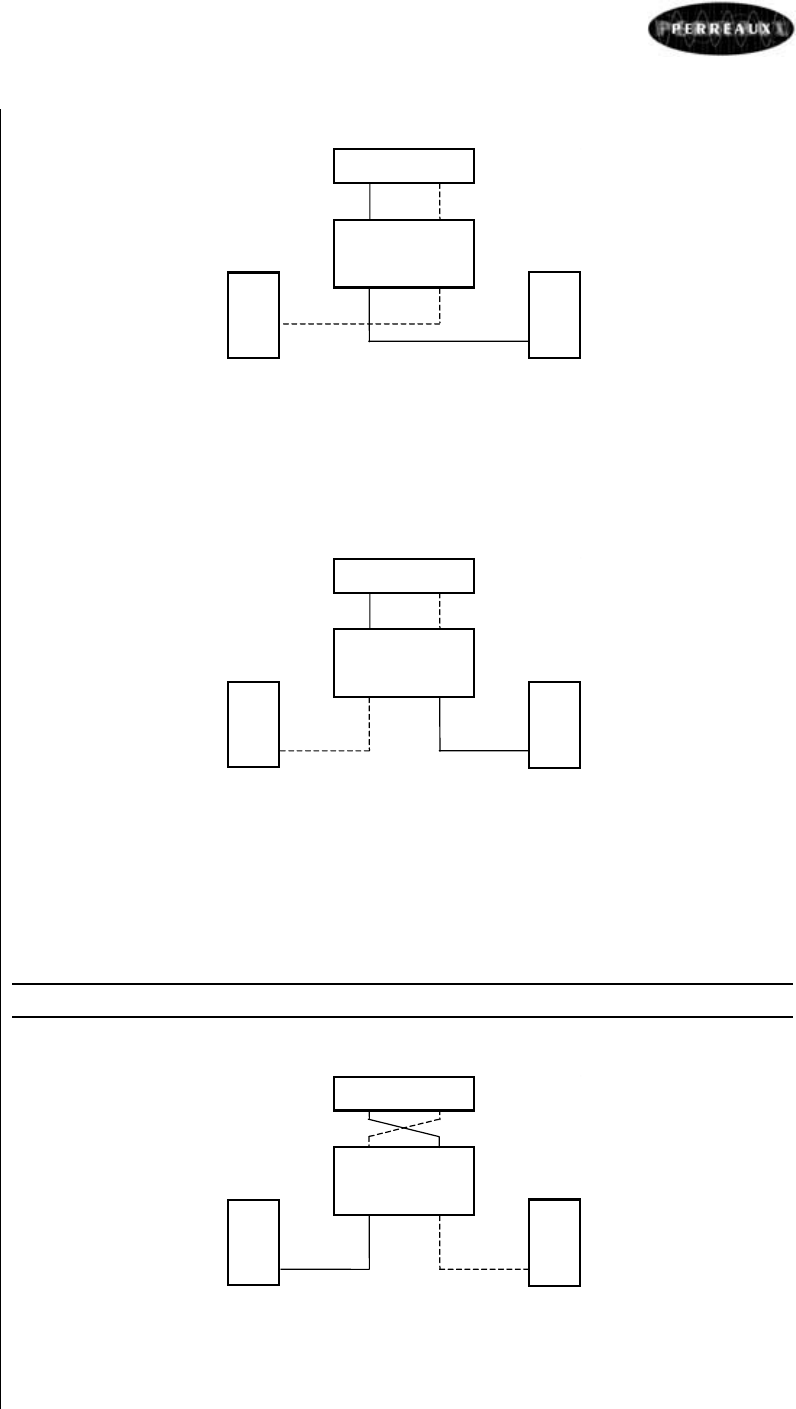
Step 1 – Loudspeakers
PREAMPLIFIER
E160
A
B
Change the loudspeaker leads from one loudspeaker to the other. If the faul
t
remains in loudspeaker ‘A’, then loudspeaker ‘A’ is at fault, go no further.
If the fault now appears in loudspeaker ‘B’ then the problem lies further up th
e
line. Move on to step 2.
Step 2 – Loudspeaker Leads
PREAMPLIFIER
E160
A
B
Change the loudspeaker leads completely from left channel to right and fro
m
right channel to left by now swapping them at the amplifier output. If the faul
t
now appears in loudspeaker ‘B’, then that loudspeaker lead is at fault, go no
further.
If the fault appears in loudspeaker ‘A’ then loudspeaker leads are OK. Move o
n
to step 3.
Caution!
Restore the loudspeaker leads to their original connections at both ends.
Step 3a – Inputs (Channels)
PREAMPLIFIER
E160
A
B
Change the input plugs on the rear of your amplifier, as follows: Change eac
h
input source in turn by swapping the plugs left to right and right to left. If th
e
fault changes to loudspeaker ‘B’ on any one of the selected inputs, then tha
t
particular input source is possibly at fault. Move on to step 3b.


