


Installation
Installation Precautions and Tips (continued)
• As you plan the cable route, avoid running cables through components that may cause
excessive chafing. Doing so may erode the jacket and break signal continuity. Also, avoid
kinking, pinching, excessive bending, or twisting a cable during a run.
• Do not trim the cable length. It is optimized for best signal reception. Coil and store any excess
cable behind the XM receiver.
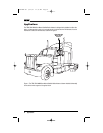
Installing The TERK SR4X-MM Mirror-Mount Antenna
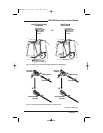
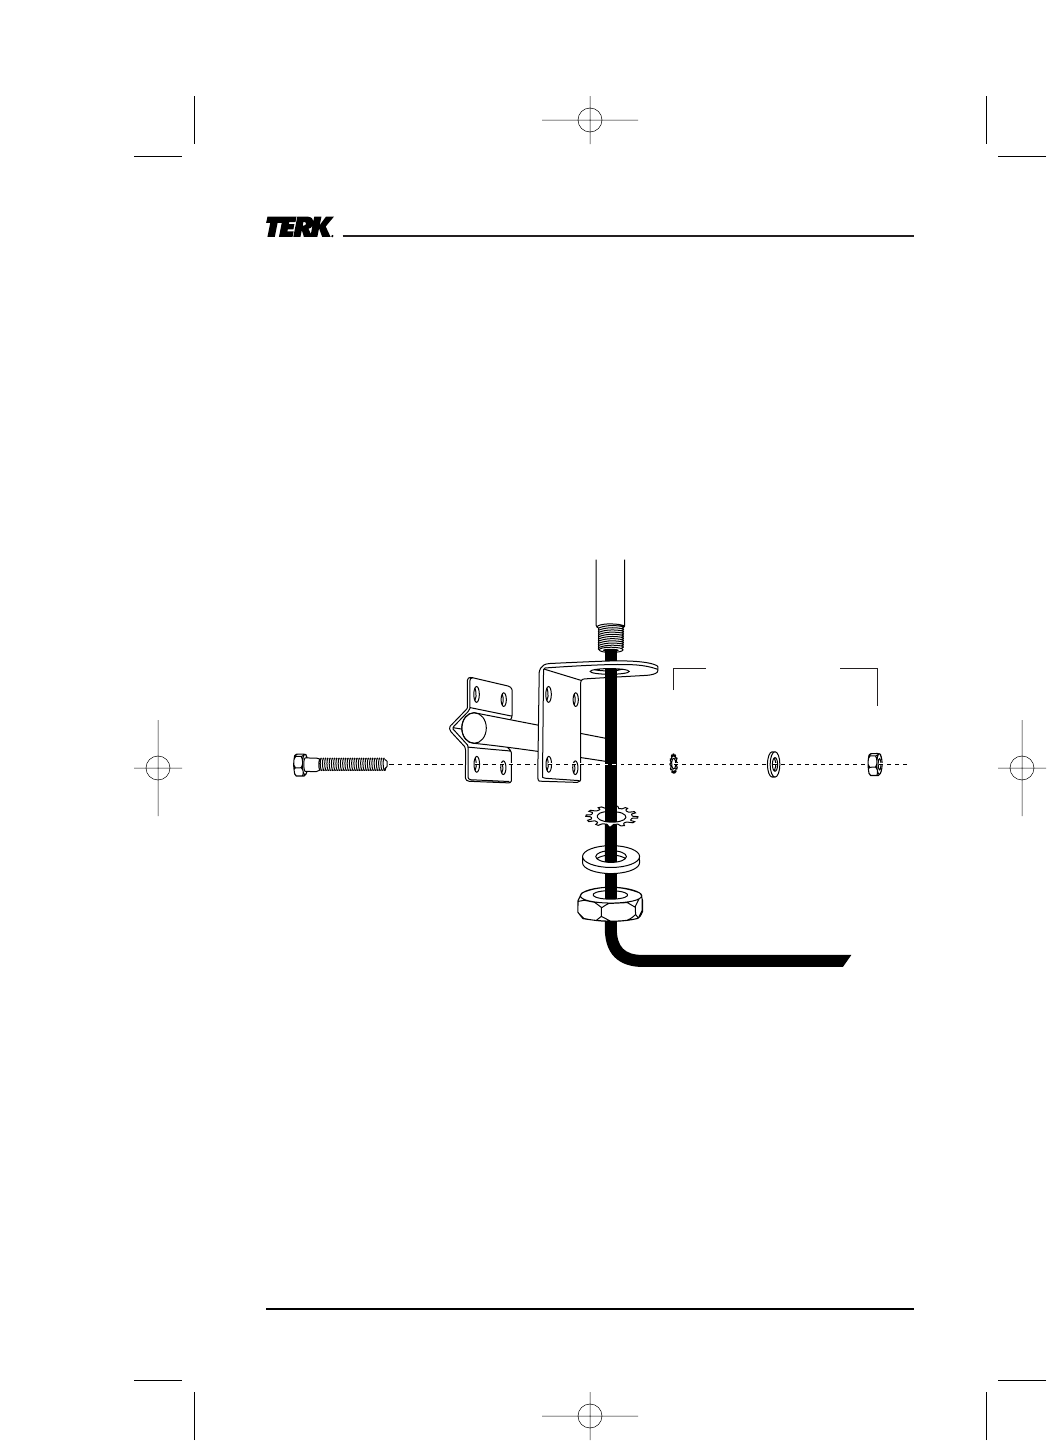
1. At the chosen site, attach the right-angle bracket and connecting bracket to the mirror’s bar
using the enclosed hardware, as shown in Figure 3.
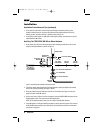
Figure 3. Assembling the brackets and antenna mast.
2. Thread the coaxial cables through the right-angle bracket’s opening and tighten the antenna
mast to the mounting assembly (see Figure 3 above).
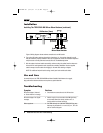
3. Route the cables through an existing access hole or vent window (see Figure 4 on the next
page) to the back of the XM receiver.
4. Use the color codes in Figure 5 (on the next page) to insert the FAKRA SMB connectors into the
supplied plastic cases. Then lock them with the supplied clips.
NOTE: Do not install the plastic cases if you are using a Sony XM Radio Receiver.
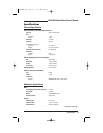
5. If the XM system is not already installed, temporarily connect power and ground. Then connect
the SR4X-MM antenna cables to your XM receiver, as directed by the receiver’s manufacturer
(see Figure 6 on page 8).
6 Installation
1⁄4"-20 x 2"
Hex-Head Bolt
(1 of 4 shown)
(1 of 4 sets shown)
Connecting
Bracket
Right-Angle
Bracket
Antenna Mast
Attached
Cables
3⁄4" Flat Washer
3⁄4" Ext. Tooth Lock Washer
3⁄4"-16 Hex Thin Nut
1⁄4" Flat
Washer
1⁄4"- 20
Ext. Tooth
Lock Washer
1⁄4"-20
Hex Nut
SR4X-MM OM 5/14/02 11:38 AM Page 6