4-8 CSI-200 User Instructions
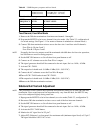
11Restore jumper J16 to short pins 1 & 2.
Program B to Right Headphone
1 Remove the signal from the PROGRAM A input, and connect it to the PROGRAM B input.
2 Measure the level at the right headphone output (J2, 3 & 5). It should be 1.3 dBu ±2 dBu.
(Program volume at maximum.)
3 Set the signal generator to 0 dBu, 100 Hz. The right headphone output should be 0.8 dBu ±2
dBu.
4 Set the signal generator to 0 dBu, 10 kHz. The right headphone output should be –3.8 dBu ±2
dBu.
5 Reset the generator to 0 dBu, 1 kHz.
6 Remove jumper J17 (program not assigned to right headphone). Verify that the signal level
drops at least 35 dB from the reference level in step 2.
7 Restore jumper J17 to short pins 1 & 2.
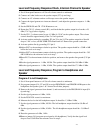
Program to Speaker
1 Connect the AC voltmeter across the 8 ohm load at the speaker output
2 Set the SPKR ON button to the on position.
3 Measure the level at he speaker output. It should be 6 dBu ±2 dBu. (Program volume at
maximum.)
4 Set the signal generator to 0 dBu, 100 Hz. The speaker output should be 1.3 dBu ±2 dBu.
5 Set the signal generator to 0 dBu, 10 kHz. The speaker output should be 7.3 dBu ±2 dBu.
6 Reset the generator to 0 dBu, 1 kHz.
7 Remove jumper J18 (program not assigned to speaker). Verify that the signal level drops at
least 35 dB from the reference level in step 3.
8 Restore jumper J18 to short pins 1 & 2.
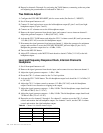
IFB Test
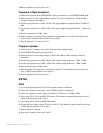
IFB B
1 Set all front panel buttons to off. Set all volume controls to minimum.
2 Move the J5 jumper to short pins 1 and 2 (IFB B assigned to channel 4).
3 Check the output level across intercom channel 4. It should be –9.8 dBu ±2 dBu.
4 Turn on the CH 4 TALK and MIC ON buttons. The channel 4 output should drop at least 45
dB from the reference level in step 3.
5 Turn off the CH 4 TALK and MIC ON buttons.
6 Ground the Key 4 input (short J22 pin 20 to pin 10). The channel 4 output should drop at least
45 dB from the reference level in step 3.
7 Remove the Key 4 ground.
8 Move the J5 jumper to short pins 2 and 3.


