14
Recording
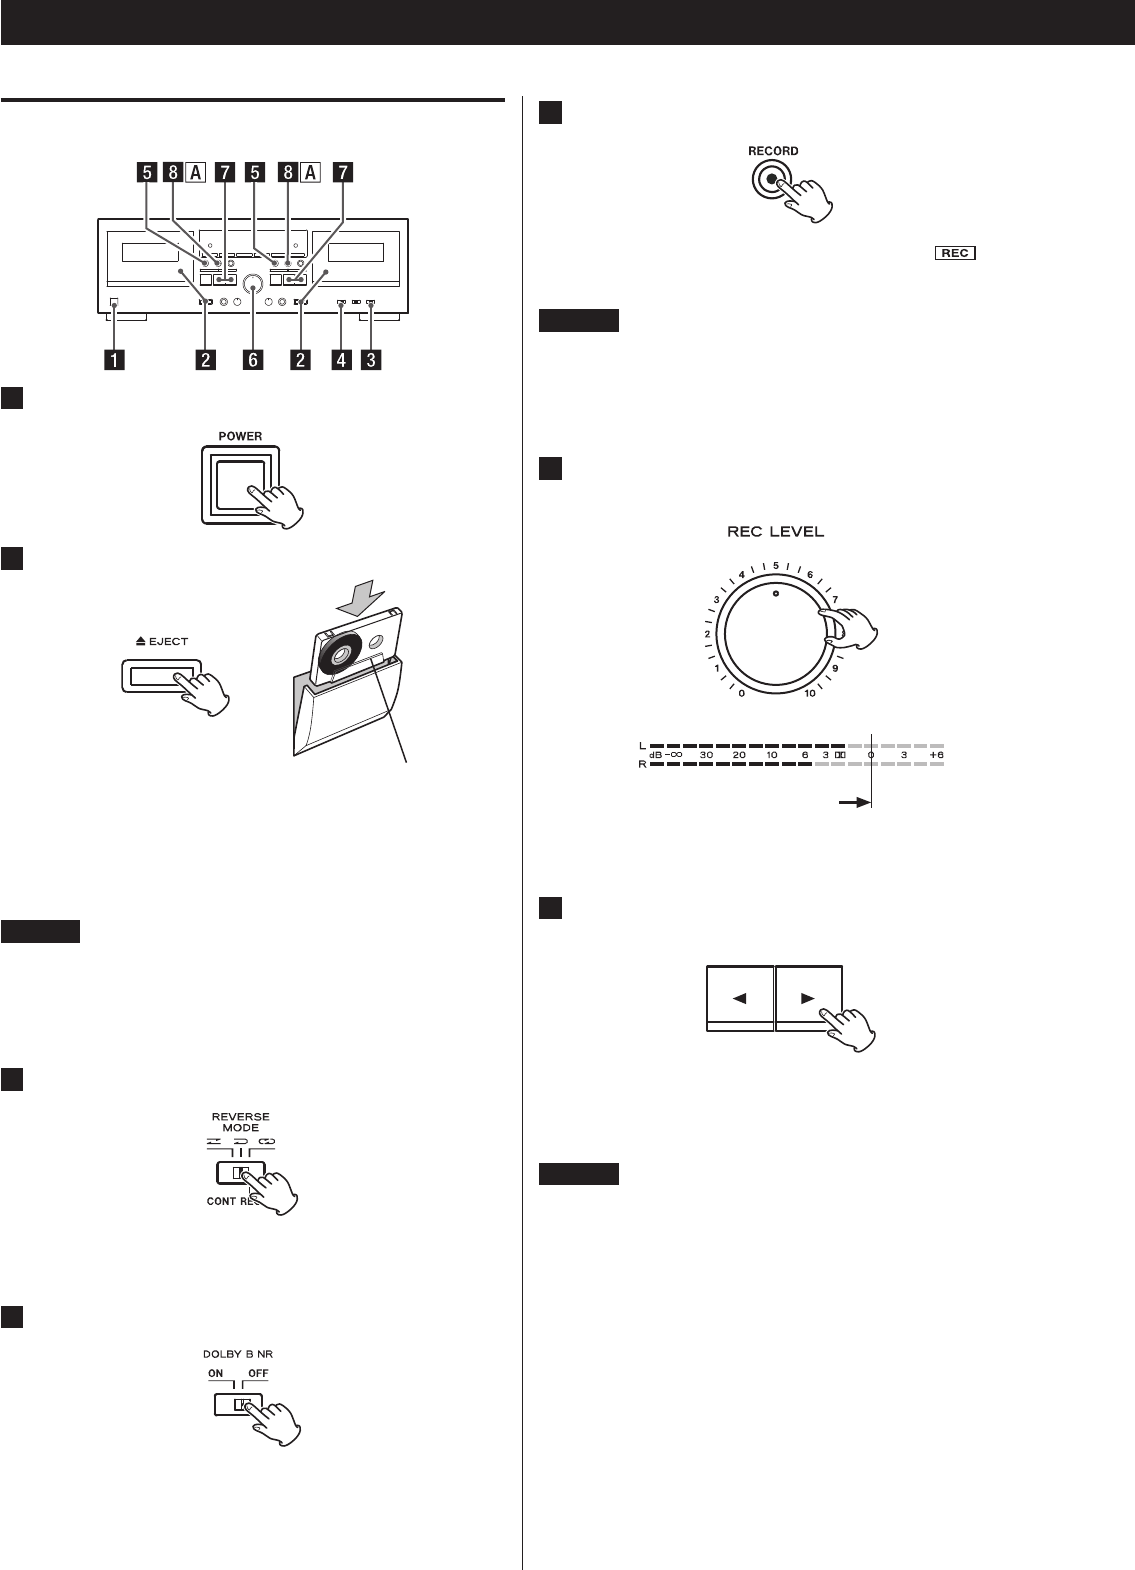
Recording (either TAPE I or TAPE II)
1
Turn on the power.
2
Load a tape for recording.
Side “A” facing you
Press the EJECT (L) key to open the cassette compartment.
Insert the cassette tape with its open edge facing down, side “A”
facing you. Then close the cassette compartment by pushing in
the cassette door until it clicks shut.
NOTE
< If the erasure prevention tabs of the loaded cassette tape have
been broken off, stick a piece of adhesive tape over the hole(s).
< With this cassette deck you can use Normal (Type I) and Chrome
(Type II) tapes for recording.
3
Set the REV MODE switch.
7 : Set to this position to record on one side only.
j : Set to either of these positions to record on both sides.
4
Set the DOLBY NR switch.
Set the switch to ON to record with Dolby Noise Reduction.
Set to OFF to record without Dolby Noise Reduction.
5
Press the RECORD (K) key.
The deck enters the record-pause mode. J and will light
on the display.
NOTE
< If you want to record using the remote control unit, press the two
RECORD keys on the remote control unit at the same time.
< To stop recording while the deck is in the record-pause mode,
press the STOP key (H).
6
Adjust the recording level.
Start playback of your recording source and set the REC LEVEL
control knob so that the level meter indicates “0 dB” at peaks.
7
Set the recording direction. (To record on only one side of
the tape)
Recording is made in the direction indicated by the play/record
direction indicator (h / y). To change this direction, press the
opposite direction PLAY (h or y) key.
NOTE
Make sure that the arrow on the key (h / y) you are going
to press points in the opposite direction of the arrow on the
indicator (h / y) shown on the display. Failure to follow this
instruction causes the deck to start recording in an unintended
direction.


