


25
The Radio Data System (RDS) is a broadcasting service which
allows stations to send additional information along with the
regular radio programme signal.
RDS works on the FM waveband in Europe only.
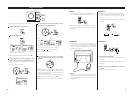
Tune in an FM RDS station (see steps to of page
23).
The Programme Service name (station’s name) appears on the
display.
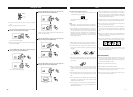
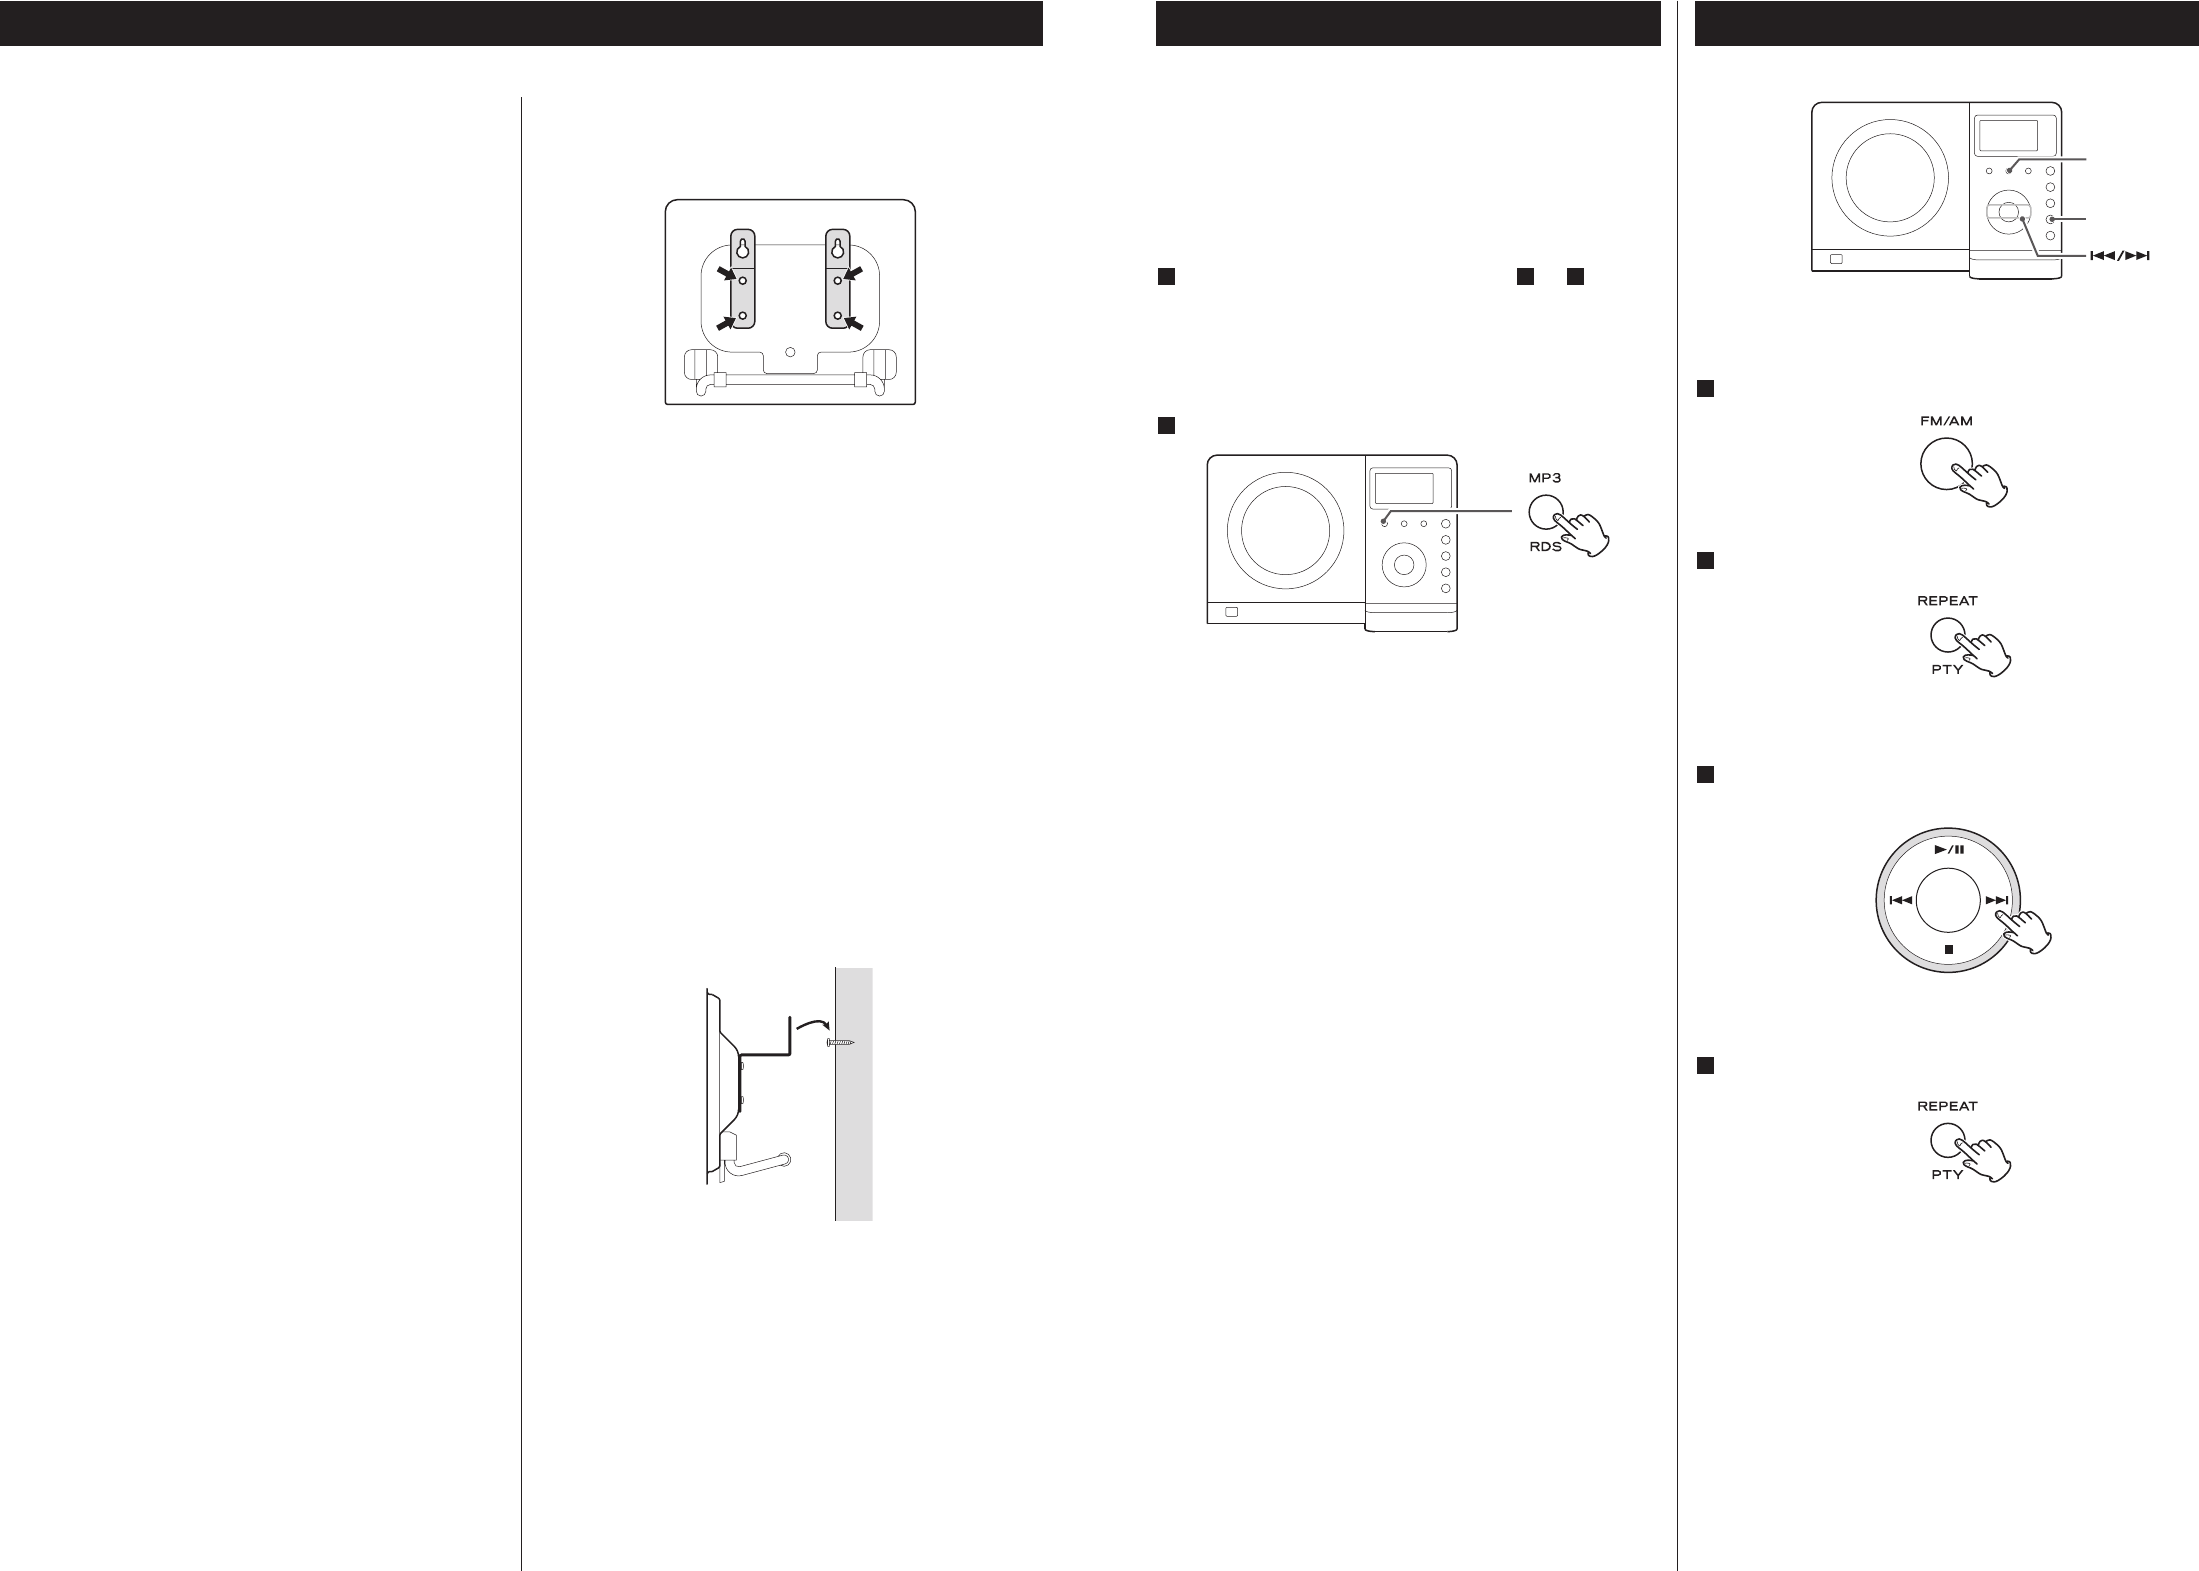
Press the RDS button.
Each time the RDS button is pressed, the RDS mode is
changed as follows:
PS (Programme Service name)
When you select PS, the frequency will be displayed for 3
seconds, and then PS (station’s name) will be displayed. If
there is no PS data, “NO PS” will be displayed.
PTY (Programme Type)
When you select PTY, the programme type will be displayed.
If there is no PTY data, “NO PTY” will be displayed.
RT (Radio Text)
When you select RT, the news of stations composed of up
to 64 symbols will be displayed. If there is no RT data, “NO
RT” will be displayed.
2
311
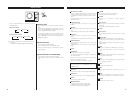
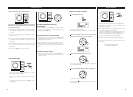
RDS RDS (PTY Search 1)
A station can be searched by this function.
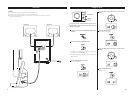
Select FM by pressing the FM/AM button.
Press the PTY button.
“PTY SEL” blinks on the display.
Within 10 seconds, select the desired PTY programme
using the SKIP button (
.or/).
You can select from 31 kinds (see page 26).
Press the PTY button.
Searching will start.
< When the programme that you have selected is found,
searching will stop and the programme type will be displayed.
< If the same program type is not found during PTY Search, it
will stop at the beginning frequency.
< If you want to stop searching, press the PTY button.
4
3
2
1
FM/AM
PTY
8
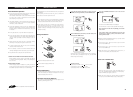
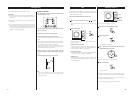
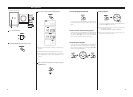
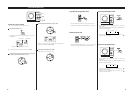
Wall Mounting
You can mount the left and right speakers on a wall.
Precautions
< Be aware that the length of the cables are approximately 3 m.
Do not attempt to mount the speakers too far from the
subwoofer.
< Drill holes into solid wall support, such as wooden frame or
concrete wall.
< TEAC supplies these brackets as a convenience to the product
owner. Consult your local building codes and exercise all
necessary caution when mounting these brackets. If you are
unsure how to use the supplied brackets, consult with a local
tradesmen or building supply expert.
To hook on the wall
1. Fix the brackets on the rear panel of the speakers using
the supplied short screws.
2. Use the supplied guide sheet to mark the exact drilling
points on the wall.
3. Drill holes in the wall at the marked points.
4. Screw the supplied long screws into the wall.
Leave about 5 mm space between the screw’s head and the
wall.
< As a convenience, a set of tapered plastic anchors is supplied.
If you chose to use these anchors, drill a pilot hole using a 6
mm drill bit then tap the anchor into the pilot hole.
Only use these anchors if they are appropriate for the
materials onto which the unit is to be mounted. Consult your
local hardware store if you are uncertain.
5.Before going on, connect the speakers and the
subwoofer using the supplied speaker cables (see page
6-7).
6. Carefully hang the speakers onto the screws.
Note:
Ensure that the speaker locks onto the hooks and that the
hooks are strong enough to support the weight before
removing your hands.