10
Features of the 202MKVI (continued)
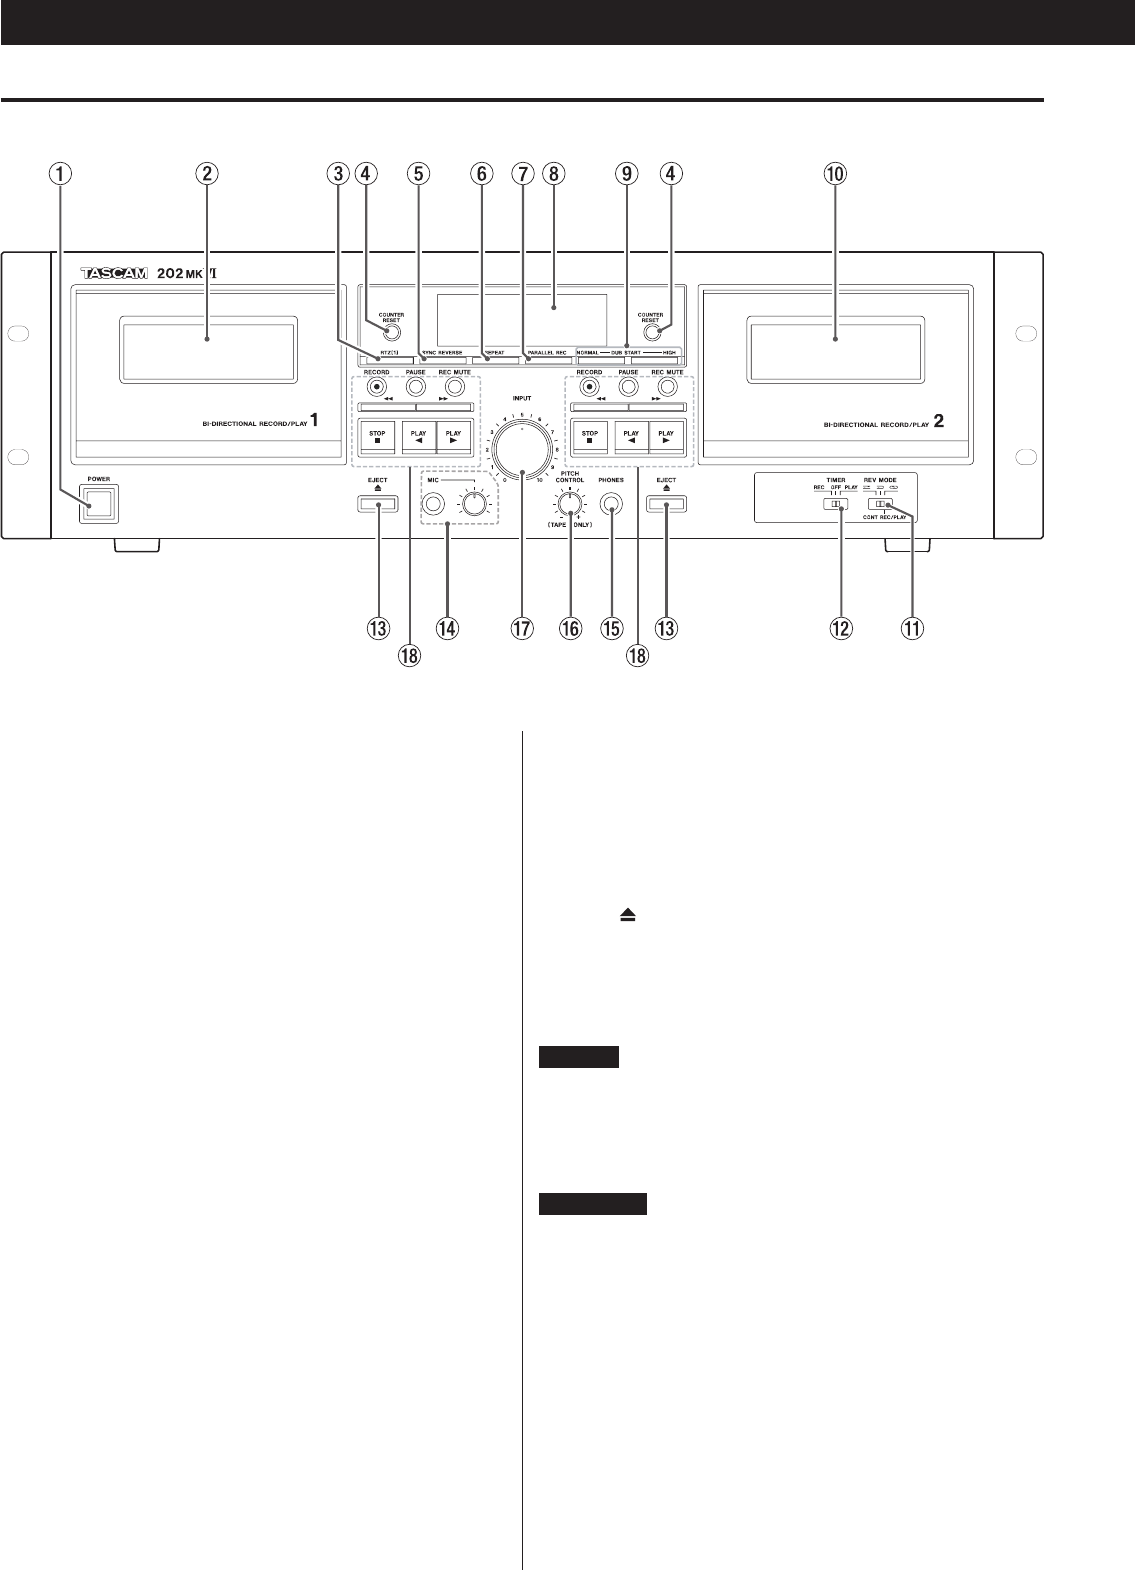
Front panel
1
1 POWER switch
This switches the unit power between off and on.
2 TAPE 1 compartment
3 RTZ(1) key (TAPE 1 only)
This key returns the tape to the counter zero point.
4 COUNTER RESET keys
Pressing these keys reset the tape counter readings for TAPE 1 and
TAPE 2, respectively.
5 Synchro reverse key (SYNC REVERSE)
Pressing this key activates the synchro reverse dubbing function.
6 REPEAT key
This allows repeat playback of a selected section of the tape.
7 Parallel record key (PARALLEL REC)
This key lets you simultaneously record on both decks.
8 Display
This shows tape counters, level meters, etc.
9 Dubbing start key (DUB START)
This key is used when copying the contents of a tape from TAPE 1
to TAPE 2, either at normal or high speed.
0 TAPE 2 compartment
q Reverse mode switch (REV MODE)
This switch is used to switch between reverse modes.
w TIMER switch
This switch is provided for use with a commercially available
audio timer, to allow timer controlled recording or playback.
Normally, leave this switch to the OFF position.
e EJECT ( ) keys
Pressing these keys opens the TAPE 1 and TAPE 2 compartments.
r MIC jack and level control
Insert your microphone into this jack and use the knob to adjust
the level of mic input.
NOTE
The MIC jack is mono. You cannot use a stereo microphone with
this cassette deck.
t Headphones jack (PHONES)
Plug your headphones into this jack.
WARNING
There is no level control for the headphones output. Beware that
sudden loud sounds may occur depending on recorded material.
You should avoid prolonged exposure to high volume sound as
this can damage your hearing.
y PITCH CONTROL
This control is used to vary the playback speed.
During dubbing, the pitch control does not work.
u INPUT
This control is used to adjust the recording level.


