


HTS Manual 3/3/06 14:50 Page 4
Composite
C M Y CM MY CY CMY K
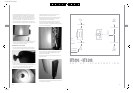
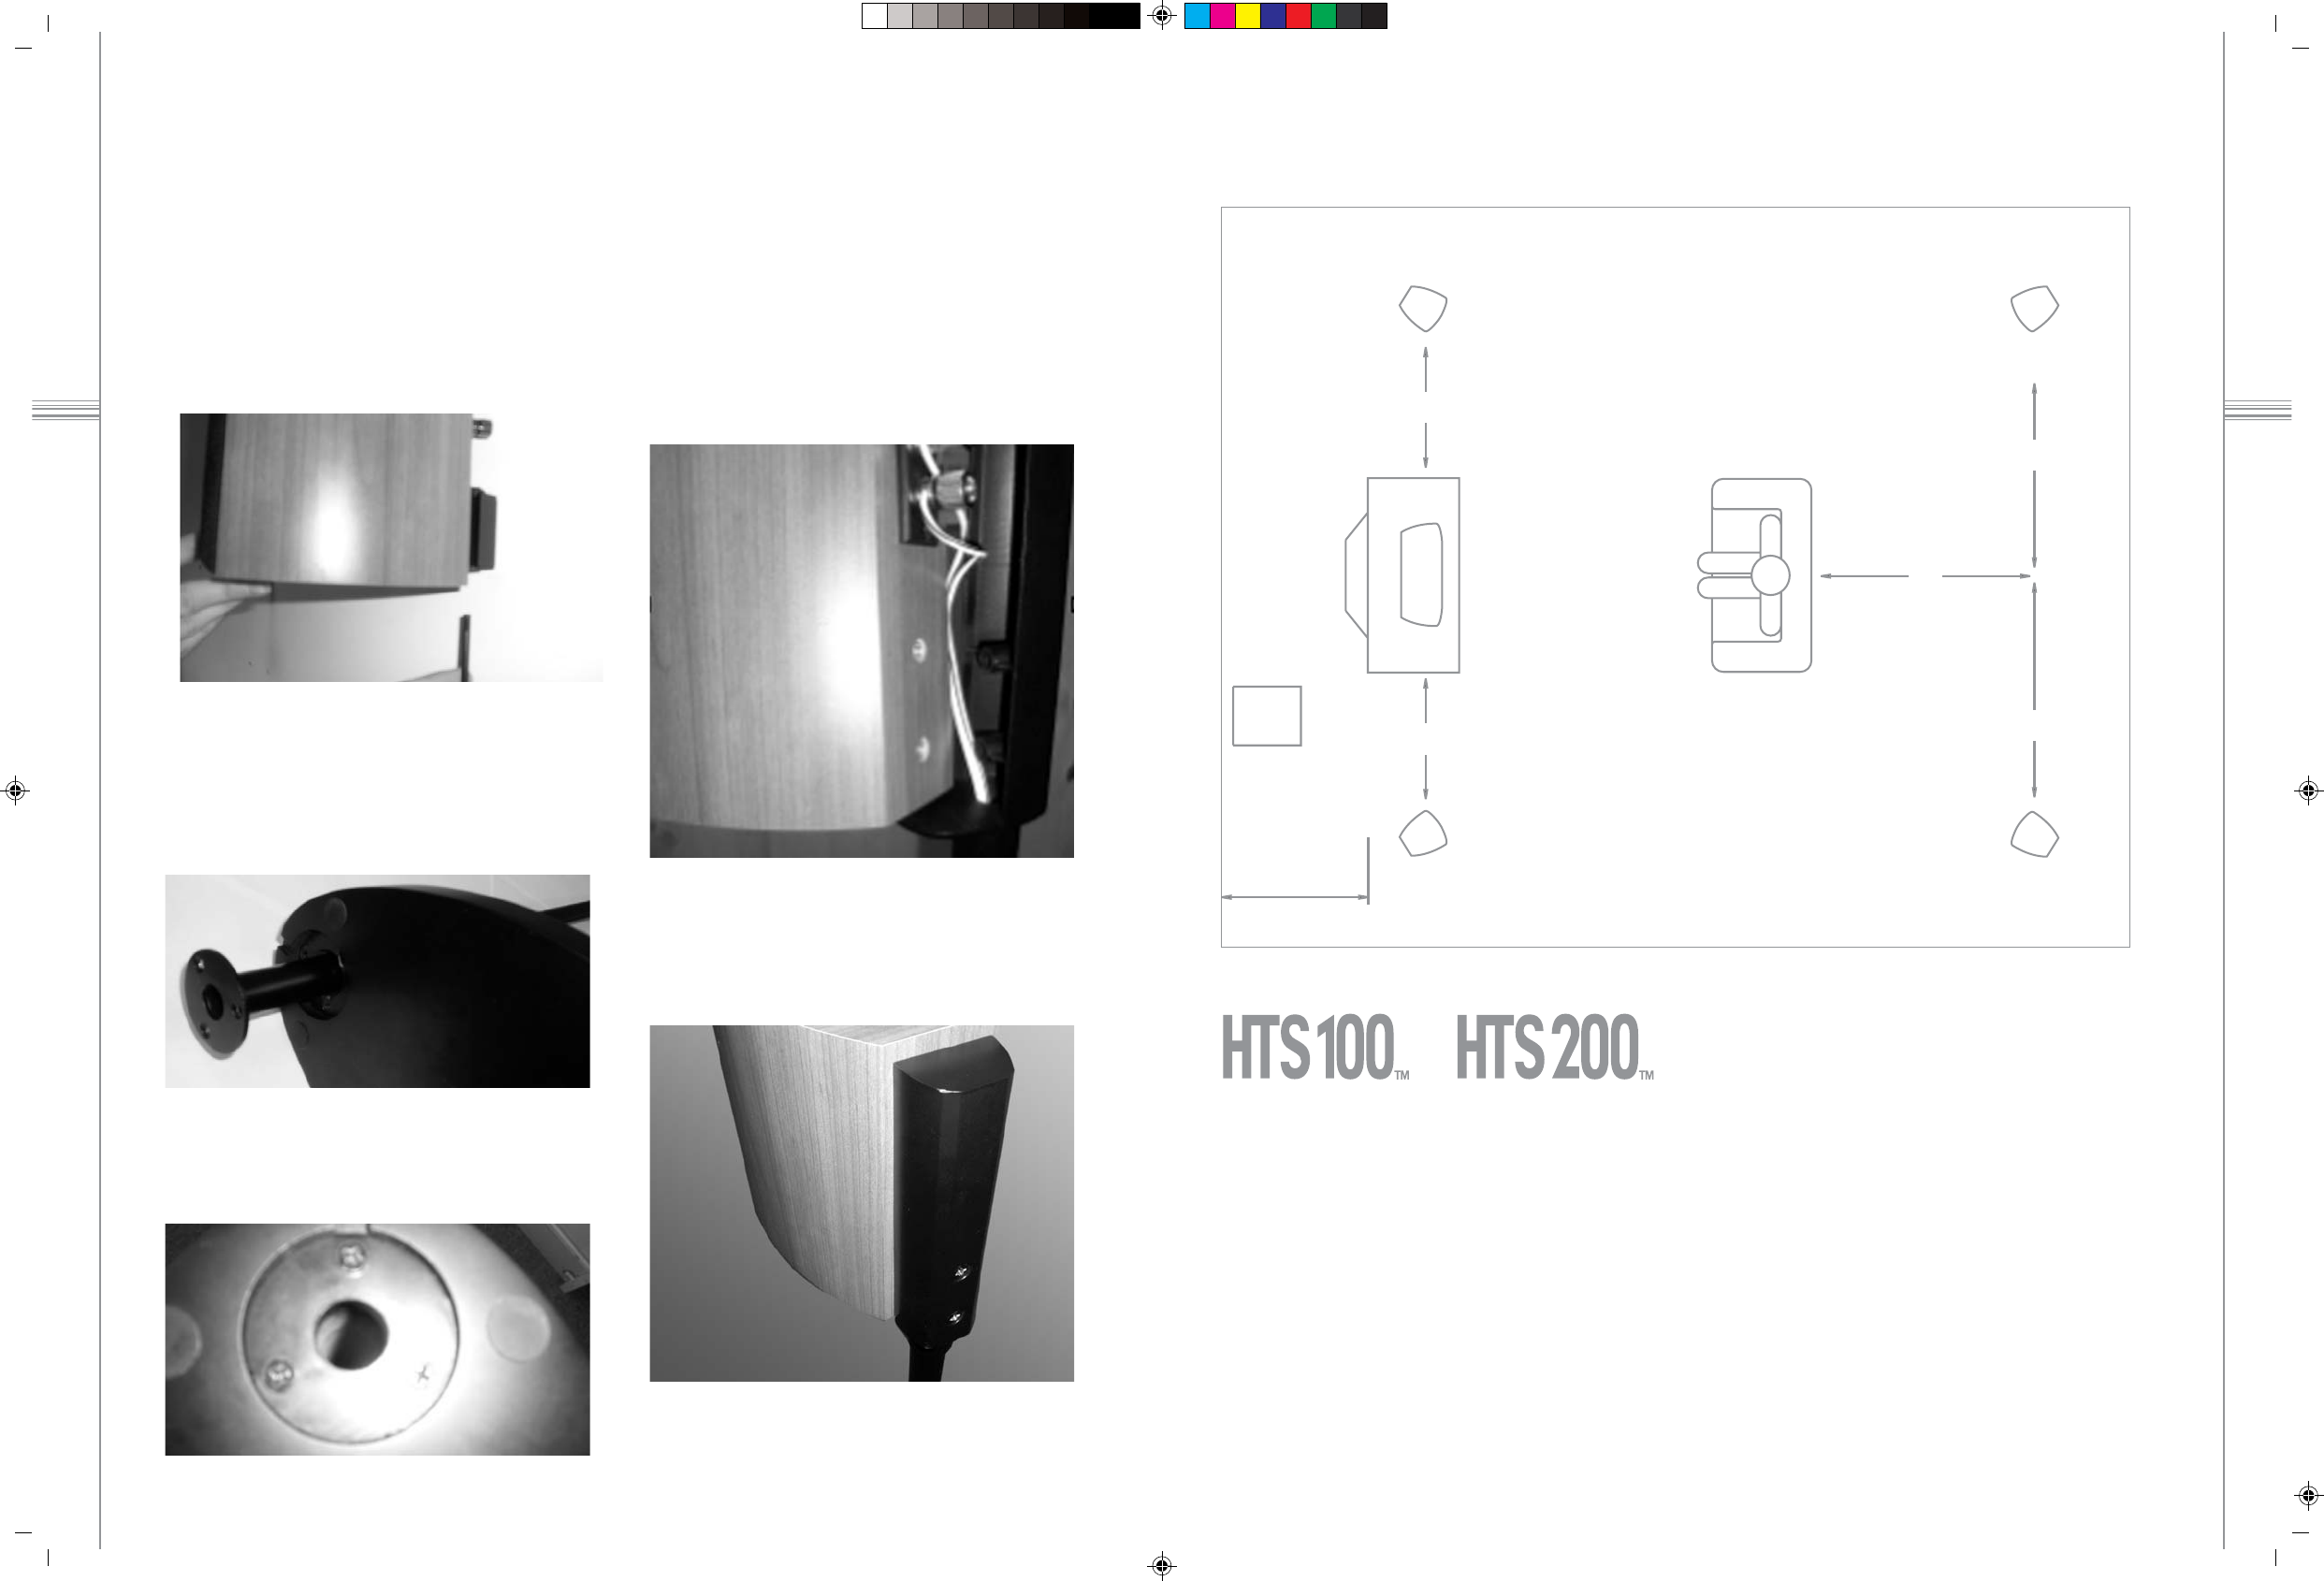
ASSEMBLING THE STANDS
• Pass the metal pole through the base so that the flange
locates in the round pocket in the underside of the base.
• Position the satellite or centre speaker (with half the wall
bracket(s) fitted) against the other half of the wall bracket
already fitted to the wall. Line up the brackets so that the
long screw.pin can be inserted vertically from below the
satellite or horizontally from the sides of the centre speaker
and screwed up lightly. The speakers will now swing in
the horizontal plane (vertical plane for the centre) for best
aural and visual effect. Tighten the long screw/pin to finish.
• To remove the speakers from the wall to access the wiring
terminals, remove the long screw/pin whilst carefully
supporting the weight of the speaker.
• Locate the slot in the top end of the pole and assemble so
that the slot points to the rear when the base points towards you.
• Fit the stand bracket to the satellite covering the terminals
and lining up the fixing holes.
• Fit the 2 screws to the satelite speaker finger tight, check
the alignment of the bracket and tighten the screws.
DO NOT OVERTIGHTEN.
• Pull the cable gently from underneath the stand base to
take up any slack.
• Line up the 3 holes in the flange with the 3 threaded
inserts in the base and fit 3 screws finger tight.
• Check the alignment of the slot in the top of the tube
(pointing backwards) and tighten the screws.
• Place the satellite and stand bracket onto the top of the
pole taking care to align the slot in the pole with the
corresponding rib in the stand bracket.
• Pass the cable up through the centre of the tube and
connect to the terminals on the satellite. Take care to
preserve correct polarity, the conductor with the grey stripe
connects to the black terminal.
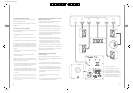
1 to 2 METRE
&
SET UP ILLUSTRATION
1 to 2 METRE
1 to 2 METRE
0.3 METRE
OR MORE
SUB
REAR
REAR
1 to 2 METRE
1 to 2 METRE
6 7