


HTS Manual 3/3/06 14:50 Page 3
Composite
C M Y CM MY CY CMY K
In addition, HTS systems have a subwoofer which provides
very low frequency sounds and special effects. The
subwoofer supports low frequencies for all 5 audio channels.
It is a specially designed high power unit with its own built-
in amplification capable of reproducing very low frequencies
at realistic levels to enhance music and movie experiences.
5.1 decoders provide a special subwoofer output signal
which you connect directly into the HTS subwoofer using
a suitable cable. The subwoofer output socket on your
equipment is usually labelled 'LFE' (Low Frequency Effects)
or 'SUB' or 'SUBWOOFER' output.
WHAT'S IN THE BOX?
HTS 100:
• One carton containing 4 x satellite speakers, 1 x
centre speaker, 1 x subwoofer, cable, wall brackets
and accessories.
HTS 200:
• One carton containing 2 x satellite speakers, 1 x centre
speaker, 1 x subwoofer, cable, wall brackets
and accessories.
• One carton containing 2 x tower speakers, 2 x base
platforms, spikes, wood floor protectors and
associated screws.
HTS Stand
One carton containing 2 x stand bases, 2 x stand poles, 2 x
stand brackets and associated screws
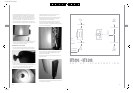
ASSEMBLING THE TOWER SPEAKERS (HTS 200)
• Fit each black base to each tower speaker using 3 screws
located in the accessory bag.
• Fit all 3 screws loosely by locating them in the threaded
inserts before tightening them all securely.
• Screw 4 chrome spikes into the threaded inserts on each
tower base.
• Note that the cable may be passed neatly from underneath
the base, through a hole in the base behind the speaker
to the adjacent terminals.
HTS SET UP GUIDE
This high performance Tannoy HTS 5.1 home cinema system
has been built and tested with care and precision to provide
first class performance and reliable operation. To ensure
maximum benefit from ownership and for reasons of safety,
please read through all the information in this owner's manual
before operating and using this system for the first time.
Tannoy HTS systems are primarily designed for use with the
following equipment:-
• An AV or Home Cinema Receiver with integral 5.1 decoder,
5 power amplifiers and a dedicated LFE or subwoofer
line level output.
• An integrated DVD player with 5.1 decoder, 5 power
amplifiers and a dedicated LFE or subwoofer line
level output.
• A 5.1 decoder (with LFE or subwoofer output) feeding 5
separate power amplifiers.
A 5.1 decoder separates digital audio signals from DVD, CD
or Digital Broadcast sources into five separate audio channels
which feed the five separate speakers in the HTS system and
a sixth channel which feeds the HTS subwoofer.
Each speaker provides a separate function.
The functions are:
• Centre Speaker which carries most of the dialogue or
solo performances.
• Front Left and Front Right Speakers which carry special
effects and left/right stereo information.
• Left Rear and Right Rear Speakers which carry special
effects information.
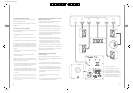
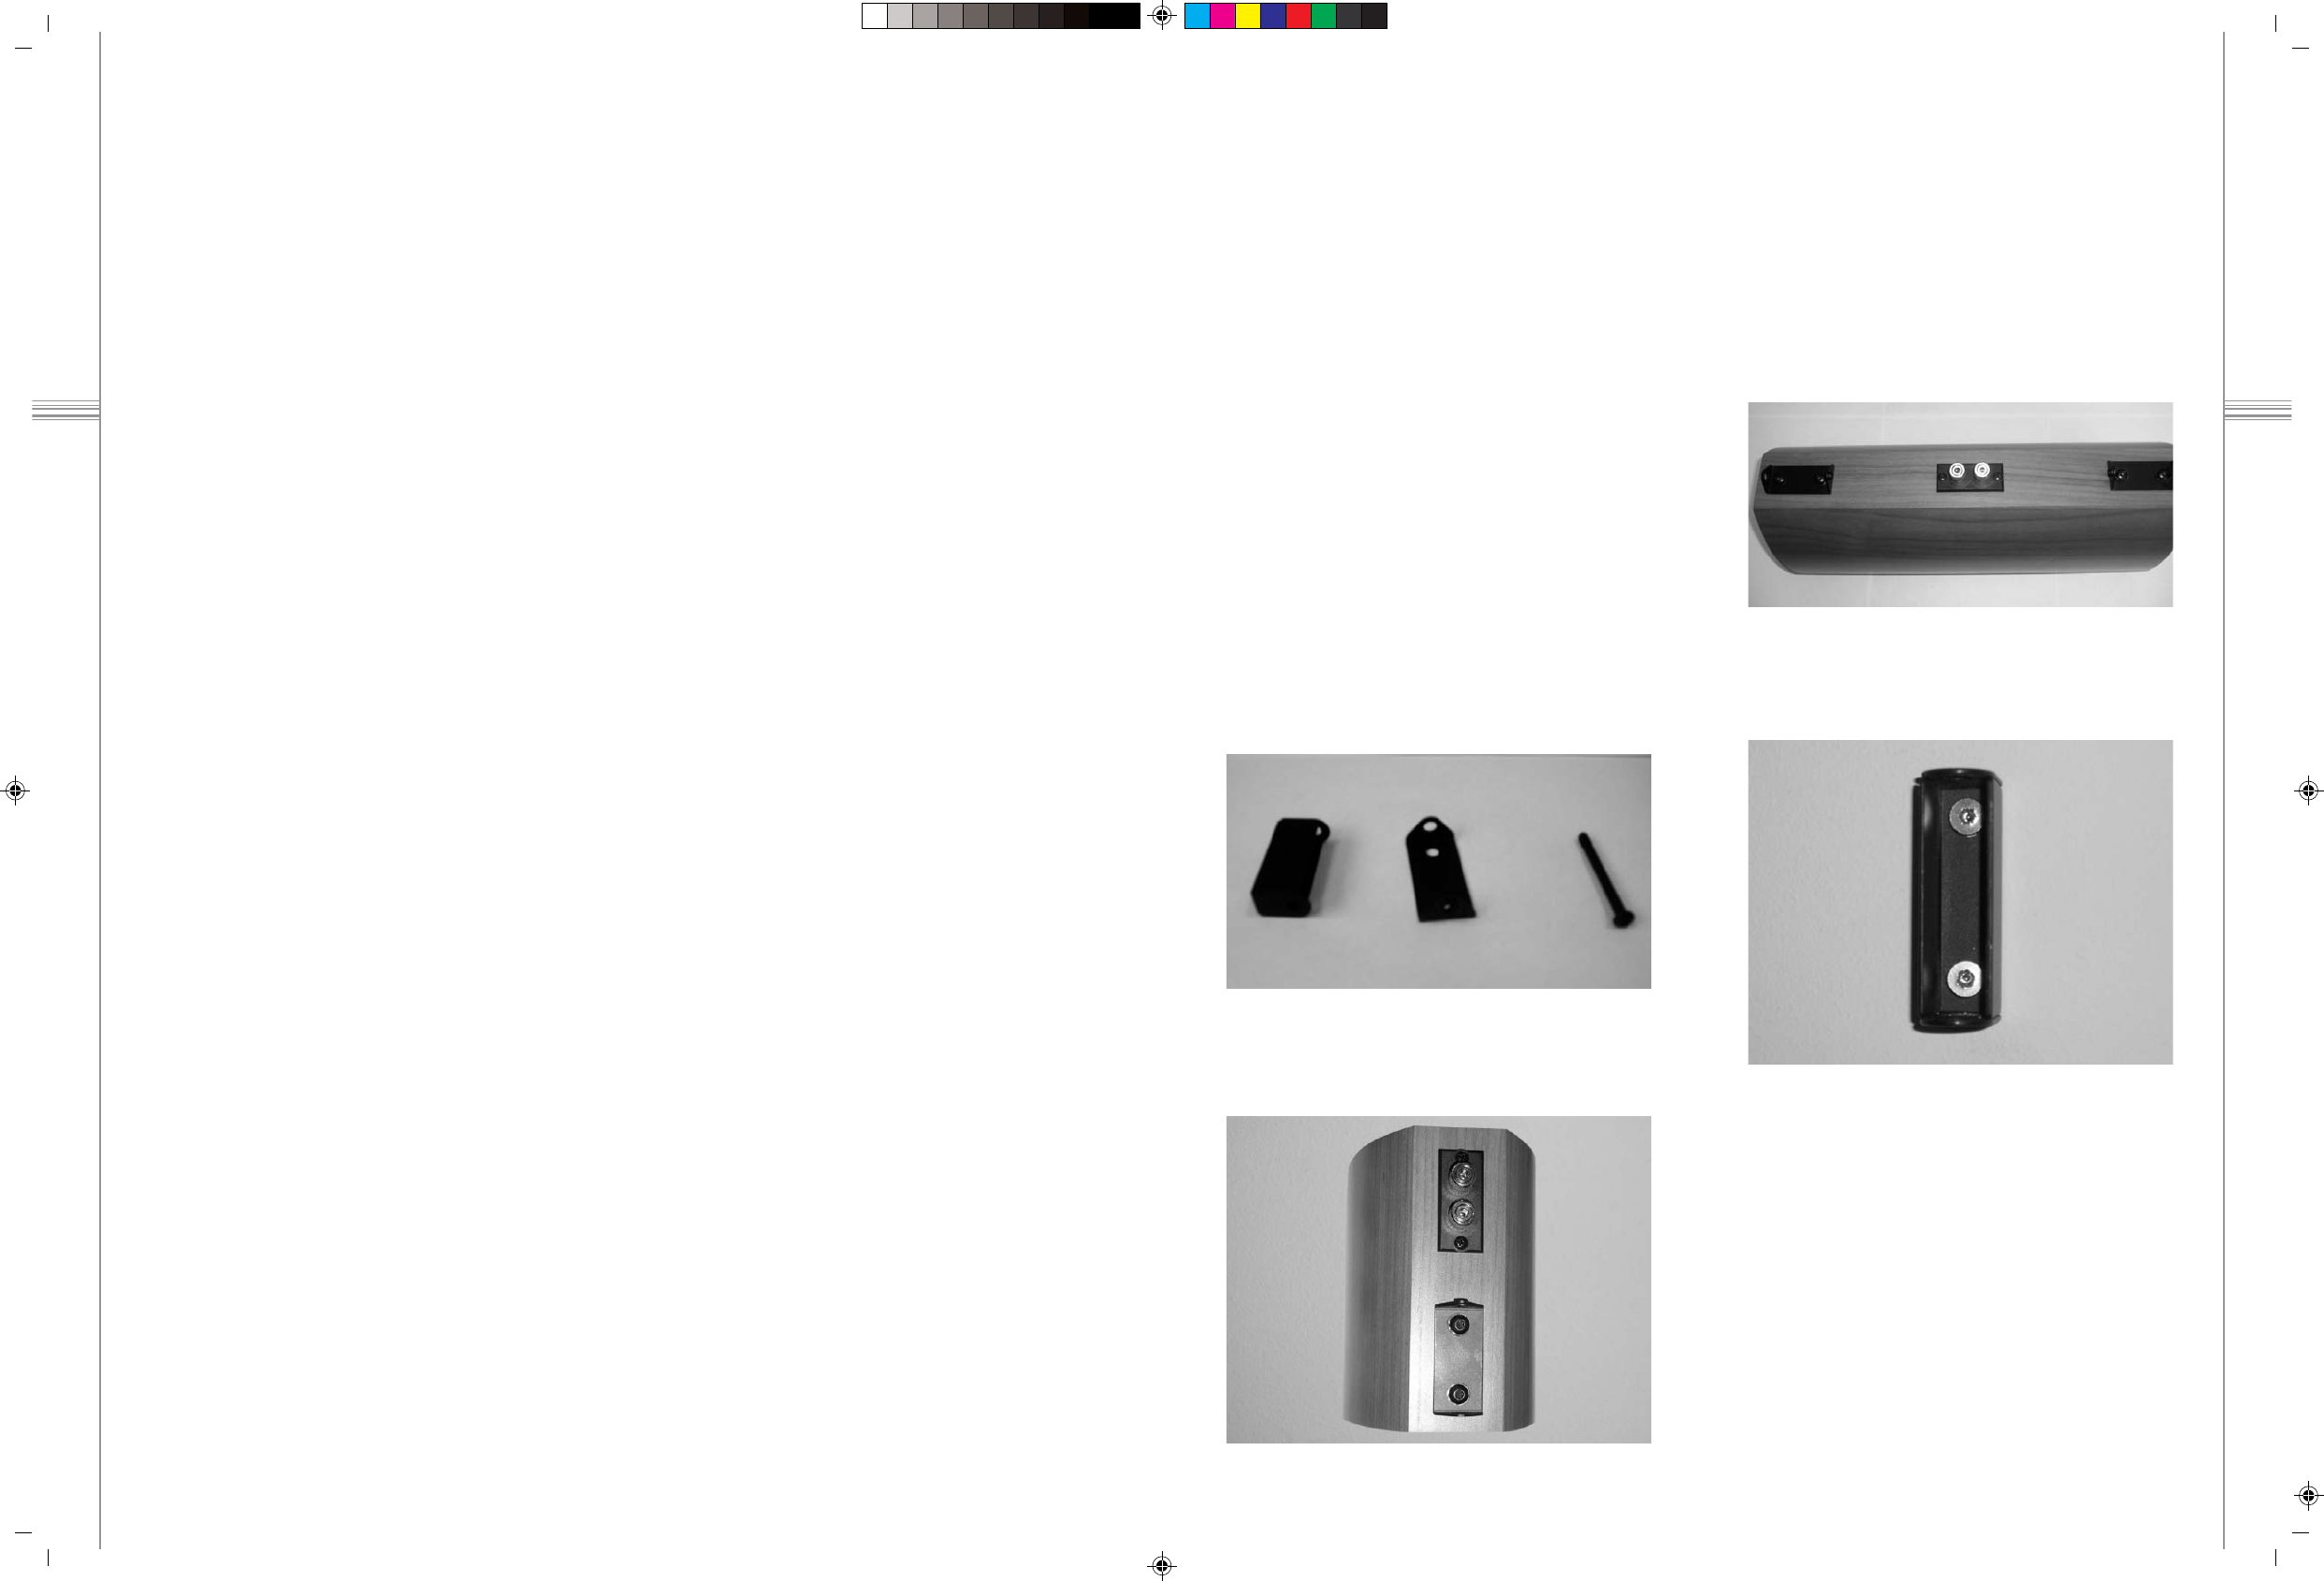
Fit the wall brackets to the smaller satellite speakers if you
wish to wall mount them as follows:
• Locate the appropriate screws and lock washers in the
accessory pack - 2 screws for each wall bracket; 12 screws
in total for the HTS100 system and 8 screws in total for
HTS200 system.
• Locate the Allen key tool which which you will use to
tighten the hex socket head screws.
Each wall mounting bracket has two halves and a long
screw/pin which holds the two halves together to act as the
hinge. One half is mounted on the speaker using 2 screws
and the other half is mounted on the wall using suitable screws
and wall plugs. It is your responsibility to ensure that the wall
and the screw fixing method are both strong enough to support
the weight of the satellite speakers. See the specification
page for weights.
ASSEMBLING THE CENTRE &
SATELLITE WALL BRACKETS
• Fit 2 halves of 2 brackets to the centre speaker with the
threaded hinge pin hole in the bracket facing the terminals
on the back of the satellite. This orientation will allow the
hinge pins to be fitted from either side of the cabinet when
mounting to the wall.
• Fit one half of the bracket with the large holes to the
speakers using the screws and lockwashers provided.
The threaded hinge pin hole in the bracket should face
the terminals on the back of the speaker.
• Separate each bracket into two halves by removing the
long hinge screw.
• Fit the other half of the bracket(s) to the wall using a
suitable fixing method for the type of wall material - seek
professional advice if unsure.
4 5