SV Sound
Page 10
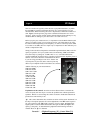
your sub, getting these bass wave forms to arrive in a complementary fashion is
the difficult job of the phase control. Essentially, “phase” varies the timing of the
bass waves
coming from the sub. But don’t despair if you don’t hear much differ-
ence, especially if running a single subwoofer. Bass “cancellation” will vary by
room shape, volume, and the bass frequency. No one setting is likely to ever be
perfect. If your receiver is equipped with a distance setting for your subwoofer, set
the SVS’s phase to “0” or full counter-clockwise, and the sub’s distance to your
main seats accordingly.
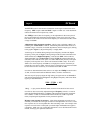
Line In/Out. Use either of the sub’s “Line In” jacks (RCA or XLR type) to connect
the subwoofer to the output jack of your receiver/processor. Feeding just one input
is enough. If you are using a conventional amp and/or a stereo setup you can use the
“Line Out” jacks to send sound (filtered of deep bass information) back to your
system amp, or switch off this “Hi-pass” filter. A simple RCA or XLR cable is all
you need for either type configuration. See “Crossover Feature” discussion below
for more on Line Out options.
Auto-On. Your Powered Box allows itself to be in an “Auto-On” mode… or “On”
all the time. With the former setting (the switch in the “Auto” position) your sub-
woofer will “sense” that a DVD or CD etc. has begun and switch its audio circuits
on immediately (the “hard” power switch mentioned below must be on, naturally).
A few minutes after a movie, the Auto-On light will turn Red, switching portions of
the sub’s power supply back off. When running (and sensing a signal) the Auto-On
LED will be green. Sometimes, with very low listening levels, your subwoofer
might not get enough of a bass signal from your surround sound processor to “trip”
the Auto-On circuit. Should you ever find this to be the case you may leave this
switch to “On”, or turn up the receiver’s subwoofer level some (be sure to recali-
brate channels levels with your meter afterwards).
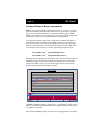
Crossover Feature Switches. If you allow your DD/DTS surround-sound receiver
or processor to manage bass frequencies (again, highly recommended), this switch
should be set to “Disabled”, eliminating the effects of the “Crossover Frequency”
knob and allowing your sub to reproduce just what it’s fed from the receiver. If you
use the sub in a two channel (stereo only) configuration, then “Enable” the crossover
and adjust the knob to best blend the sub into the output of your speakers. XLR and
RCA Hi-Pass filters can be switched “Off” if you desire to “daisy chain” the output
of one sub to the input of another without frequency response conflicts; or pass full-
range audio signals to an outboard stereo amp/receiver.
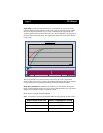
Power. This heavy-duty two-position switch next to the power cord will completely
cut the power to your sub amp. Flip this switch to off before you ever move the sub
or change inputs or outputs. Do not plug this sub into receiver convenience power
outlets. Allow two minutes of “off” time before switching back “on”.
Fuse. User replaceable, contact your dealer if you have trouble finding one. The
fuse can be accessed by a small door immediately next to the power cord fitting
(where you should also find a spare one for your use).


