


More Setup, calibrating and integration
SV Sound
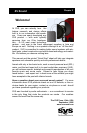
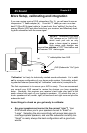
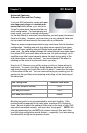
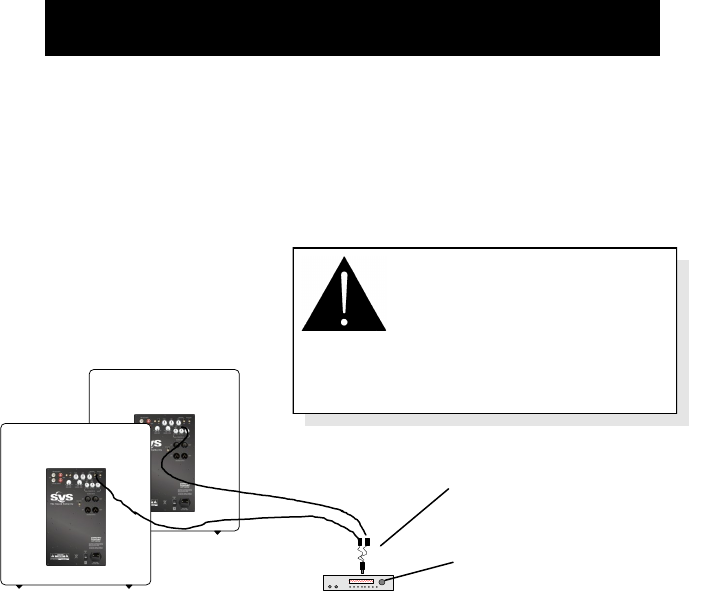
If you are running a pair of SVS subwoofers (Fig. 2), you will need to use an
inexpensive “Y” cable adapter (d.) From the “Y” cable you can run a stan-
dard 75 Ohm RCA signal cable (e.) to each sub, thus “splitting” the Low Fre-
quency Effects (LFE) and other bass from your receiver, and effectively feed-
ing both subwoofers with the same signal.
“Calibration” isn’t only for technically minded sound enthusiasts. It is ’s criti-
cal to a proper configuration of your home audio system. Fortunately, adjust-
ing channel balance (essentially all “calibration” amounts to) is simple to do.
The first requirement is to ensure your AVR is ready. Thus we recommend
you consult your AVR manual to review the choices you have regarding
setup. Generally, this requires your receiver’s test tones play back at the
same volume from each of your system’s speakers. Of course this can in-
clude speakers at left, center, right, left surround and right surround plus the
subwoofer itself.
Some things to check as you get ready to calibrate:
Are your speakers set correct to the correct “size”? Your
AVR should allow you to your speakers be set to “Small” or
“Large”. Selecting the size accordingly will ensure bass goes to
most appropriate speakers, and use the subwoofer correctly too.
“Small” is nearly always the best configuration with a good sub-
woofer.
Chapter 6-2
SV Sound
AVR (Subwoofer “Out”) jack
Fig. 2
(e.)
(d.)
“Y” cable/splitter from AVR
NOTES: Determine if you want
“ON” (always on) or “AUTO ON”
which turns your sub on only
when a bass signal is present.
High power amp designs can
require five minutes of “OFF” time before sub
will resume “ON” status again.