


User's Manual
6
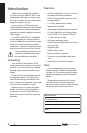
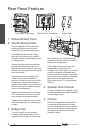
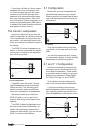
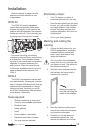
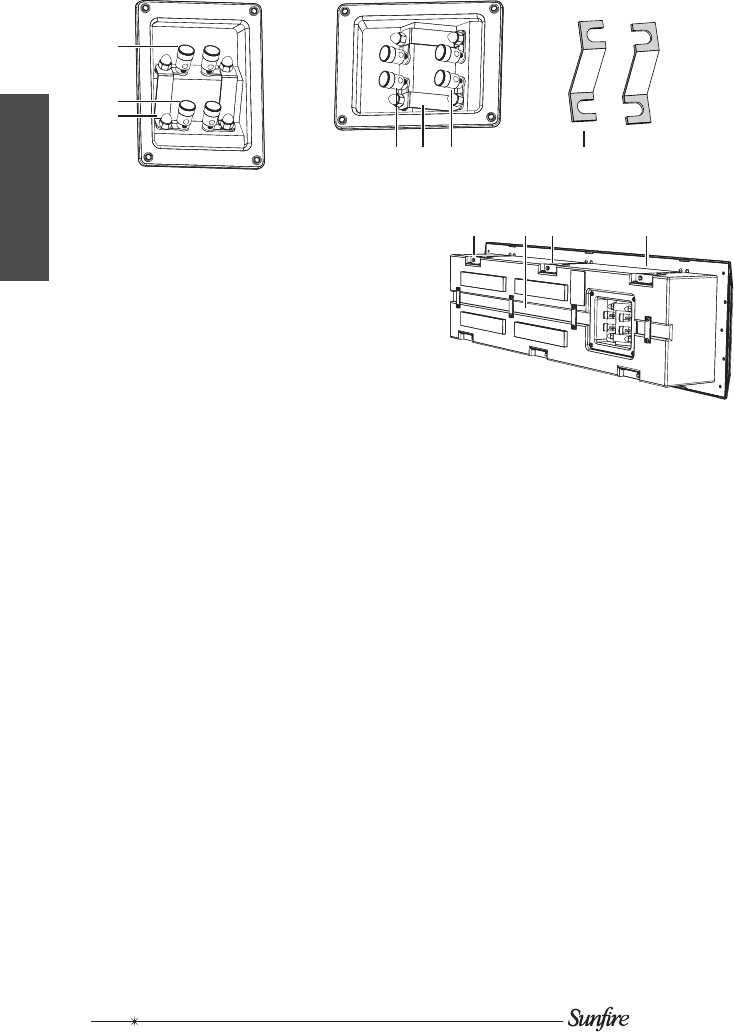
1. Ribbon Binding Posts
2. Woofer Binding Posts
The loudspeakers have two sets of
binding posts that are joined with
bridge clips (3) for normal operation.
If the bridging clips are left in place,
then you can connect your amplier
outputs to either positive/negative pair
of binding posts.
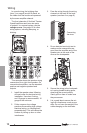
Always use high quality connections
and speaker wires, and make sure
there are no loose ttings or stray wire
strands. The spring connections accept
bare wire or pins.
Connect the positive speaker-level
output of your power amplier or
receiver to a positive (red) input of the
loudspeaker. Connect the negative
speaker-level output of your power am-
plier or receiver to a negative (black)
input of the loudspeaker.
Make sure that the positive and nega-
tive connections do not touch, or this
may damage your power amplier.
Tighten all four adjacent nuts to make
sure the bridge clips are making good
contact.
3. Bridge Clips
From the factory, the two positive
binding posts are electrically joined
together with a bridge clip, as are the
two negative posts. Leave these clips
in place, unless you intend to biwire or
biamp your loudspeakers.
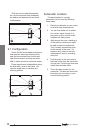
If the bridge clips are removed, the
loudspeaker can be biwired or
biamped. The ribbon posts (1) are then
used for connection of speaker-level
power to the ribbon section. The woofer
posts (2) are for connection of speaker-
level power to the woofer section.
(See page 16 and 17 for biamp/biwire
details.)
4. Speaker Wire Channel
To ease installation, the speaker wiring
can be passed through these channels
to the binding posts.
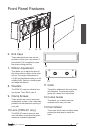
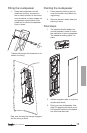
5. Clamps
Once the loudspeaker is pressed into
an opening in the sheetrock, screws
on the front panel are turned to pull the
clamps out and down to press against
the sheetrock, and secure the loud-
speaker in place.
Rear Panel Features
CRW-3 Rear Connectors CRW-3C Rear Connectors Bridge Clips
1
2
31 2
4 5
3
3
5 5