


User's Manual
13
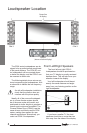
Read the details on page 8 to help
determine the best position for your
loudspeakers.
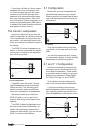
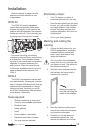
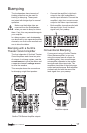
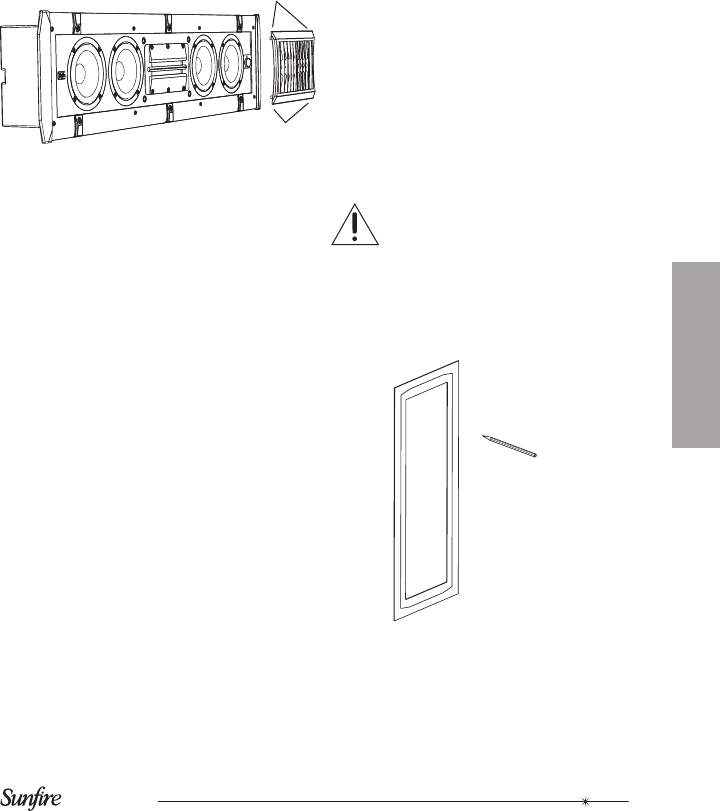
CRW-3C
The CRW-3C center loudspeaker
can be tted horizontally, either above
or below the display. A pair can also be
used as left/right speakers if the acoustic
lenses are removed. This is done by gen-
tly prying them off at the four corners.
Horizontal mounting into existing
construction will most likely mean cutting
a vertical stud. This installation should
be done by an experienced and qualied
carpenter, to prevent weakening the
wall structure. When the extra framing
is done, the installation and wiring is the
same as described as follows for the
CRW-3.
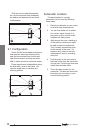
CRW-3
The CRW-3 loudspeakers can be wall
mounted vertically, for example, on either
side of a display. We recommend that the
ribbon section is positioned at a height
close to ear-level, therefore you can t
the CRW-3 loudspeakers with the ribbon
at the bottom if necessary.
Tools required:
• Phillips screwdriver or screw gun
• Pencil or other suitable wall marker
• Sheetrock saw
• Safety glasses
• Level
• Sturdy ladder or step ladder
• Electronic stud nder if needed
• You may need an assistant.
Installation
Preliminary steps:
• If the TV display is in place, it
should be removed from the wall.
• Clear the area where you are going
to work, so it will be safe. Remove
any fragile objects, small children
or pets, and cover anything that
might be affected by dust from cut-
ting sheetrock.
• Put on your safety glasses.
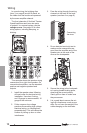
Marking and cutting the
opening
1. Choose the best location for your
CRW-3 loudspeakers, preferably
centered between vertical wall
studs. Use a stud nder to nd
where the studs are.
Do not position the loudspeaker
closer than one inch from the cabi-
net sides to a stud. This allows for
the clamps to swing out.
2. Hold the cutout template onto the
wall surface, and use a level to
make sure it is vertical.
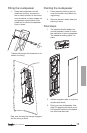
3. Mark the sheetrock with a pencil
around the inside of the template,
and remove the template.
4. Carefully cut out the sheetrock
around the marked lines, and
remove any debris from the hole.
Marking the opening
onto the wall using the
inside of the template