


12
Adjusting bias and recording level
calibration automatically (continued)
5 Start the actual recording (see page
10).
To cancel the Automatic Calibration
function
Press x on the deck you’re using.
If “A” or “B” flashes continuously
The automatic calibration procedure has been
interrupted by:
• The end of the tape. Reverse the tape
direction or rewind the tape to a new position
that allows recording of the test tone.
• Damaged tape or dirty heads. Change the
cassette or clean and demagnetize the heads
(see page 21).
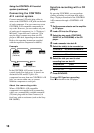
Updating the calibration
setting
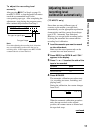
If you load a cassette and “A CAL” or “CAL
B” appears in the display, it means that
automatic calibration data in that deck for that
tape type (I, II or IV) exists. However, we
recommend that you repeat the automatic
calibration procedure each time you load a new
cassette since cassettes of the same type also
vary in their characteristics.
Before recalibrating, be sure to turn off “A
CAL” or “CAL B” by pressing the DECK A
or DECK B button. Then start from Step 2 of
the automatic calibration procedure.
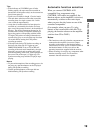
Adjusting the recording
level automatically
— Auto Rec Level
The Auto Rec Level function automatically
measures the peak signal level and adjusts the
recording level accordingly. The Auto Rec
Level function operates during normal
recording, Relay Recording* or Simultaneous
Recording* on either deck.
* TC-WE675 only
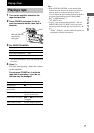
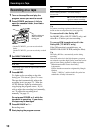
1 Follow Steps 1 to 3 of “Recording on a
tape” on page 10.
Make sure that record-protect tabs on the
cassette have not been removed.
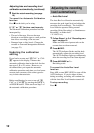
2 Press z REC.
The AUTO indicator flashes and the deck
automatically adjusts the recording level.
The AUTO indicator lights up continuously
after the recording level has been adjusted.
3 Press X PAUSE or H.
Recording starts.
To cancel the Auto Rec Level
function
Press ARL or turn REC LEVEL to turn off the
AUTO indicator. If you do either of these
during recording, recording will continue but
with the Auto Rec Level function turned off.
To stop recording
Press x.