9
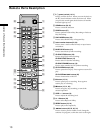
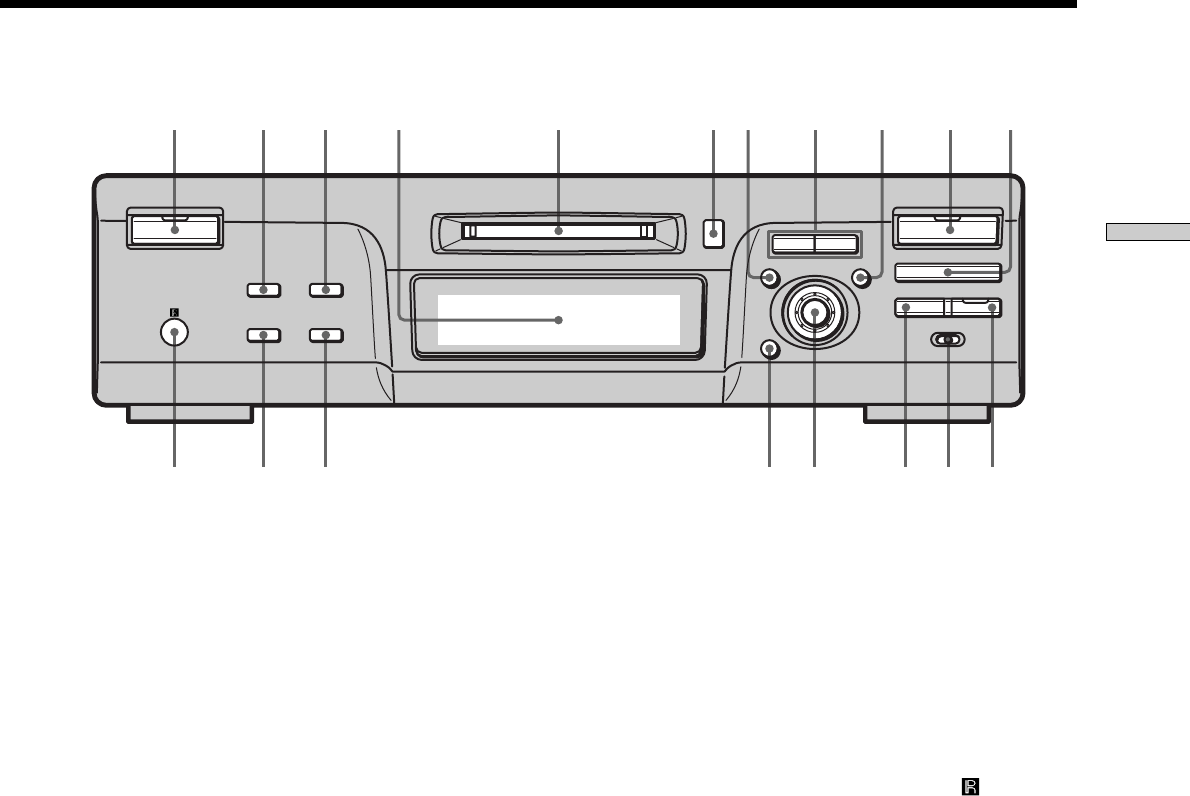
Location of Parts and Brief Explanations
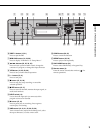
1 6 87 9 0 qa2 3 54
qjqkql qf qd qsqgqh
H
M
m
?/1
A
x
X
.>
z
••
SCROLL
PLAY MODE REPEAT
EJECT
DISPLAY/CHAR
MENU/NO
AMS
CLEAR
YES
INPUT
LEVEL/LEVEL/
DIGITAL ANALOG
REC
PUSH ENTER
6 EJECT A button (15, 21)
Press to eject the MD.
7 MENU/NO button (14, 29, 38)
Press to display “Edit Menu” or “Setup Menu.”
8 m/M buttons (23, 25, 30, 33)
Press to locate a portion within a track, change the
contents of a program, or change the input character.
9 YES button (14, 25, 29, 38)
Press to carry out the selected operation.
q; H button (15, 21)
Press to start play.
qa x button (15, 21, 29)
Press to stop play, stop recording, or cancel the
selected operation.
qs z REC button (15-17)
Press to record on the MD, monitor the input signal, or
mark track numbers.
qd INPUT switch (14)
Use to select the input jack (or connector) of the
program source to be recorded.
qf X button (15, 21)
Press to pause play or recording. Press again to
resume play or recording.
qg AMS control (14-16, 21, 25, 29, 33, 38)
Turn to locate tracks, adjust the recording level, select
the input characters, or select a menu item.
qh CLEAR button (26, 34)
Press to cancel the selection.
qj REPEAT button (23, 24)
Press to play tracks repeatedly.
qk PLAY MODE button (24)
Press to select Shuffle Play or Program Play.
ql Remote sensor (4)
Point the remote towards this window (
) for
remote operations.


