10
Location of Parts and Brief Explanations
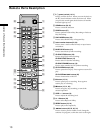
Remote Parts Description
1
2
3
4
6
9
0
qs
7
ws
wa
qa
w;
qh
qk
qj
qd
qf
qg
ql
5
8
ABC
LEVEL
CD-SYNC
MUSIC
SYNC
A
y
B
REPEAT
2
DEF
3
& ! ?
FADERSCROLL
DISPLAY
PLAY MODE
NAME IN
CLEARYES
MENU/NO
CHARNAME
STANDBY
STOP
START
1
JKL
5
MNO
6
GHI
4
TUV
8
QZ
10/0
T.REC
>
10
WXY
9
PRS
7
CD PLAYER
. >
m M
z x
X
H
Z
` / 1
+
–
>.X
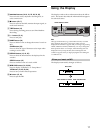
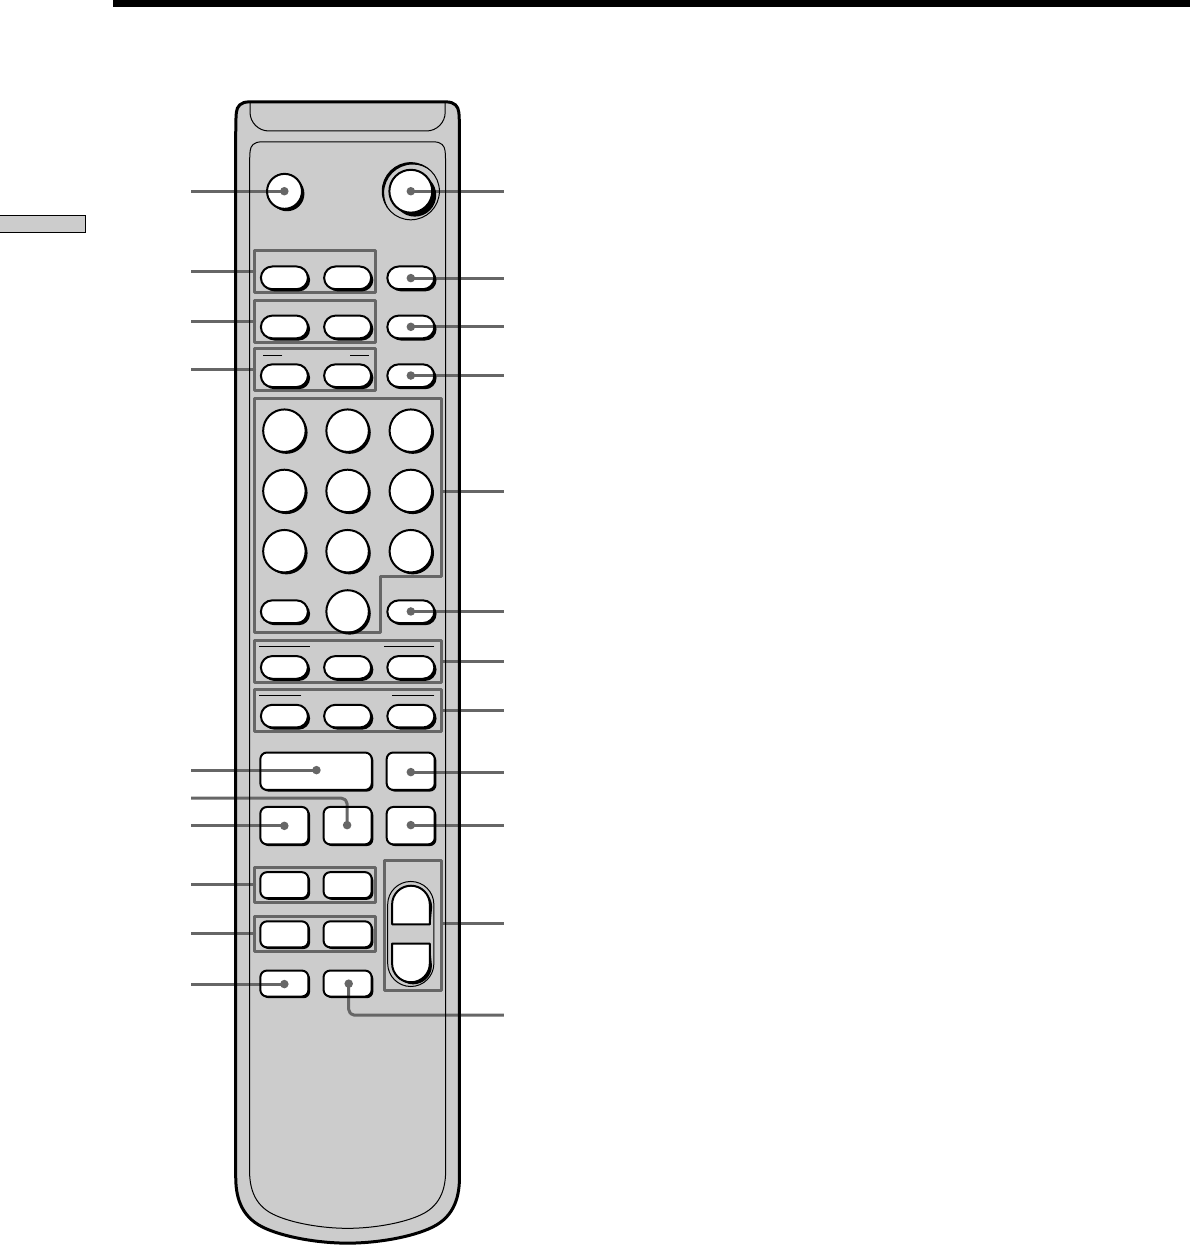
1 ~/1 (power) switch (14, 21)
Press to turn the deck on. When you turn the deck on,
the ~/1 switch indicator on the deck turns off. When
you press the switch again, the deck turns off and the
indicator lights up red.
2 CLEAR button (26, 34)
Press to cancel the selection.
3 FADER button (37)
Press to perform Fade-in Play/Recording or Fade-out
Play/Recording.
4 PLAY MODE button (24)
Press to select Shuffle Play or Program Play.
5 Letter/number buttons (22, 34)
Press to enter a track number directly or input letters
or numbers.
6 MUSIC SYNC button (19)
Press to start Music Synchro-recording.
7 CD-SYNC STOP button (20)
Press to stop CD Synchro-recording.
CD-SYNC START button (19)
Press to start CD Synchro-recording.
CD-SYNC STANDBY button (19)
Press to enter standby for CD Synchro-recording.
8 CD PLAYER X button (20)
Press to pause the CD play. Press again to resume CD
play.
CD PLAYER ./> buttons (20)
Press to locate tracks on the CD.
9 X button (15, 21)
Press to pause play or recording. Press again to
resume play or recording.
q; x button (15, 21, 29)
Press to stop play, stop recording, or cancel the
selected operation.
qa LEVEL +/– buttons (16)
Press to adjust the recording level.
qs AyB button (24)
Press to select Repeat A-B Play.
qd REPEAT button (23, 24)
Press to play tracks repeatedly.
qf m/M buttons (23, 25, 30, 34)
Press to locate a portion within a track, change the
contents of a program, or shift the cursor to the right.


