


— 13 —
3. Press X key to write the adjustment value.
The adjustment completion display appears as follows.
LCD display
5-4-5.Electrical offset adjustment method
Note: Doing adjustment by the state that a disc does not enter.
1. Confirm the power voltage is 1.5V.
2. Set to the test mode.
3. Press the VOL– key activates the overall adjustment mode.
LCD display
4. Press the DISPLAY key.
LCD display
5. If result of electrical offset adjustment is OK,the following display
appears.
LCD display
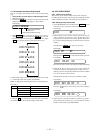
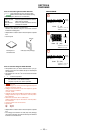
5-5. OVERALL ADJUSTMENT MODE
5-5-1. Overall adjustment mode structure
Note: The overall adjustments should be always performed in the
sequence of CD t MO adjustments.
5-5-2. Overall CD and MO adjustment method
1. Set the TEST MODE and press VOL– key to set the Overall
Adjustment mode.
LCD display
2. Insert CD disc in the set, and press . key to set the Overall
CD Adjustment mode.
Automatic adjustments are made.
LCD display
XXX: Item No. for which an adjustment is being executed.
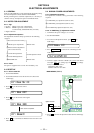
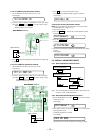
5-4-3. Vc PWM Duty (H) adjustment method
1. Set the Manual mode and set the item No. to 763.
LCD display
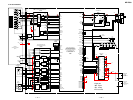
2. Connect a digital voltmeter to TP901(VC) on the main board
and adjust VOL+ key and VOL– key on the remote control.
Adjustment value:2.75V
Standard value:2.735 to 2.765V
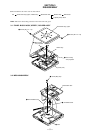
MAIN BOARD (SIDE B)
3. Press X key to write the adjustment value.(Item No. will change
to 764)
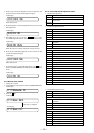
5-4-4. VLL PWM Duty adjustment method
1. Set the Manual mode and set the item No. to 764.
LCD display
2. Connect a digital voltmeter to TP917 (VL) on the main board
and adjust VOL+ key and VOL– key on the remote control.
Adjustment value:2.23V
Standard value:2.22 to 2.235V
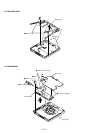
MAIN BOARD (SIDE B)
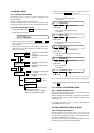
763 VchPWM XX
764 Vl PWM XX
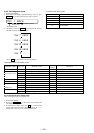
000 Assy11
030 Ofst**
030 OfstOK
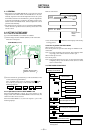
TEST MODE
(Display Check Mode)
Overall Adjustment
Title Display(ASSY**)
CD overall
Adjustment
.
key
VOL – key
key
x
MO overall
Adjustment
> N
key
> N
key
key
x
XXX CD RUN
000 Assy11
TP901
TP901 (VC)
digital voltmeter
1
8
4356
20
TP917
TP917 (VL)
digital voltmeter
000 ADJ OK