


23
GB
Basic Operations
4 Press REC to .
“SYNC” lights up and “REC” flashes
in the display.
“PUSH ENTER” appears in the
display.
5 Press ENTER.
Transferring starts when “DON’T
REMOVE” appears in the display.
When the transferring is completed,
both USB device stop automatically.
You can easily transfer the audio file on
an USB device that is currently being
played back onto another USB device.
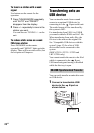
1 Connect a transferable USB
device to the B port on the
unit.
2 Press (Press USB
(RM-AMU053) or press
FUNCTION +/– (RM-AMU054)
repeatedly on the remote), then
connect the USB device you
want to transfer to the A port.
3 Select the audio file you want to
transfer, then start play.
4 Press REC TO while the
selected audio file is being
played back.
“REC” flashes in the display.
“PUSH ENTER” appears in the
display.
5 Press ENTER.
Transferring starts from the beginning
of the file when “DON’T REMOVE”
appears in the display. When the
transferring is completed, the audio
file continues to play.
Note
(MHC-GTZ4i / GTZ3i / GTZ2i and
LBT-GTZ4i only)
You cannot transfer the audio files from the
iPod which is connected to the A port.
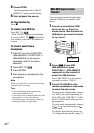
When listening to music from a Sony
Ericsson mobile phone or when
transferring music from this system to the
mobile phone, you can select the playback
source or transferring destination as
follows:
– internal memory of the mobile phone.
– Memory Stick
1 Connect the mobile phone to the
B port on the unit and press
USB B.
2 Press OPTIONS on the unit in
stop mode.
3 Turn OPERATION DIAL to select
“USB MEM SEL”.
4 Press ENTER.
The memory number of the mobile
phone appears in the display but varies
depending on the specification of the
mobile phone.
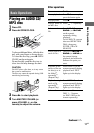
Transferring a single audio file
during playback from an USB
device to another USB device
(USB-USB REC1 Transferring)
USB
USB
USB
To select the playback source
or transferring destination on
the Sony Ericsson mobile
phone
(W302, W595, W760i, W890i,
W902, W910i only)
Continued
l