


22
GB
4 Press ENTER.
Transferring starts when “DON’T
REMOVE” appears in the display.
5 Start playback the source.
To stop transferring
Press x.
To create a new MP3 file
Press REC TO .
“NEW TRACK” appears in the display.
If you press REC TO again after a
few seconds, a new MP3 file cannot be
created.
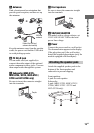
To transfer sound from a
microphone
1 Press PC (or press FUNCTION
(RM-AMU053) or FUNCTION +/–
(RM-AMU054) on the remote
repeatedly until PC function is
selected).
2 Press REC TO .
3 Press ENTER.
4 Start singing or speaking into the
microphone.
Note
When a new MP3 file is created, transferring is
disabled for the time being.
Tips
• If distortion happen during transferring,
reduce the microphone level.
• A new MP3 file is created automatically after
approximately 1 hour of transferring.
• Transferring stops automatically when you
change the function or tuner band.
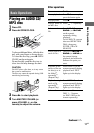
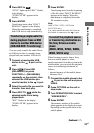
You can easily transfer the audio files
from an USB device to another USB
device.
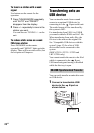
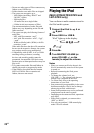
1 Connect a transferable USB
device to the B port as
shown below, then connect the
USB device you want to transfer
to A port.
2 Press (Press USB
(RM-AMU053) or press
FUNCTION +/– (RM-AMU054)
repeatedly on the remote) to
select the USB function.
Press USB SELECT on the remote
repeatedly to select “USB A”.
3 Press PLAY MODE on the
remote repeatedly in stop mode
to select the play mode.
The play mode automatically changes
to 1 USB if you start transferring in
ALL USB, ALL USB SHUF, 1 USB
SHUF or PGM mode (when no file is
programmed).
The play mode automatically changes
to if you start transferring in
SHUF mode.
For details about the play mode, see
“To change the play mode” (page 27).
USB
USB
USB
USB-USB Synchronized
Transfer
USB device
USB