


o Welcome
o Installation
o Overview
o Mounting
o Host Cable
o Antenna
o Power Cable
o Using AirBooster
o Troubleshooting
o Service
o Contact Us
User Guide
Installation Overview
This section contains instructions for installing the AirBooster RF amplifier.
Before you can use your AirBooster amplifier for the first time you must:
Mount the AirBooster amplifier in your vehicle. (more...)1.
Install the CDPD device cabling and connector. (more...)2.
Install the antenna, cabling, and connector. (more...)3.
Install and connect the power cable. (more...)4.
Installation of the optional GPS is covered in separate sections on the GPS
generally, the Field Upgrade Kit, and its related software.
o Installation (top)
o Mounting
o Host Cable
o Antenna
o Power Cable
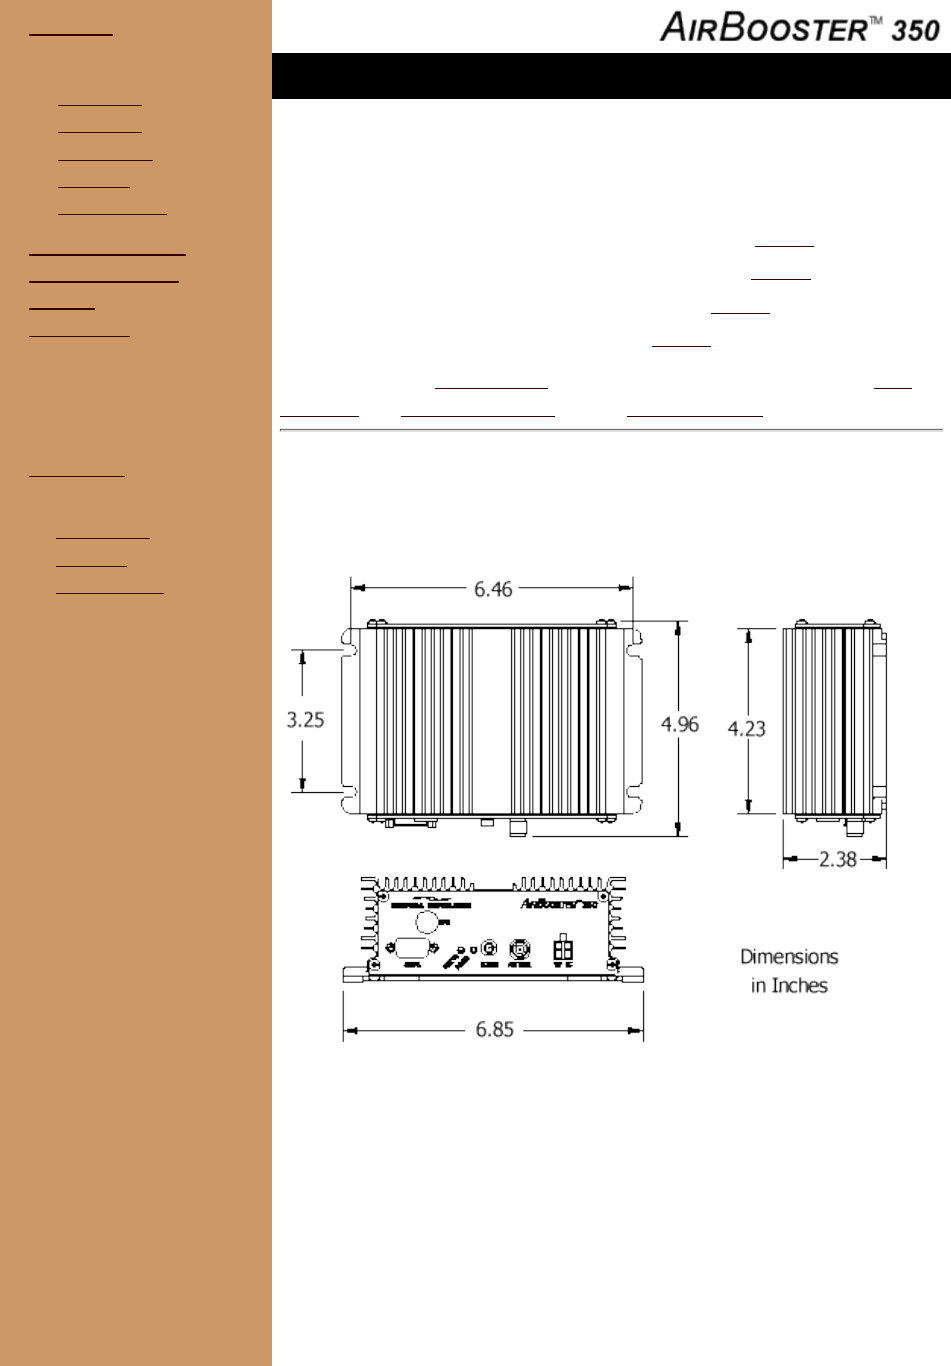
Mounting the AirBooster RF Amplifier
Your AirBooster RF amplifier is designed for mounting in a vehicle, either in
the trunk or some other suitable location.
Choose a location within the vehicle which:
Allows access to the connectors on the front panel.
❍
Provides access for installing needed connector cables.❍
Avoids excessive heat from sources such as the engine
compartment, heaters, or vehicle exhaust.
❍
Protects it from weather and excessive moisture. If mounted in
the passenger compartment, ensure that spills cannot leak into
the unit.
❍
1.
Use the mounting template supplied to mark the location of the
mounting holes.
2.
Drill the required pilot holes (5/32").3.