


CHANGING THE SPEED
7
O P E R A T I O N STYLUS REPLACEMENT
5
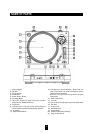
1. Push the power button to turn on the power, the
speed indicator and the strobe-illuminator will light up.
2. Place a record on the slip mat, when playing a
45rpm record with a large center hole, place the
45-rpm adaptor on the center spindle.
3. Set the speed to match the record.
4. Remove the stylus protector, release the arm clamp.
5. Set the cueing lever to the up position.
6. Press the Start/Stop button, the turntable platter
will start to rotate.
7. Move the tonearm over the desired groove.
8. Set the cueing lever to the down position, the
tonearm will descend slowly onto the record and
play begins.
9. When play is finished, raise the cueing lever, move
the tonearm to the arm rest, secure the tonearm
with the arm clamp.
10. Press the Start/Stop button to stop the platter
rotating, push the power button to turn off the power.
Suspend play
Set the cueing lever to "UP"position during play, the
stylus tip of the cartridge will be lifted from the record.
Target light
This unit is provided with a target light for illumi- nating
the stylus tip during play.
Push the target light button, the target light will be
raised into position for illuminating the stylus tip.
When not in use, keep the target light lowered
through depression.
As long as the pitch control (13) is in center click
position,the turntable is operated witch quartz- controlled
rated speed.The green LED (12) will then be lit.
The speed can be increased or decreased by 10% via
the pitch control (13). The red LED (12) will then be lit. If
the change of speed does not correspond to the pitch
control change, it is possible to correct this with the trim
control (15).
An incorrect adjustment done on purpose can also be
used to have the turntable rotate extremely slow or fast.
The strobe dots (4) at the edge of the turntable issued
for speed monitoring.
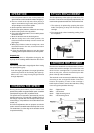
The life expectancy of the stylus tip is 500 hours. For
the sake of maximum sound quality reproduction, we
recommend replacement within the minimum time limit.
1. The stylus tip is replaced by grasping the stylus
holder and pulling it away from the body of the
cartridge.
2. The new stylus tip s then inserted by pushing it into
the receptacle.
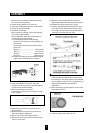
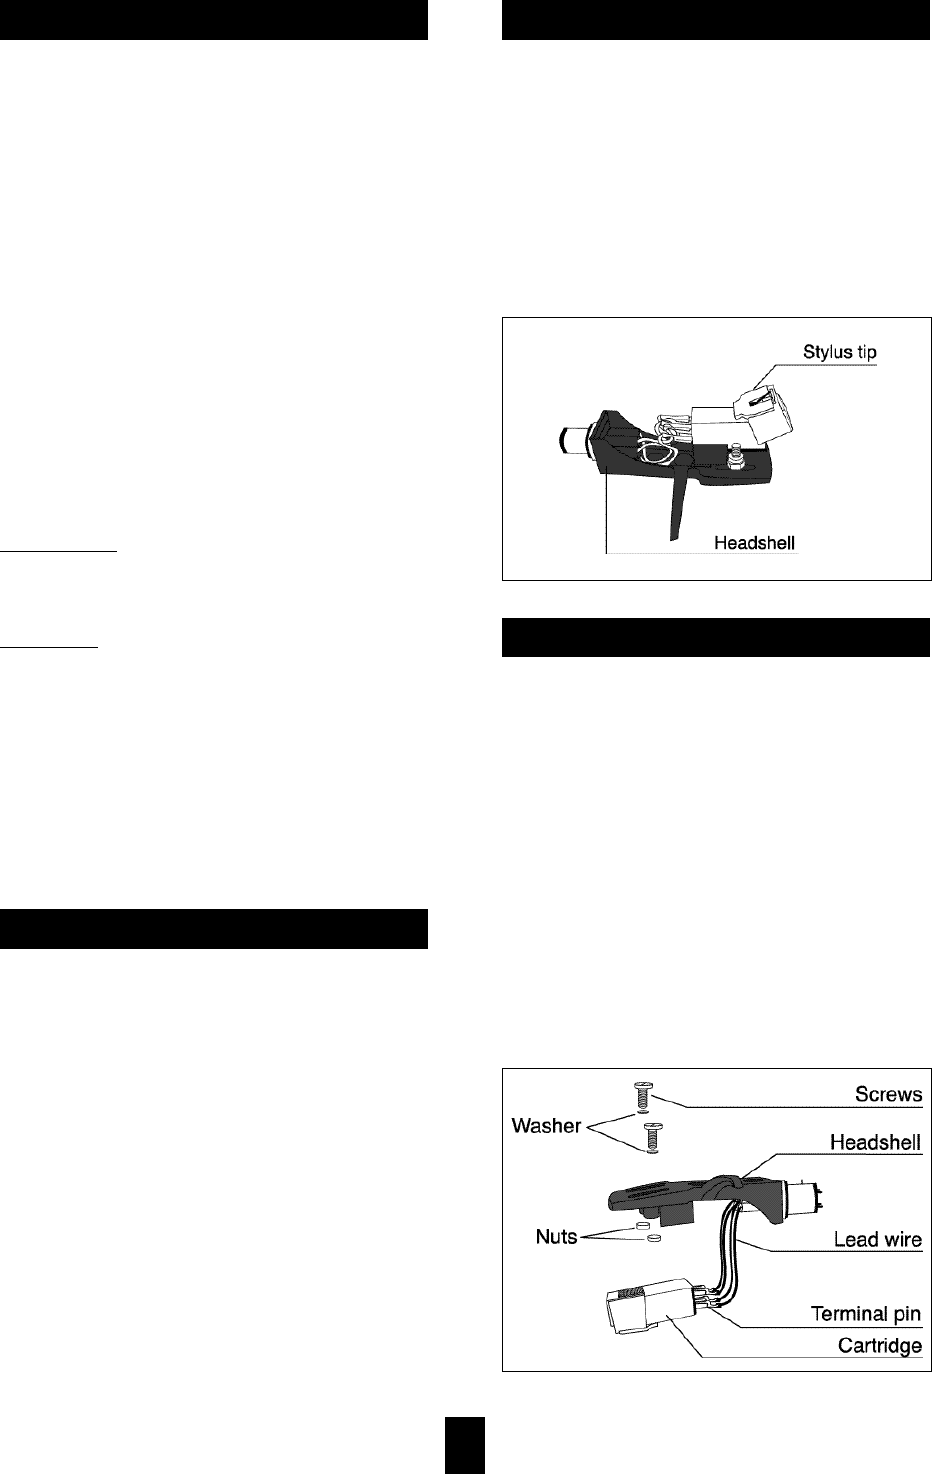
CARTRIDGE REPLACEMENT
Remove the headshell from thd tonearm, and the
screws that hold the cartridge. Pull out the four lead
wires from the cartridge itself. To protect the lead
wires at this point, remove the terminal pins with
pliers or the tip of the screwdriver.
The terminals on the accessory headshell are aligned
according to the arrangement below. Check the
location and polarity of each of the cartridge’s
terminal pins and then connect the lead wires, taking
care not to get the polarities mixed up.
Red : Right channel
White : Left channel
Green : Right channel ground
Blue : Left channel ground