


8 English English 9
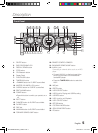
The Display function
You can view all functions available on the dis-
play, adjust the brightness of the display and set
the Display/LED either on or of
f.
Each time you press the DISPLAY/DEMO button,
the display mode will change as follows:
◆
The Dimmer function
The Dimmer function is selected and the display dark-
ens.
◆
LED OFF
The LED is turned off while the dimmer function is work-
ing.
◆
Clock ON
The clock you set is displayed.
◆
Display/LED ON
All displays and the LED are turned on.
➣
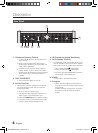
The
DEMO function
Press DISPLAY/DEMO button for 5 seconds to oper-
ate the demo mode.
When you press the DISPLAY/DEMO button while
displaying the demo, the function operates as follows:
DIMMER
➝
LED Off (unit/speaker)
➝
--:--
[time dis-
play]
➝
LED On (unit/speaker)
- To cancel the Demo mode
• Press the DISPLAY/DEMO again for 5 seconds. The
current mode is canceled and the product is turned off.
•Press the TUNER/AUX, CD/Bluetooth or USB
button. The current mode is canceled and the mode
is changed to the mode you selected.
- While displaying DEMO, only the
[Power], VOL
buttons and the buttons mentioned
above work.
- If you connect speaker to AUX1 while displaying
DEMO, sound is produced through AUX1 and you
can use the VOL buttons and
[MUTE].
Playing CDs
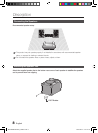
Loading a Compact Disc
You can play standard CDs that require no adapter.
1. Insert a disc gently into the disc slot with the disc's
label facing up. The disc will be played automatically.
• You can load or unload compact discs when the
radio, USB or auxiliary source function is selected.
When you press the EJECT button, all of the other
functions will change to the CD mode.
• If no buttons are pressed on the product or remote
control for more than 3 minutes when the product is
in Pause mode, it will change to Stop mode.
• If no buttons are pressed on the product or remote
control for more than 25 minutes when the product
is in Stop mode, the product will turn off.
CD/MP3/WMA-CD Playback
☛
This product is designed to play the following audio
disc types: CD, CD-R, CD-RW, MP3/WMA-CD.
1. Insert a disc gently into the disc slot with the disc's
label facing up.
2. The disc will be played automatically.
• For MP3/WMA-CD audio, it may take several minutes
for the product to finish scanning the disc tracks.
• If you play a file with an English name or an MP3/
WMA-CD file with an English title, the song title will be
shown in the display. (Titles in other languages will not
be displayed.)
• An English-titled track containing a special character
will not be displayed.
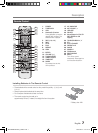
isplay.
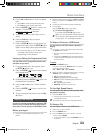
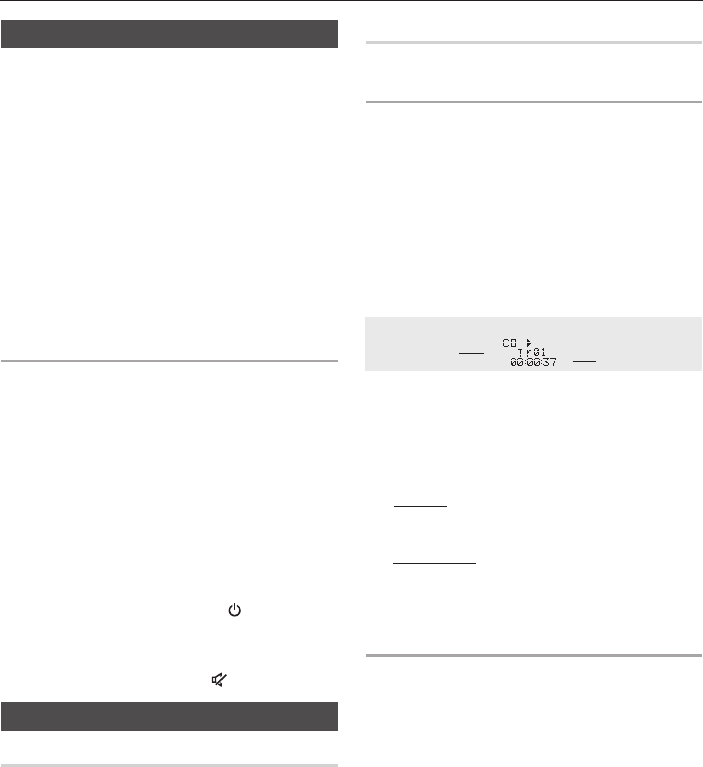
<CD Playback Display>
Track Indicator
Playtime Indicator
3. To adjust the volume:
• Turn the VOLUME control on the product.
• Press the VOL + or VOL - button of the remote
control.
The volume level can be adjust in 31 steps (VOLUME
MIN, VOLUME01~ VOLUME 29, and VOLUME MAX).
4. Main Unit
To pause playback temporarily, press the p button.
Press p again to continue playing the disc.
Remote control
To pause playback temporarily, press the PAUSE(#) but-
ton.
Pr
ess the PLAY (+) button to continue playing the disc.
5. To end playing, press the STOP (
@
) button.
• If no CD is in the disc slot, “NO DISC” appears on the
display.
• The quality of MP3/WMA-CD playback may vary
depending on the condition of the disc or the condition of
the recorder with which the disc was created.
• If a disc contains different types of files or unnecessary
folders, you will have problems with playback.
• Gently insert a CD into the disc slot. Do not apply
excessive force.
• Do not apply force to the product or place a heavy object
on the product.
• Do not insert an out-of-spec or oddly shaped CD (heart
shaped, octangular, etc.). You can damage the product.
• Carefully maintain your CDs.
Basic Functions
MX-FS9000-ZA-ENG_130401.indd 9 2013-04-01 �� 11:10:20