


10
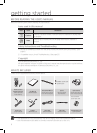
connections
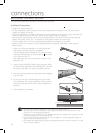
INSTALLING THE WALL MOUNT
You can use the wall mount bracket to mount this unit on a wall.
Installation Precautions
• Install on a vertical wall only.
• For the installation, avoid a location with high temperature or humidity, or a wall that cannot
sustain the weight of the set.
• Check the strength of the wall. If the wall is not strong enough to support the unit, reinforce the
wall or install the unit on a different wall that can support the unit's weight.
• Purchase and use the fixing screws or mollys appropriate for the kind of wall you have (plaster
board, iron board, wood, etc.). If possible, fix the support screws into wall studs.
• Connect cables from the unit to external devices before you install it on the wall.
• Make sure the unit is turned off and unplugged before you install it. Otherwise, it may cause an
electric shock.
▪ Do not hang onto the installed unit and avoid any impact to the unit.
▪ Secure the unit firmly to the wall so that it does not fall off. If the unit falls off, it may
cause an injury or damage the product.
▪ When the unit is installed on a wall, please make sure that children do not pull any of the
connecting cables, as it may cause it to fall.
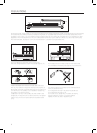
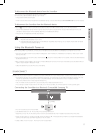
▪ For the optimal performance of a wall mount installation, install the speaker system at
least 2 inches (5 cm) below the TV.
▪ For a better sound experience, place the subwoofer away from the wall at least 12 inches
(30 cm) when installing.
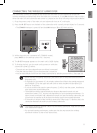
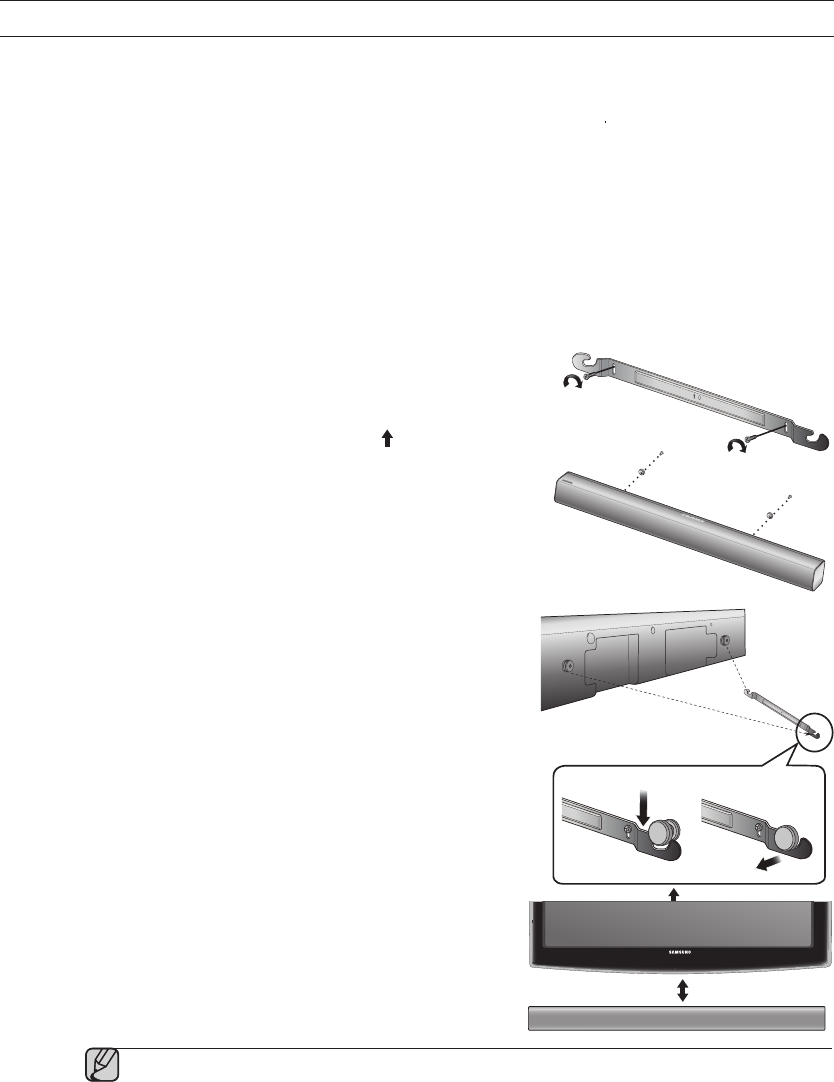
1. Place the wall mount bracket on a wall surface
and
then secure it with two screws (not supplied).
If you are hanging the unit below a TV, be
sure to install
the wall mount bracket so that the arrow ( ) is placed
in the Centre of the TV.
Also make sure the unit is at least two inches (5 cm)
below the TV.
2. Align the two HOLDER-SCREWs with the screw holes
on the left and right sides of the MAIN UNIT, and then
fix them to the main unit with the supplied screws.
3. Insert the USB converter into the unit before installing
it on the wall.
4. Fit the unit into the corresponding slots of the wall
mount bracket. For secure installation, make sure the
mounting studs slide firmly down into the bottom of
the slots.
5. The installation is complete.
2 inches (5 cm) or more
1 2