


SURROUND SOUND PROCESSOR RSP-985
24
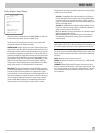
SURROUNDS (small/large/none): Surround speaker performance
varies widely from system to system. It is important to tell the
RSP-985 what type of surround speakers you have in your system.
If your rear surround speakers are capable of sustained low
frequency output below 80 Hz, select the LARGE setting. This
ensures that your rear speakers receive a full bandwidth sig-
nal whenever available from the RSP-985.
If your rear speakers have limited bass capability or if you
have THX certified surround speakers, use the SMALL set-
ting. This limits the RSP-985’s low frequency output so that
the speaker is not overdriven. The result will be cleaner re-
production of ambience and effects information. In the
SMALL position, the bass information originally intended for
particular speakers is sent to the Subwoofer or LARGE
speakers instead. Fundamental tones are not lost but simply
redirected to the speakers best able to handle them.
If your system has no rear surround speakers, select the
NONE setting. Surround information is sent to the front
speakers and, in certain cases, the subwoofer.
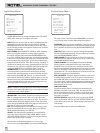
SUBWOOFER (On/Off): Use the ON setting if your system has a
subwoofer. This activates the built-in electronic crossover to
route low frequencies (called “redirected bass”) from any SMALL
speakers to the subwoofer, which is best capable of reproducing
these low frequency signals. If your system does not have a
subwoofer, put this switch in the OFF position. This sends the re-
directed bass signals plus the LFE channel (Low Frequency Exten-
sion, the .1 channel) to LARGE speakers in the system.
Note: In STEREO, DOLBY PRO LOGIC, and DSP MUSIC modes,
bass is directed to the front speakers and NOT to the subwoofer
when LARGE is selected. For subwoofer output in these modes
with LARGE front speakers, override the bass management sys-
tem with a setting in the SUBWOOFER SETUP menu.
Once you have completed the settings for all of your speakers, re-
turn to the MAIN menu by pressing the BACK button.
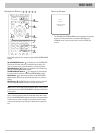
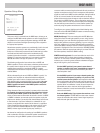
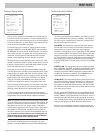
Delay Setup Menu
DELAY SETUP
< 1 ms : 1 ft >
Left..........: ms
Center........: ms
Right.........: ms
Right surround: ms
Left surround.: ms
Subwoofer.....: ms
VOL buttons to set
DOWN/UP to move
BACK to return
This menu, which is reached from the MAIN menu, allows you to
set the delay time for each individual speaker. This is an important
feature as it enables the sound from each speaker to arrive at the
listening position at the same time, even when they are not all
placed at equal distances from the listener. This preserves accu-
rate sound imaging even with irregular speaker placements.
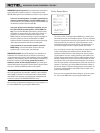
As a rule of thumb, increase the relative delay to speakers located
closer to the seating area and decrease the relative delay to
speakers located farther from the seating area. Start by measur-
ing the distance from your seating position to each speaker. The
speaker farthest away should receive no additional delay. Each of
the other speakers will receive one millisecond of delay for each
foot (30 cm) closer to you than the farthest speaker. For example,
if the left front speaker is farthest away at 13 feet and the left rear
speaker is 7 feet away, you should add 6 milliseconds of delay to
the left rear speaker. Continue setting delays for each speaker un-
til you have compensated for each speaker that is closer to you
than the farthest speaker.
Once you have completed the delay settings for all of your speak-
ers, return to the MAIN menu by pressing the BACK button.