


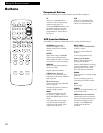
Setting Up the VCR
Startup
4. Turn on the TV.
A. Turn on the TV.
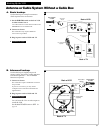
B. If you used one of the basic hookups, tune the TV
to the channel selected with the CH3 CH4 switch
on back of VCR.
If you used one of the advanced hookups, tune the
TV to the TVÕs video input. (See TV ownerÕs
manual for details.)
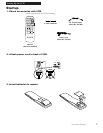
5. Turn on the VCR.
A. Press VCR on the remote.
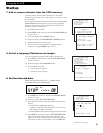
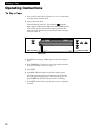
6. Place channels in the VCR’s memory.
The first time you turn on the VCR or after a power
interruption, the VCR will display a message on the TV
screen prompting you to Auto-Search Channels for the
VCR. If the message does not appear, go to step A
below. If the message appears, follow the directions on
the screen.
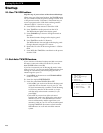
Wait until the channel numbers stop changing. This
takes about one to two minutes. The TV will then tune
to the lowest channel found. Pressing CHANNEL up or
down will select only the active channels.
If you ever need to manually Auto-Search Channels
because you change cable or antenna signals:
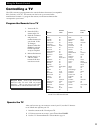
A. Press MENU to display the VCR MAIN MENU on
the TV screen. If this menu does not appear:
¥ Make sure TV is tuned to same channel as the
CH3 CH4 switch on the back of the VCR or the
TVÕs video input (refer to TVÕs manual).
¥ Press VCR, then press MENU again.
¥ If you use a basic hookup, check VCR indicator
in display panel Ð it should be on. Press
TV•VCR to turn it on.
¥ Check the connections.
B. Press 4 to display the CHANNELS menu.
C. Press 1 to begin Auto Channel Search.
The VCR automatically selects CABLE (cable TV)
or ANTENNA. If you need to change the setting
manually, press 3.
VCR MAIN MENU
1 VCR Plus+
2 Timer Recordings
3 Set Clock
4 Channels
CHANNELS
1 Auto Channel Search
2 Add/Remove Channels
3 Signal Type: CABLE
4 VCR Plus+ Channel List
0 Exit
8
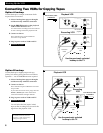
Auto-Search Channels
Connect antenna cable...
then press CH UP.