15
EN
16
EN
Radio
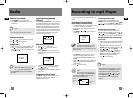
Selecting Tuner Band
1. Press SOURCE to enter Tuner mode.
2. Press BAND to select between FM or AM
Radio band.
Tuning to a Station
Press or to select frequencies. Press and
hold or to scan frequecies.
Using Presets
The tuner can be in either TUNE or PRESET mode.
• Press to toggle TUNE and PRESET mode.
• Press or to access the previous or next
preset station.
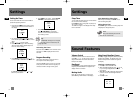
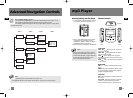
Auto Preset Programming
(FM only)
Press and hold the BAND button for 2 seconds to
scan stations in FM band. The stations will then
be stored as preset channels. A maximum of 32
stations can be stored. Beware of your preset
channels being erased accidentally because the
scanning and storing process is automatic upon
pressing the button. You can stop the automatic
scan by pressing any button, but the erased
stations cannot be recovered.
Manually Setting Presets
1. Press to enter TUNE mode.
2. Press or to access the desired
frequency.
3. Press the PROG button once and the most
recently accessed program location flashes on
the display.
4. If a different program location is preferred,
press or to move to the desired
preset number (1-32).
5. Press PROG to store the selected frequency at
that preset.
Suppressing Stereo Signal
Press FM ST to toggle between FM mono and
stereo mode. (Remote Only) “STEREO” is
displayed in stereo mode.
Tips:
Your audio system has 32 preset stations.
Preset 01
87.50MHz
Auto Prog
87.50MHz
Preset 02
90.50MHz
Tips: Under PRESET mode, press
or can only access the preset
stations. Manually tuning is not accessible in
this mode.
Recording to mp3 Player
You can record CD, Tuner or AUX files to the mp3
player.
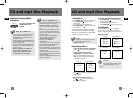
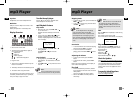
Recording CD to mp3 Player
Normal/High Speed Recording
1. Connect the mp3 player to the USB port, “USB
Connected” will show on the display.
2. In CD stop mode or navigation mode, press
RECORD.
3. Press , , or to select Normal or
High Speed.
4. Press SELECT to confirm selection. The unit
will enter recording standby mode. This is
indicated by the RECORD icon flashes on the
display.
5. Press to start playback and recording will
begin. This is indicated by the RECORD icon
on the display.
6. Press to stop recording.
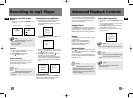
Example (Record one CD):
In CD stop mode or CD pause mode, press
RECORD. Select Normal/High speed using ,
or , then press SELECT and DISC 1 to
DISC 5 to start recording the corresponding disc.
Example (Record all 5 CDs):
In CD stop mode or CD pause mode, press
RECORD. Select Normal/High speed using ,
or , then press SELECT and to start
recording (Make sure “All Disc” mode is selected).
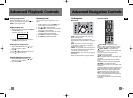
Example (Record only selected tracks
from a CD):
1. Create a CD program by following instructions
under “Setting Up a Program List” on page
18.
2. In CD stop mode or CD pause mode, press
RECORD. Select Normal/High speed using ,
, or , then press SELECT.
3. Press PROG and then to enter program
playback mode. Playback and recording
begins automatically. The PROGRAM and
RECORD icons light on the display.
4. Press to stop recording.
Tips:
If CD playback is already started, recording
will begin instanly when RECORD is pressed.
If CD playback is stopped, select Normal/
High Speed using , , or , then
press SELECT and to start recording.
Recording will not start until CD starts
playback.
Rec. Speed
Normal
> High
Note:
High speed recording mode can save
time when recording from CDs. It is
normal that the pitch is increased during high
speed recording.
Tips:
To view elapsed recording time and
remaining time, press BAND/INFO on
the main unit or INFO on the remote in
normal speed recording mode.
0:22
146:14
Elapsed
recording
time
Remaining
Time