QAMP-30 • 10
We're almost finished. All we need to do now is install a few remaining parts that
have to be handmade - for that "old-world craftsmanship" touch! We'll prepare
all those parts now for further assembly. We give you plenty of enameled wire,
but if you mess up, you can get a whole 50' spool of it from Radio Shack.
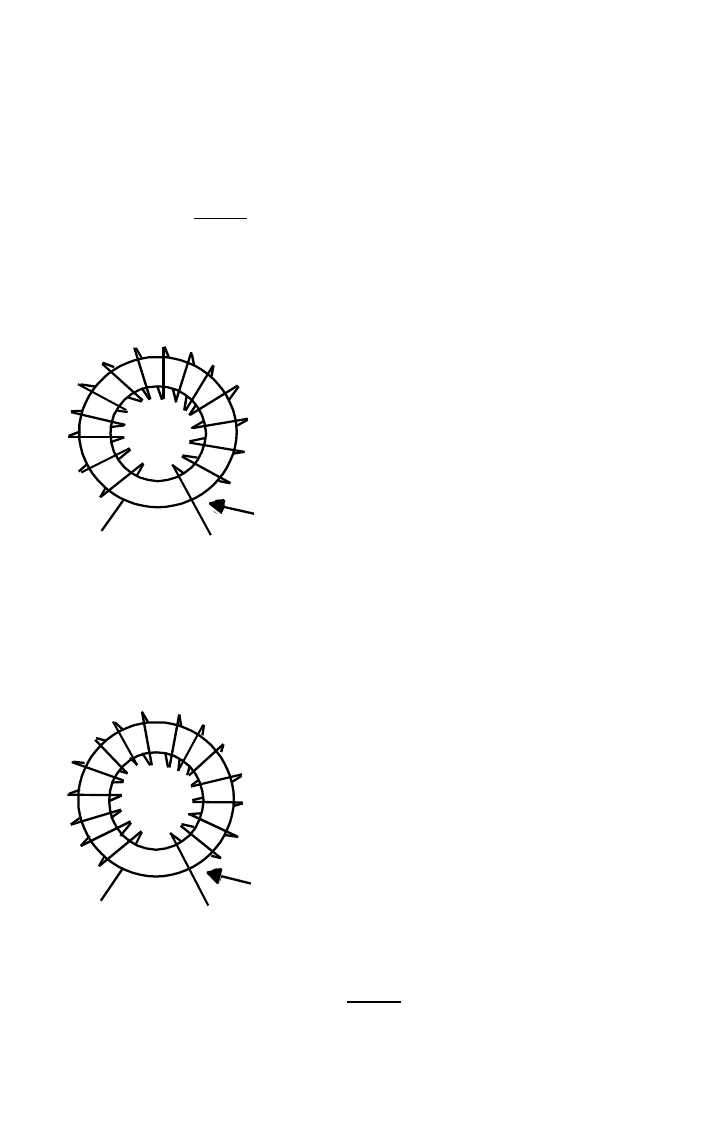
41. Winding L1 and L3 toroid RF coils (two identical units ): Locate 2 of the
donut shaped yellow toroid cores provided in the kit. Cut 10" of the
enameled magnet wire and, following the drawing, thread the wire through
the core 15 times - not 14, not 16; it MUST be 15 times through the core,
pulling each turn gently
tight. Winding too tightly runs the risk of scraping
off the enamel insulation and shorting the wire. Tin each end with solder by
holding your soldering iron and solder the wire ends until the insulation
melts away and the copper wire underneath coats nicely with solder. Tin all
the way up to the toroid core body.
42. Winding L2: Locate the remaining yellow toroid core and cut 11" of
enameled magnet wire. Wind 16 turns through the core using the same
procedure as above. Tin the wire ends as before. Mark this part with a piece
of tape, a dab of paint or a magic marker. We don't want to confuse it with
the other two toroid coils wound just before!
43. Winding T2: Locate the smaller of the two 2-hole ferrite cores. Cut off
one 11 inch length of enameled magnet wire and thread the wire through
the core 6 times, pulling each turn gently
tight. That's 6 times through each
hole, resulting in 6 complete whole turns through the core. Be especially
careful not to strip the insulation by pulling too tightly around the core. The
IMPORTANT:
Loop the first winding
around the front of the
core as shown.
15 turns through center of core
IMPORTANT:
around the front of the
core as shown.
Loop the first winding
16 turns through center of core


