9
Basic Operation
Playing CDs
To select a CD, enter its number on the remote control, then press
DISC
SET
within 5 seconds. You can also use
DISC NUMBER
(or
DISC
on the
remote) to step through the disc numbers until you reach the desired CD. (Hold
down either button for a rapid search.)
If the position you select does not have a CD, the CD changer displays
no dISC
and plays the next CD.
To select a disc in the single play slot, repeatedly press
DISC NUMBER
until
the changer displays
P0
.
Follow these steps to play CDs.
Note:
Be sure the CD changer’s rack cover is closed — playback does not
begin if the rack cover is open.
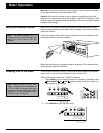
1. Turn on your receiver/amplifier and select the audio input (CD, AUX, or
TAPE) to which you connected your CD changer.
2. Press
POWER
to turn on the CD changer. The CD changer returns to the
first track of the last CD you played.
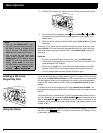
3. While the CD changer is stopped, repeatedly press
MODE
until the play
mode you want appears on the display.
ALL
— Plays all the loaded CDs.
SINGLE
— Plays only the selected CD.
CUSTOM
I
,
II
, or
III
— Plays only the CDs that belong to the custom
CD group (see “Assigning CDs to a Custom CD Group” on Page 11).
You can switch between
ALL
and
SINGLE
during play, but you can
select custom play only when the CD changer is stopped.
Note:
You can also select and play a CD in the single play slot by press-
ing
0
then
DISC
SET
on the remote control.
4. Press ( on the remote control) to begin play from Track 1 on Disc 1
(or the last CD you played) and have all tracks and CDs play in order. The
CD changer stops after it plays the highest-numbered CD you loaded.
The changer displays the disc, track number, and the currently playing
track’s elapsed play time.
If a slot does not contain a CD, the CD changer displays
no diSC
next to
the disc number as it skips to the next slot.
The CD changer memorizes which slots contain CDs, then it skips empty
slots on subsequent play passes. Opening the rack cover (to load/unload
CDs, for example) resets this memory.
5. To temporarily stop play, press ( on the remote control). The display
shows
.
Press
again (or press or on the remote control) to
resume play.
6. The CD changer automatically stops play at the end of the last track on
the highest numbered CD. To stop play sooner, press . The CD changer
returns to the first track on the last-played CD.
Note:
A sudden shock or jolt while a CD is playing might suddenly change the
CD’s rotation speed or make the CD changer skip the current track. This might
momentarily mute or distort the sound. This is not a malfunction.
Notes:
With a custom CD group
selected:
• When you press
DISC NUMBER
during play, the changer scans only
through the CD slots within the cus-
tom CD group.
• If you select a slot that is not in the
custom CD group using the remote
control’s number buttons,
no dISC
appears for about 3 seconds. (See
“Assigning CDs to a Custom CD
Group” on Page 11.)
• If a CD in the custom CD group is
not loaded,
no dISC
appears on
the display for about 3 seconds, the
disc number is erased from memory,
and play continues from the next
CD.


