19
Getting Started (continued)
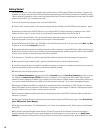
17- Select Device, Add Device, from the menu. A new window will open prompting you to name the device. Name it logically, such
as RAVE 1, or similar. Select the Device Type and select RAVE 520uz. At the Password prompt, enter “qsc” (lower case, no quotation
marks). This is the device password, separate from the software password. The default, in both cases, is “qsc”, but you are free to
change either or both. Enter the IP address of the RAVE and click OK.
18- The RAVE will now appear in the inventory root (left side of screen, first with a red “x”, then a yellow exclamation point, then a nor-
mal icon). If the RAVE does not eventually show in the inventory root, check that a crossover cable is used (only for RAVE connected
directly to PC), check the cable connections, verify IP addresses are set correctly, verify Subnet masks are set correctly, and verify AC
power is properly applied to the RAVE.
19- Click on the “+” sign of the RAVE 520uz in the inventory root, then the “+” sign of the Flashed Configs. Click on the config with the
loudspeaker icon. A view of applicable device tabs will open. Click the DSP tab and the current DSP configuration of the RAVE will be
displayed.
20- Right click on the Design Editor icon in the lower left of your display; select “New”. A new window opens; select RAVE 520uz for
the device type.
21- Click on Help to access the software’s Help system. All software operation is covered in the on-line help file.
Operation of the RAVE 520uz is accomplished with the included QSControl.net software. No software
operation is covered in this hardware manual. After installing your software, open the Help file and
follow its recommendations. The software Help file includes the most recent information available
for your RAVE 520uz.


