


6
MOUNTING
The Atrium’s bracket allows it to be mounted
either horizontally or vertically and aimed to
deliver the best possible sound in a variety
of situations. Follow the steps below to safely
secure the brackets and speakers.
Installation of Atrium Series Loudspeakers
requires basic skills in using tools such as a
drill and screwdriver. If you are in doubt that
you possess the necessary skills or tools,
consult your Polk Audio dealer, or a
professional installer.
1) Make sure the material on which you
plan to mount the speakers (plaster,
drywall, paneling, stone, etc.) can
support the weight of the speakers
(Atrium50=approx 5lbs/2.3kg ea,).
2) Make sure the locations you select do not
conceal electrical wiring or plumbing.
3) Prior to installation, hold the speaker in
the chosen location to make sure it safely
clears obstacles such as ceiling, adjacent
walls, corners, beams, lighting fixtures
and door/window frames.
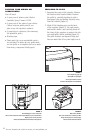
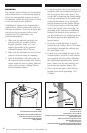
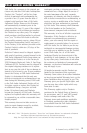
4) Using the keyhole slots in the bracket as a
template, mark the installation location of
the two keyhole slots with a pencil. You
can do this by removing the bracket knobs
on the top and bottom of the speaker and
removing the bracket, or by leaving the
bracket connected to the speaker [figure
9]. Orient the bracket so that the small
ends of the keyhole slots are facing “up”
according to the direction of installation.
Reattach the bracket to the speakers, if
you have removed it, by reinserting it into
the bracket gap and then tightening the
bracket knobs.
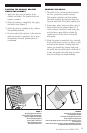
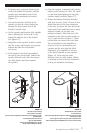
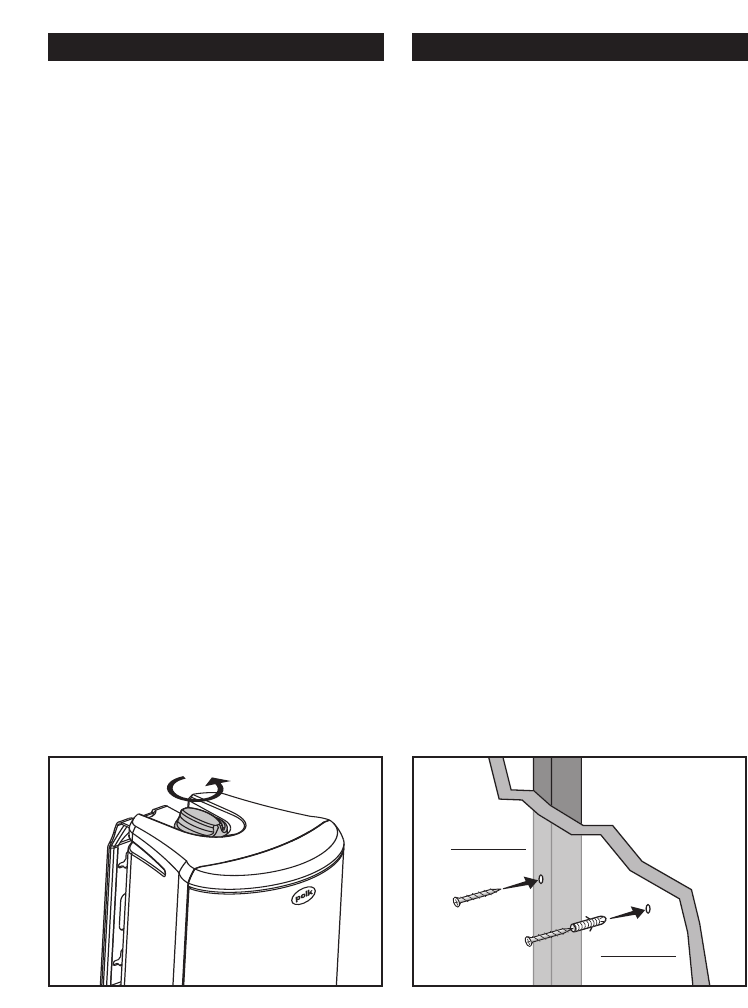
5) If you are certain that there is a stud
behind the wall surface, drive #10 screws
(not included) through the wall and into
the stud [figure 10a].
6) If there is no stud behind the wall at the
chosen location, install #10 wall anchors
(not supplied) into the wall by following
the wall-anchor-manufacturer’s instruc-
tions. Always use two wall anchors and
two screws per speaker [figure 10b].
7) Drive screws into stud or wall anchors,
leaving screw heads protruding 1/16"
(1/6mm).
Get more information and exclusive accessories, visit www.polkaudio.com
FIGURE 9
Turn the bracket knobs to remove the bracket assembly
.
Gire las perillas de los soportes para quitar la unidad de soporte.
Tournez les boutons du support pour retirer le bloc-support.
Drehen Sie die Halterungsknöpfe, um die gesamte
Halterung abzunehmen.
FIGURES 10a & b
Use #10 screw for wall stud,
use #10 wall anchors + screw for no wall stud.
Use tornillos n° 10 si la pared tiene parales internos, use anclas de pared y tornillos n° 10 si la
pared no tiene parales internos.
Utilisez une vis no10 pour fixer le support dans un montant.
Utilisez une cheville d'ancrage et une vis
no10 s'il n'y a pas de montant.
Verwenden Sie eine Schraube Nr. 10 für Wände mit Holzstielverstärkung bzw. Dübel und
Schrauben (Nr. 10) für Wände ohne Holzstielverstärkung.
figure 10a
Wall Stud
figure 10b
No Wall Stud