


The System Setup menu
09
33
En
English
AV Direct setting
The AV Direct mode allows the receiver to pass audio/
video signals arriving at one of the AV connector inputs
to the other AV connector outputs without the sound
being routed to the speakers. (See also
The AV Direct
mode
on page 9.) In AV Direct mode, the current input is
shown (at reduced brightness) in the front panel display.
The AV Direct setting determines whether the receiver
switches to AV Direct mode automatically, or only when
you switch it manually.
•
AVD MANU
– Allows you to switch between standby
and AV Direct mode using the
AV DIRECT
button on
the remote control.
•
AVD AUTO
– Automatically switches to AV Direct
mode when an incoming signal is sensed by the
receiver in standby.
Auto input select setting
Specifies how the receiver responds when it senses that
a component connected to one of the SCART AV
connectors is switched on.
•
SEL MANU
– You must select the receiver’s input
manually using the front panel
INPUT SELECTOR
, or
the input buttons on the remote control.
•
SEL AUTO
– When a component connected to one of
the SCART AV connectors (except the TV) is switched
on, the receiver automatically switches to that input.
• When set to
AVD AUTO
, if a connected component
is switched on, you cannot switch this receiver into
standby (
INPUT ON
appears in the display).
• You can’t use the sleep timer when the AV Direct
setting is
AVD AUTO
(see also
Using the sleep timer
on page 29).
• AV Direct does not work when EON is on (see also
Enhanced Other Network (EON)
on page 28).
Setting individual channel levels
Use to set the relative volume of each channel as you find
necessary for balanced surround sound. You can set up
individual channel levels for each listening mode.
1 Use the AUTO, STEREO, SOUND MODE,
SURROUND or ADVANCED SURROUND button to
select a listening mode to set up channel levels for.
2 Use MASTER VOLUME to adjust the volume to an
appropriate level.
3 Press TEST TONE to output the test tone.
The test tone is output in the following order (from
speakers that are switched on and are appropriate for
the current listening mode):
•
L
– Front left
•
C
– Center
•
R
– Front right
•
RS
– Right surround
•
LS
– Left surround
•
SW
– Subwoofer
4 Use the LEVEL +/– buttons to adjust speaker
levels so that you hear the test tone at the same
volume from each speaker when seated in your
main listening position.
• The channel level range is ± 10 dB.
5 Press TEST TONE to turn off the test tone.
• Since the subwoofer transmits an ultra-low
frequency its sound may seem quieter than it
actually is. Be careful not to turn up your subwoofer
too much and check the volume with an actual
source.
• The subwoofer volume is best controlled with the
volume control on the subwoofer unit itself.
• The speaker volume can be adjusted without
outputting the test tone by pressing
CH SELECT
then
using the
LEVEL +/–
buttons.
• The level setting mode is automatically exited after 5
seconds of inactivity.
• The default setting is
0 dB
for all channels.
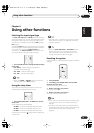
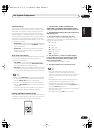
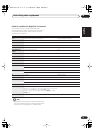
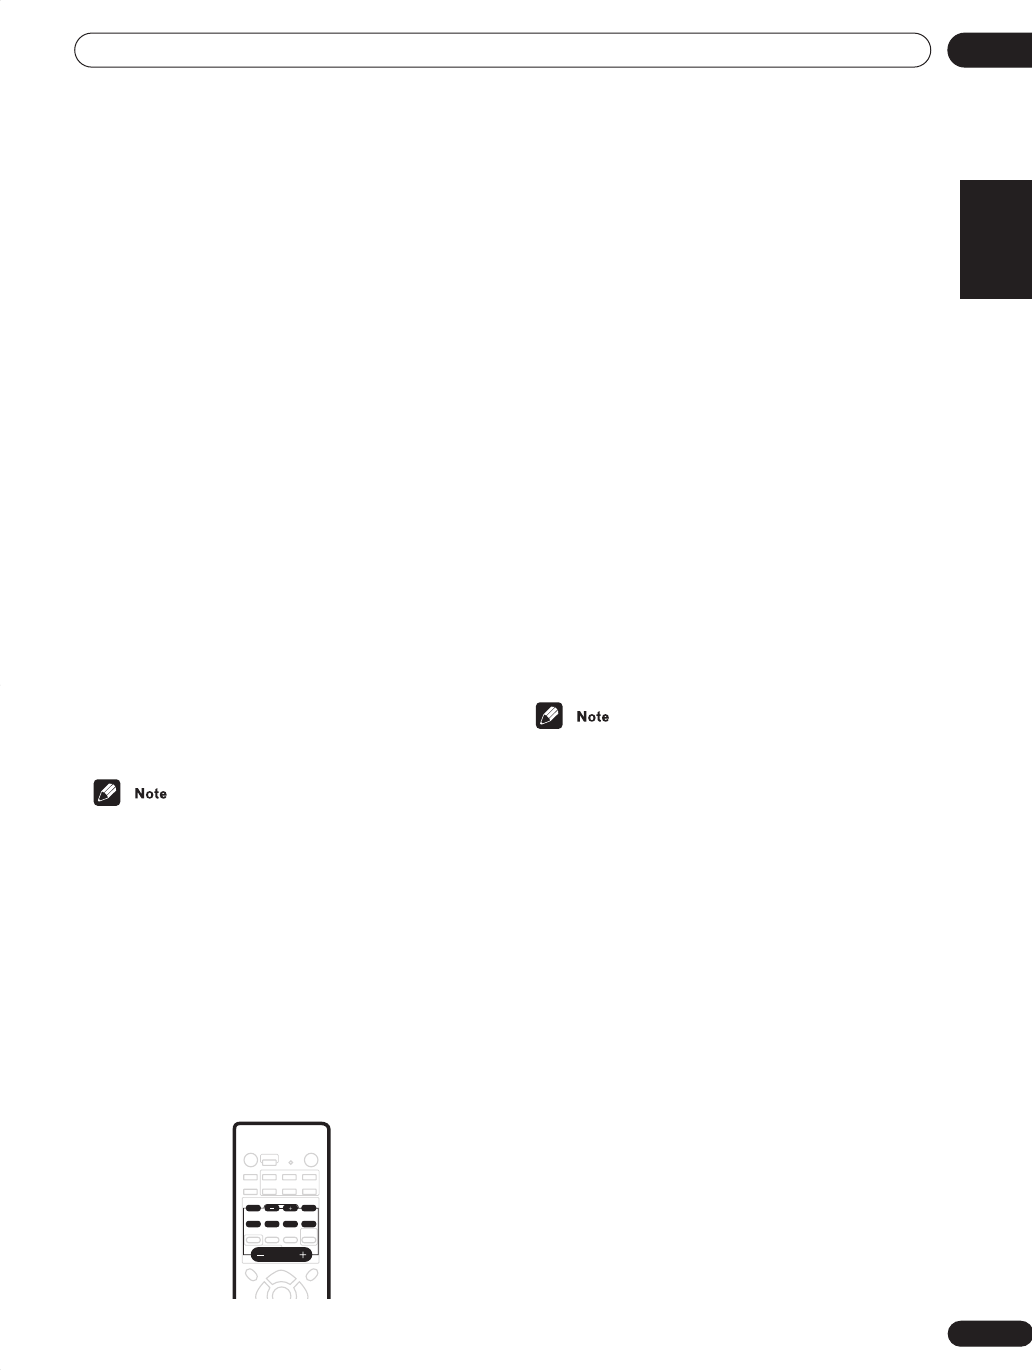
SOURCE
RECEIVER
SLEEP
RECEIVER
AV DIRECT
INPUT
DVD
VIDEO
STB
FRONT
FM/AM
DVR/TV
SURROUND
ADVANCED
SURROUND
SOUND
MODE
DIALOG
AUTO STEREO
LEVEL
TEST TONECH SELECT
MUTE
MASTER
VOLUME
DTV MENU
TOP MENU
T.EDIT
MENU
ROOM
SETUP
TUNE
STST
SYSTEM
SETUP
ENTER
vsx-c301.book 33 ページ 2003年2月6日 木曜日 午後5時4分