35
Audio Adjustment <Network>
Adjusting the Filter
First, determine the approximate band to be used, taking into consideration the reproduced
frequency band and the characteristics of the connected speaker.
Important points in adjusting cut-off frequencies
• If the subwoofer is installed in the rear tray, setting a high cut-off frequency of L.P.F. of the
subwoofer separates the bass and gives the listener the feeling that the bass is coming from behind.
The L.P.F. of the subwoofer is recommended to be set at 100 Hz or below.
• Speakers used for mid and high-ranges are generally constructed to handle a limited level of input
compared to low range speakers. If the cut-off frequency of H.P.F. is set lower than necessary,
strong bass signals can reach the speaker and may damage it.
Important points in adjusting the level
• The low band, because of its sound frequency characteristics, incorporates the basic frequencies of
many musical instruments. It is recommended that the level adjustment of the low band be made
first, and then the level adjustment of the mid, high, and subwoofer be made in that order.
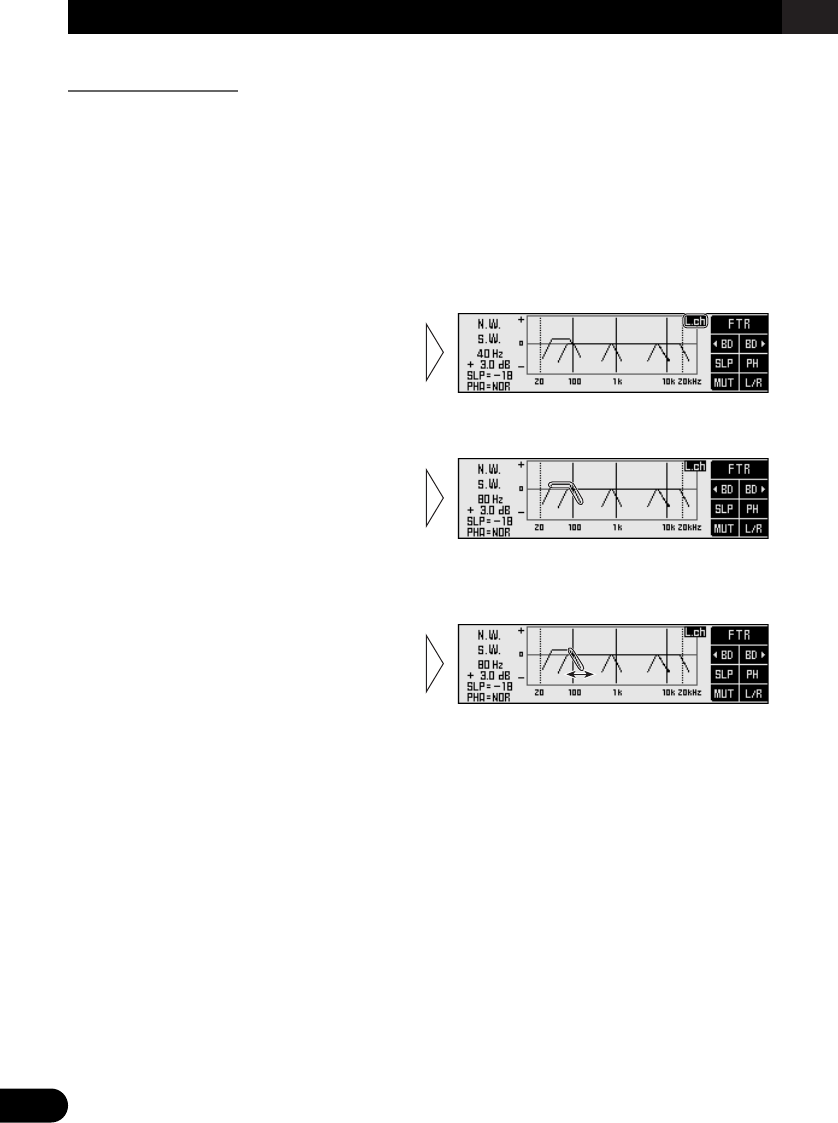
6. Set up the cut-off frequencies of each filter for all the bands.
Repeat steps 4 and 5 to adjust each filter so that the band used and crossover frequency
are appropriately located.
5. Press the 2/3 buttons to set up
the cut-off frequency of the
selected filter (crossover
frequency).
Holding down these buttons continues
their operations.
4. Press FUNCTION buttons 1 or 2
and select the filter to be
adjusted.
Press the button to switch the band to
be adjusted and high pass filter/low
pass filter.
3. Press FUNCTION button 6 and
select left (Left) or right (Right)
channel (only for LR/IND mode).
Each press the FUNCTION button 6
switches left and right channel.
2. Press the FUNCTION button 1.
The display switches to Filter Adjustment Screen, allowing filter adjustments.
1. Open the cover of the remote controller in the Network Menu (refer to
page 5).
This switches to Network Menu Setting Screen.


