


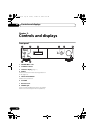
Controls and displays 03
11
En
English
FrançaisDeutsch
Nederlands
Italiano Español
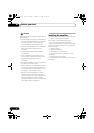
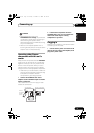
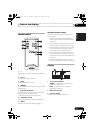
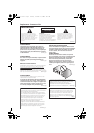
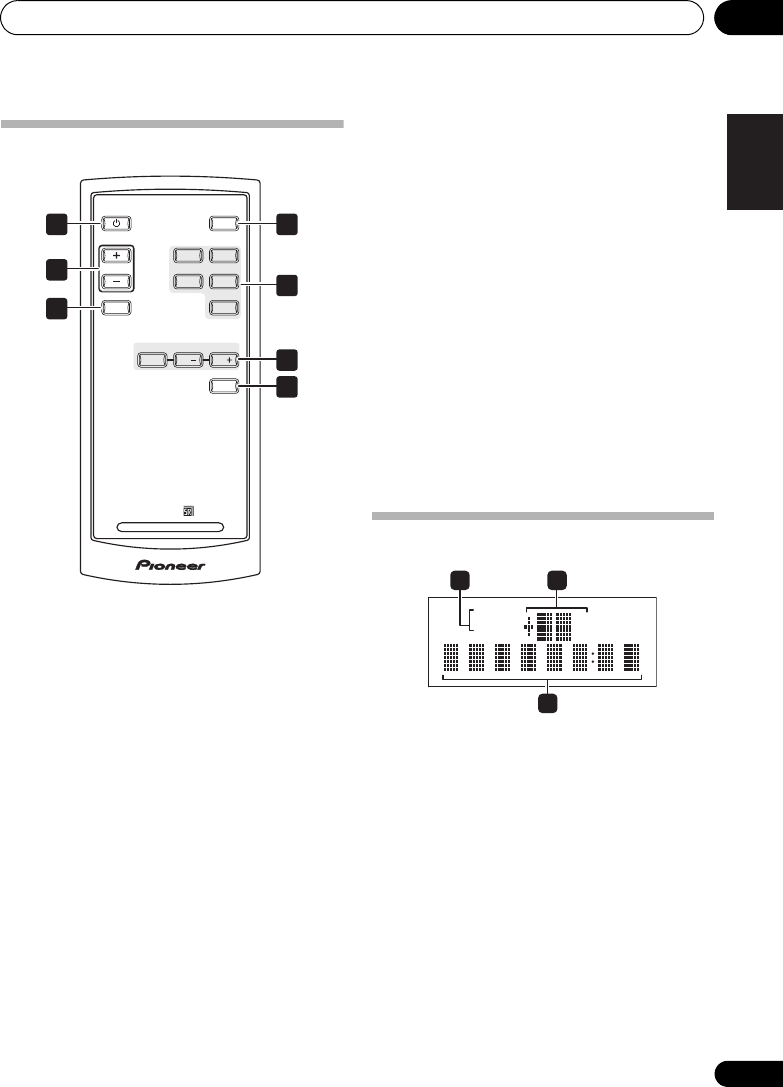
Remote control
1
Switches the amplifier between standby and
on.
2
VOL +/–
Use to set the listening volume.
3
MUTE
Mutes/unmutes the sound.
4
DIMMER
Dims or brightens the display (or switches the
backlight off).
5 Input selector buttons
Press to select an input source. These select
the component connected to the
corresponding input on the rear panel.
6
TONE/BAL
controls
Use to adjust the tone and balance (page 12).
7
DIRECT
Press to access Direct listening (page 12).
Using the remote control
Keep in mind the following when using the
remote control:
• Make sure that there are no obstacles
between the remote and the remote sensor
on the unit.
• The remote has a range of about 7 m at an
angle of about 30º from the remote sensor.
• Remote operation may become unreliable
if strong sunlight or fluorescent light is
shining on the unit’s remote sensor.
• Remote controllers for different devices
can interfere with each other. Avoid using
remotes for other equipment located close
to this unit.
• Replace the batteries when you notice a
fall off in the operating range of the remote.
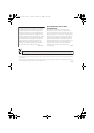
Display
1 Tone control indicators
TREBLE – Lights when high-range tone
adjustment is applied.
BASS – Lights when low-range tone
adjustment is applied.
2 Master volume level
3 Character display
Displays various system information.
INTEGRATED AMPLIFIER
DIMMER
TAPE
TUNER
AUX
VOL
MUTE
CD
PHONO
TONE/BAL
L
/
R
/
DIRECT
1
2
3
4
5
6
7
TREBLETREBLE
BASSBASS
dBdB
2
3
1
A6_MY.book Page 11 Tuesday, November 14, 2006 10:19 AM