


RQT7230
12
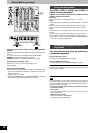
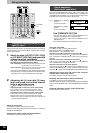
Using play mode functions
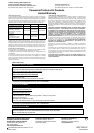
1 Switch to either [L/R SPLIT (CH1 CH2)]
or [L/R SPLIT (CH3 CH4)] and select the
channel to adjust individually
The input of the selected channel is allocated to
the channel to be adjusted on the panel.
CH1 or CH2 input: Left (L) is input to CH1 on the panel, right
(R) is input to CH2 on the panel.
CH3 or CH4 input: Left (L) is input to CH3 on the panel, right
(R) is input to CH4 on the panel.
•The L or R PLAY MODE lamp of the selected channel lights.
•By selecting OFF, input becomes both channels without any
separation. The L or R PLAY MODE lamp doesn’t light.
2 Adjusting left (L) and right (R) input
level and sound, and use the channel
fader to adjust the volume
( page 9, Mixing, instructions 4 - 5)
Adjusting the CH1 or CH2 level, sound, channel fader
Left (L) input: Use any of the CH1 knobs on the panel
Right (R) input: Use any of the CH2 knobs on the panel
Adjusting the CH3 or CH4 level, sound, channel fader
Left (L) input: Use any of the CH3 knobs on the panel
Right (R) input: Use any of the CH4 knobs on the panel
•Mixed source audio is output from the left (L) and right (R)
terminals of MASTER OUT 1.
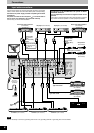
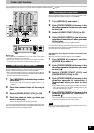
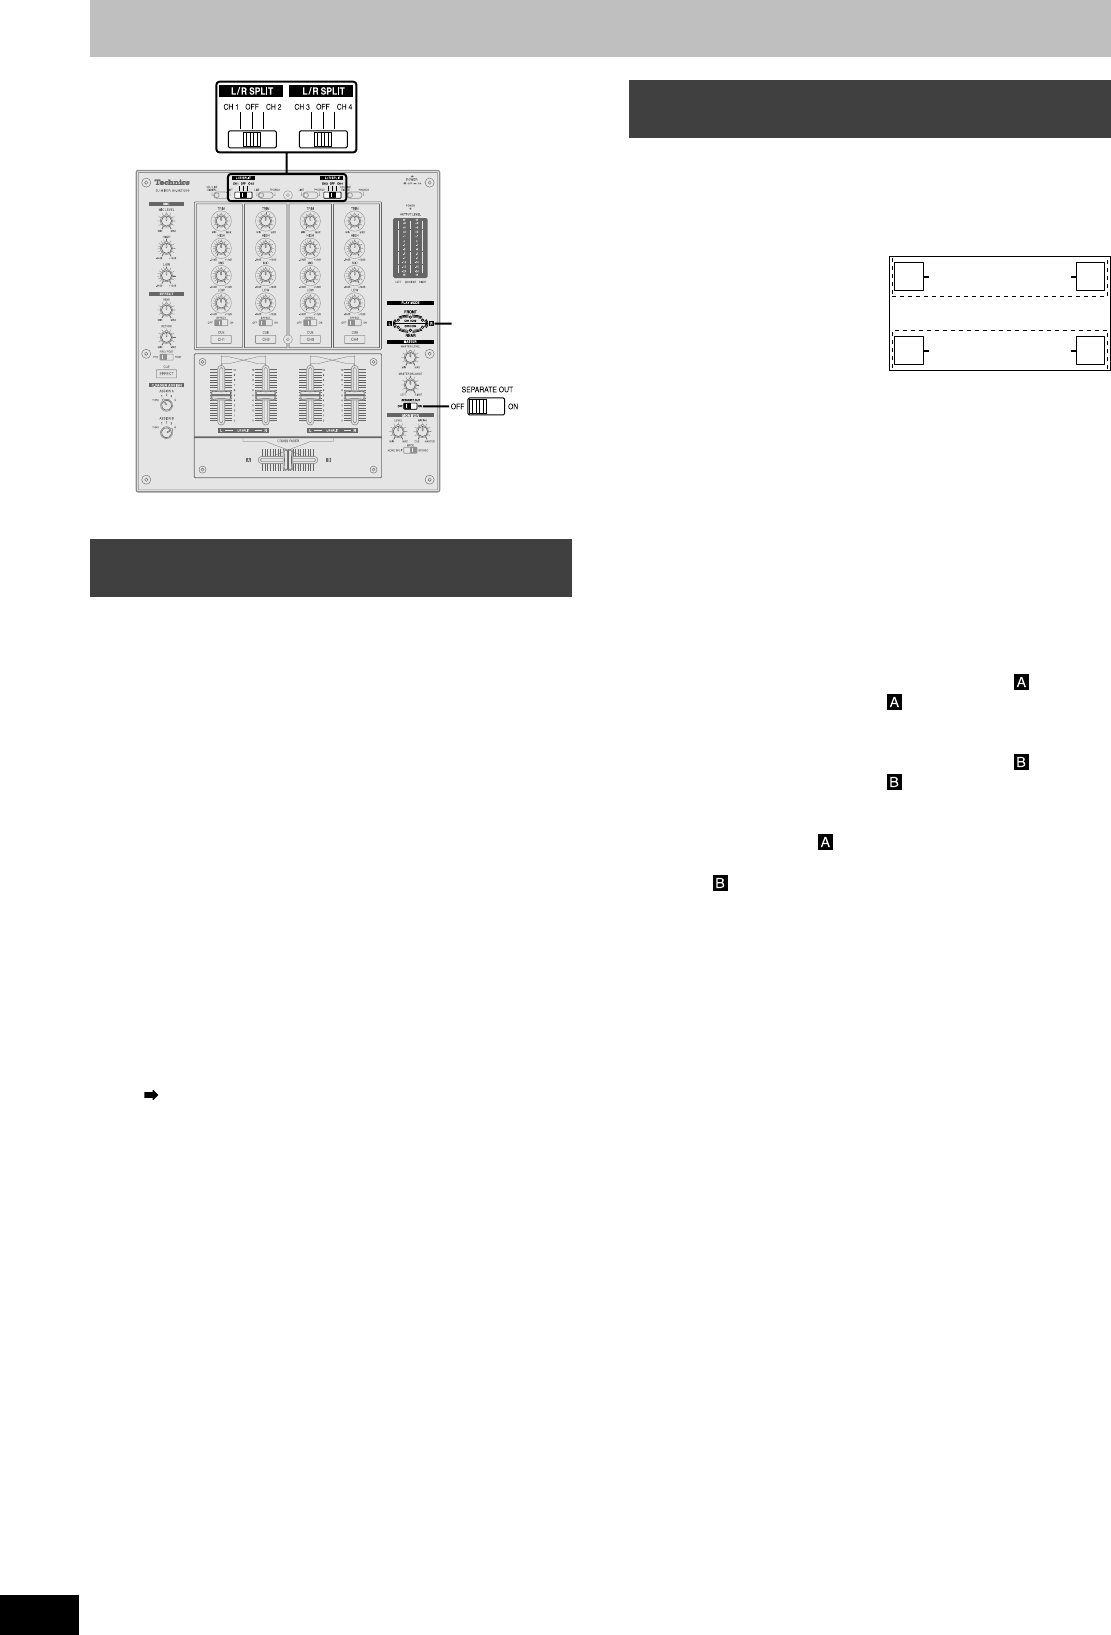
Output separation
(dual output separation)
(e.g.) MASTER OUT 1 (FRONT)
terminal:
For the front speaker
MASTER OUT 2 (REAR)
terminal:
For the rear speaker
Turn [SEPARATE OUT] ON
•CH1 and CH2 input is output from the MASTER OUT 1
(FRONT) and MASTER OUT 1 (XLR) terminal.
•CH3 and CH4 input is output from the MASTER OUT 2
(REAR) terminal.
•The FRONT and REAR PLAY MODE lamps light.
Using the play mode function, by separating the left (L) and right (R)
selected input channel you can individually adjust the left (L) and right
(R) volume and sound.
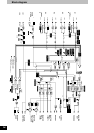
L R
LR
[MASTER OUT 1]
[MASTER OUT 2]
Venue
By turning the SEPARATE OUT function ON, you can output audio
through 2 separate channels, from MASTER OUT 1 (FRONT) and
from MASTER OUT 2 (REAR). You can adjust the left and right output
individually and use the cross fader for real time play.
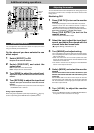
Using the cross fader
From Mixing on page 9, perform instructions 6-7.
Select the same channel selected above in instruction 1 for switching
ASSIGN A and ASSIGN B.
Adjusting the master output volume and balance
From Mixing on page 9, perform instruction 8.
Using the cross fader
From Mixing on page 9, perform instructions 6-7.
While the cross fader is in NORMAL position
While ASSIGN A : 1 or 2, ASSIGN B : 3 or 4
When the cross fader is moved all the way toward :
Only the source audio assigned to is output from the MASTER
OUT 1 (FRONT) and MASTER OUT 1 (XLR) left (L) and right (R)
terminals.
When the cross fader is moved all the way toward :
Only the source audio assigned to is output from the MASTER
OUT 2 (REAR) left (L) and right (R) terminals.
When the cross fader is in the center position:
Source audio assigned to is output through the MASTER OUT 1
(FRONT) and MASTER OUT 1 (XLR) terminals, and source audio
assigned to is output through the MASTER OUT 2 (REAR) terminal.
Adjusting the input level and sound, and using the
channel fader to adjust the volume
From Mixing on page 9, perform instructions 4-5.
Adjusting the master output volume and balance
From Mixing on page 9, perform instruction 8.
Adjust the volume and left (L) and the right (R) balance of the MASTER
OUT 1 (FRONT), MASTER OUT 1 (XLR) and MASTER OUT 2 (REAR)
output.
Adjusting individually of left (L) and right (R) input
Perform instructions 1-2 on the left.
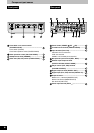
PLAY MODE
lamp
Individually adjusting the left (L) and
right (R) input