6
Outlaw Audio
Owner’s Manual
7
Model 200 M-Block Power Amplier
Owner’s Manual
If you are using spade lugs, connect them to the wire using the manufacturer’s
instructions, and then loosen the caps on the speaker terminals. Place lugs
between the plastic cap and the back of the terminal, as if it were a horseshoe
on the game’s post. Again, remember to observe proper polarity. Tighten with
your ngers to obtain a positive contact.
When banana plugs are permitted, connections may be made by simply insert-
ing the jack afxed to your speaker wire into the hole provided on the rear of
the colored screw caps on the binding posts. Before using banana type jacks
make certain that the plastic screw caps are rmly tightened down by turning
them in a counter clockwise direction until they are snug against the chassis.
This will ensure that the maximum surface area of the plug is in contact with
the jack. Be certain to observe proper polarity.
Finally, run the cables to the speaker locations. Where possible, it is recom-
mended that the length of cable connecting any pair of speakers is identical
even though one speaker may be physically closer to the amplier than the
other. Do not coil any excess cable, as this may become an inductor that creates
frequency response variations in your system.
NOTE:
While most speaker manufacturers adhere to an industry conven-
tion of using black terminals for negative and red ones for positive, some
manufacturers may vary from this conguration. To ensure proper phase
connections, and optimal performance, consult the identication plate on
your speaker terminals, or the speaker’s manual to verify polarity. If you
do not know the polarity of your speaker, ask your dealer or installer of
advice before proceeding, or consult the speaker’s manufacturer.
As a general rule, always avoid running input signal or speaker wire connections
in parallel with each other, or with AC power cords. This can result in undesired
hum or other interference that will greatly degrade signal performance.
Audio Signal Connections
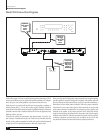
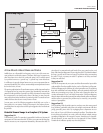
Audio connection to the Model 200 is simple and straight-forward: Connect the
output of the source unit, which may be the preamp, multi-room or subwoofer
output of a surround processor, stereo preamp, AV receiver or “whole-house”
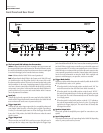
audio system controller to the Audio Input Jack
B
.
When making connections with the “RCA” type plugs on interconnect cables,
make certain to gently, but rmly insert them into the jacks on the back of the
Model 200. Loose connections can cause intermittent sound and may dam-
age your speakers. The barrel assembly of some high quality RCA plugs may
be very tight, and it is important to ensure a proper connection between the
interconnect cable and the input jack.
AC Power Connection
The nal step in the installation of the Model 200 is to connect the power cord.
First, connect the female end of the cord into the AC Power Receptacle
J
on
the rear panel. Once the cord as been rmly connected to the Model 200, insert
the plug end into an AC power outlet.
Safety Notes
Due to the current draw of the Model 200, DO NOT connect the power cord
to the accessory outlet of an audio/video component.
Should the power cord become lost or damaged, be certain to replace it
with a replacement that meets or exceed the original specications. Use of
power cords with insufcient capacity, such as those used with computers
or ofce equipment, may create a safety hazard.
Operation
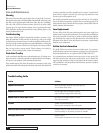
Operation of the Model 200 is simple. In normal use there are no controls to
adjust once the installation is complete.
After all connections have been made to the amplier’s inputs and speaker
terminals have been made, and the AC power cord has been connected, the way
in which the unit turns on is determined by the setting for the Trigger Mode
Switch
E
. Depending on the setting, as described on page 5, the amplier
will turn on in one of these three ways:
When the Trigger Mode Switch
E
is set to the left, in the “On” position,
the Model 200 will turn on when the AC Power Switch
H
is turned on.
Use the switch to turn the Model 200 off when your nished listening.
When the Trigger Mode Switch
E
is set in the center, in the “Music”
position, the AC Power Switch
H
should be turned ON to place the Model
200 in the Standby Mode. The unit will automatically turn on whenever
an audio signal is present. The unit will return to the Standby mode a few
minutes after the audio signal is removed.
When the Trigger Mode Switch
E
is set to the right, in the “12V” position,
the AC Power Switch
H
should be turned ON to place the Model 200 in
the Standby Mode. The unit will automatically turn on when a low voltage
signal is present at the Trigger Jack
C
and return to the Standby Mode
when the host product’s trigger signal is removed.
As a general rule, it is always a good idea to turn on your amplier LAST. This
avoids the possibility of any turn on pops or transients from other equipment
being amplied and sent to your speakers where they may cause damage.
Always start with a low volume level on your receiver, controller or preamp to
avoid damage to your speakers.
SAFETY NOTE:
To prevent unintended operation, remember to turn the
unit completely off when it will not be used for an extended period of time.
This is done by turning the AC Power Switch OFF and noting that the front
panel; LED indicator goes off. This will prevent the automatic turn on circuits
from accidentally turning the amplier on during your absence.
Note:
There are no output level controls on the Model 200, as the level
is determined by the signal received from your source device. We recom-
mend that after installing a new amplier such as the Model 200 that you
always re-calibrate your system to ensure that the system levels match
at all speaker locations.
Operation


