41
3
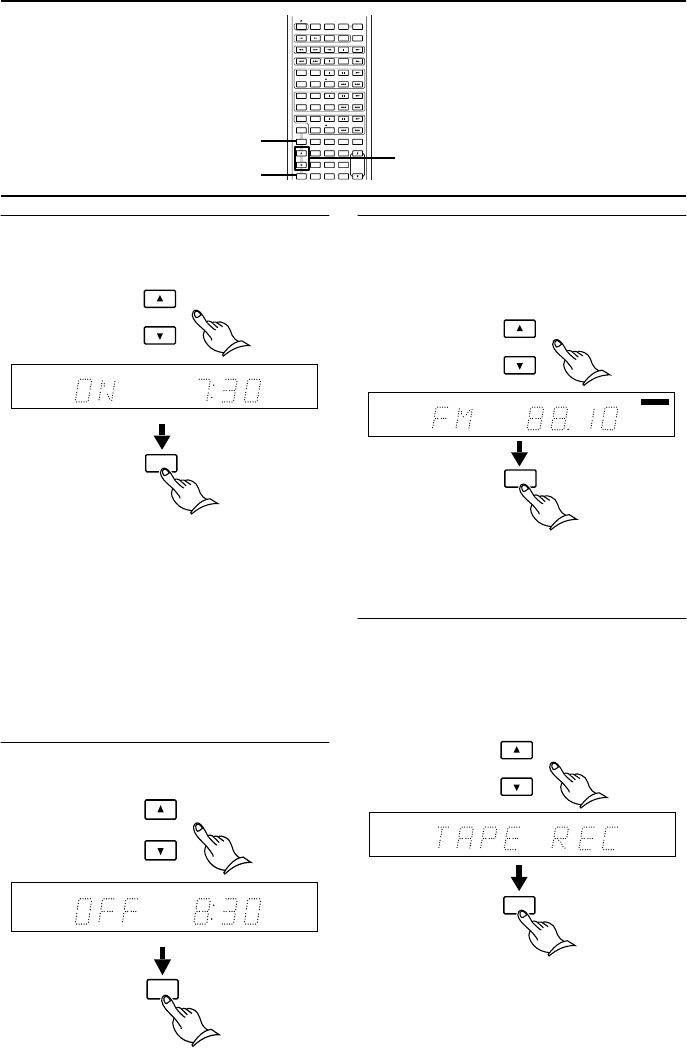
Press the UP π or DOWN † button to set
the ON time, and press the ENTER button.
Notes
• You can also use the number buttons
instead of the UP π or DOWN † button
to set the desired recording ON and OFF
time. To do so, refer to step 3 on page 24
and select the 24-hour display. You cannot
use the number buttons if you select the
12-hour display.
• When you store the ON time, the display
automatically indicates that the OFF time is
one hour after the ON time you specified.
4 P
ress the UP π or DOWN † button to set
the OFF time, then press the ENTER button.
5 Press the UP π or DOWN † button to
select the source (FM, AM, LINE/DVD),
and press the ENTER button.
If you select “FM” or ”AM“, press the UP π
or DOWN † buttons again to select the pre-
set number, then press the ENTER button.
6 Press the UP π or DOWN † button to
select the recording component (TAPE
REC, MD REC, or MD/TAPE), and press
the ENTER button.
• When you record analog FM or AM sig-
nals to an MD recorder, be sure to use
Analog In on the MD recorder.
(continued on the next page)
CLOCK SLEEP EFFECT
GRAPHIC EQ
MODE
123
456
789
10
/
0
-
- /
-
-
-
VOLUME
PRESET
F
MA
M
PLAY MODE
PLAY MODE
REPEAT
CLEAR
SCROLL
MEMORY
REPEAT
CLEAR
DISC
REPEAT
CLEAR
ACOUSTIC
PRESENCE
TONE
RANDOM
TIMER
UP/DOWN
ENTER
MUTING
INPUTTUNER
M D
DVD
C D
CDR
TAPE
REC
REC
PAUSE
/
STEP
STANDBY/ ON
TIMER
UPπ/DOWN†
ENTER
STEREO
TIMER
REC
ENTER
UP/DOWN
STEREO
TIMER
REC
ENTER
UP/DOWN
STEREO
MHz
TIMER
REC
ENTER
UP/DOWN
STEREO
AUTOTIMER
REC
ENTER
UP/DOWN


