29
Recording
Before recording
Refer to the instruction manuals of the
related components for detailed recording
operations.
Note
Do not turn the INPUT selector during recording.
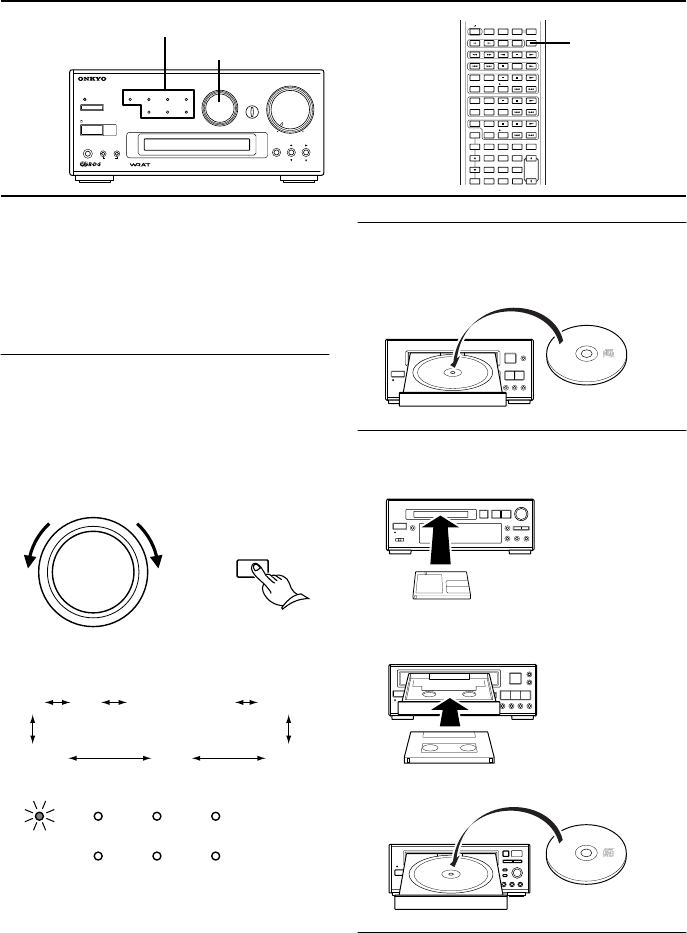
1 Turn the INPUT selector clockwise or
counterclockwise until the input indi-
cator of the source you wish to record
from lights.
Or press the INPUT button on the
remote controller.
The indicators light in the following
order:
e.g. The CD player is selected.
CDR/PC* (Asian model)
Note
If you press the INPUT button on the remote
controller repeatedly, the indicators light up
sequentially left-to-right as reflected in the
figure.
2 Prepare the playing source.
e.g. Insert the CD you want to record
from into the CD player.
3 Prepare the recording component.
e.g. 1 Insert an MD into the MD recorder.
e.g. 2 Insert a cassette into the stereo
cassette tape deck.
e.g. 3 Insert a CD-R into the CD recorder.
4 Start recording with the component
prepared in step 3, then start playing
the source prepared in step 2.
WIDE RANGE AMPLIFIER
TECHNOLOGY
ACCUCLOCK
STANDBY/ ON
DISPLAY
PHONES
MEMORY
CLEAR
FM MODE
PRESET
TUNING
R-805TX
FM STEREO / AM TUNER AMPLIFIER
ENERGY SAVE
ACOUSTIC
PRESENCE
OFF/1/2/3
CD MD CDR LINE/DVD
FM AM TAPE
INPUT
VOLUME
INPUT
INPUT
CLOCK SLEEP EFFECT
GRAPHIC EQ
MODE
123
456
789
10
/
0
-
- /
-
-
-
VOLUME
PRESET
F
MA
M
PLAY MODE
PLAY MODE
REPEAT
CLEAR
SCROLL
MEMORY
REPEAT
CLEAR
DISC
REPEAT
CLEAR
ACOUSTIC
PRESENCE
TONE
RANDOM
TIMER
UP/DOWN
ENTER
MUTING
INPUTTUNER
M D
DVD
C D
CDR
TAPE
REC
REC
PAUSE
/
STEP
STANDBY/ ON
Input source indicators
INPUT
INPUT
or
Remote
controller
CD MD
CDR (or CDR/PC*)
LINE/DVD
TAPE AM FM
CD MD CDR LINE/DVD
FM AM TAPE
ONKYO
CD PLAYER
CD PLAYER
ONKYO
CD PLAYER
CD PLAYER


