15
Connections
—Continued
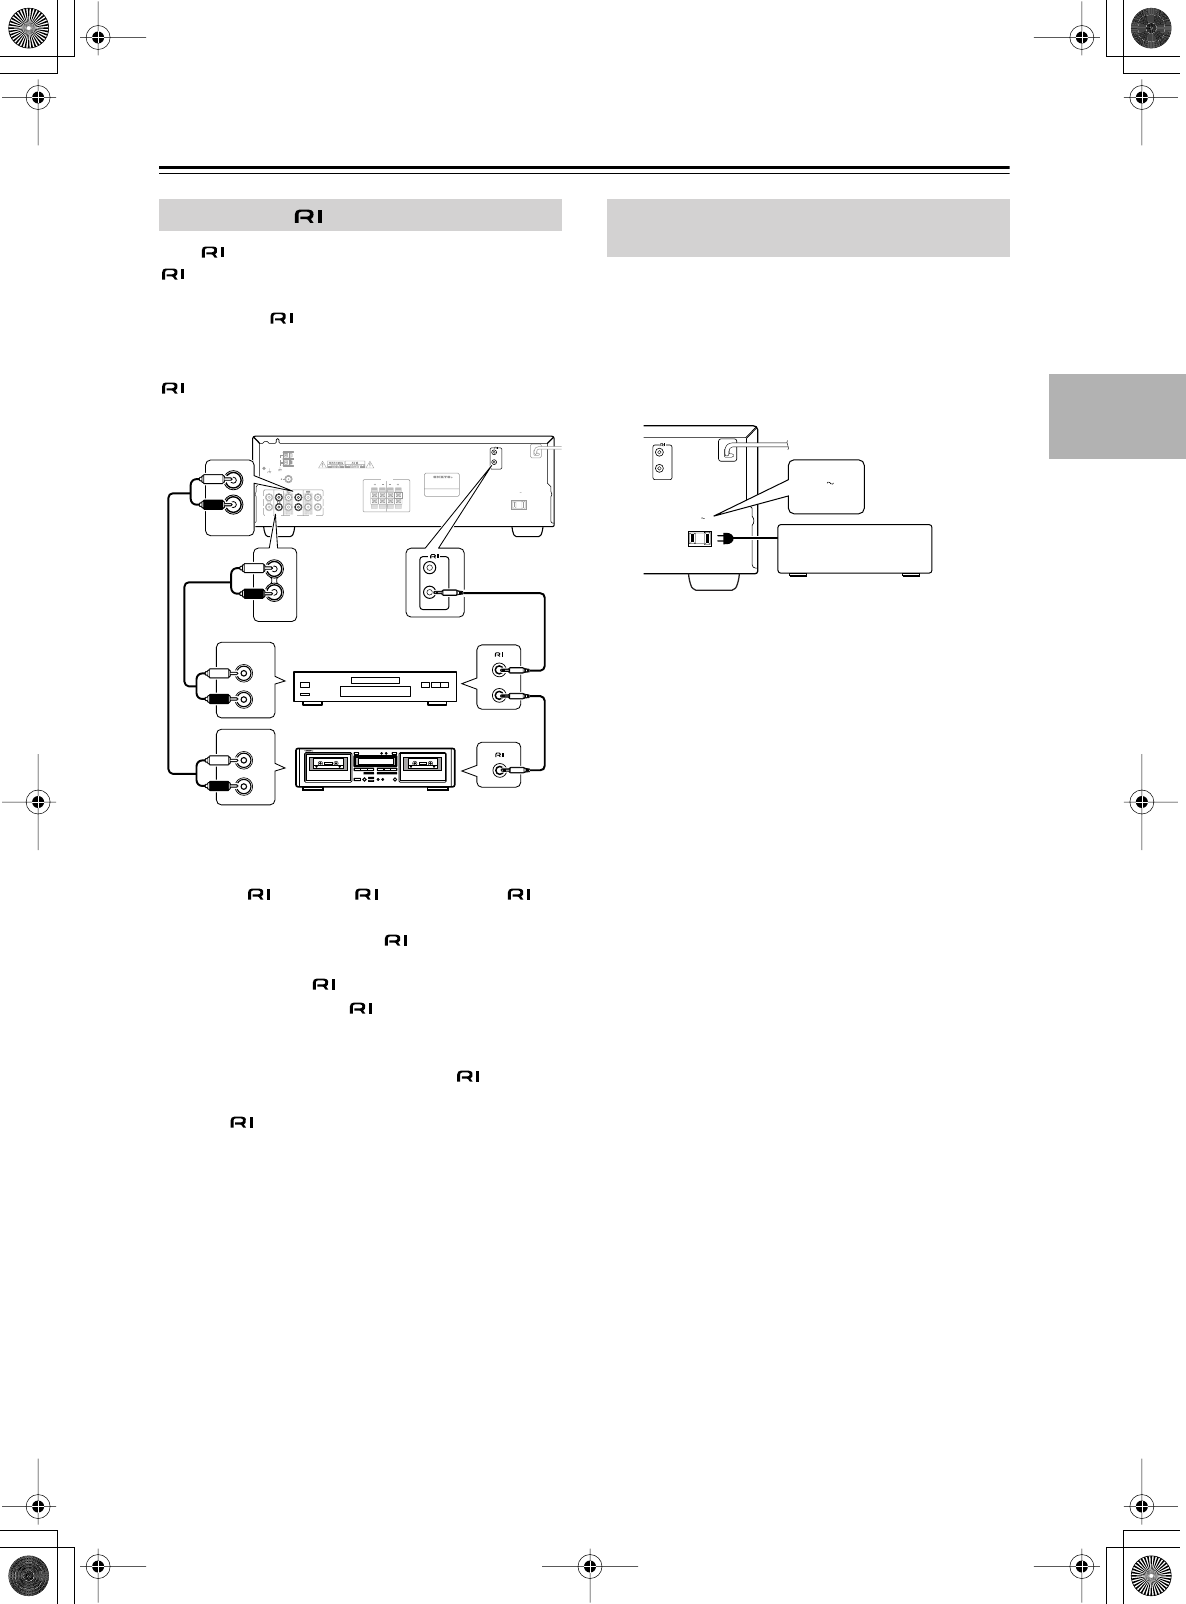
With (Remote Interactive) you can control your
-compatible Onkyo CD player and cassette recorder
with the TX-8011’s remote controller, and use the fol-
lowing special functions:
Direct Change
When playback is started on a component connected via
, the TX-8011 automatically selects that component
as the input source.
Notes:
• Push plugs in all the way to make good connections.
• Use only cables for connections. An
cable is not included with the TX-8011.
• Some components have two jacks, you can con-
nect either one to the TX-8011. The other is for con-
necting additional -compatible components.
• Connect the TX-8011’s jacks to only Onkyo com-
ponents. Connecting to other manufacturer’s compo-
nents may cause them to malfunction.
• Some components may not support all functions.
Refer to the manuals supplied with your components.
•To use , you must make an analog audio connec-
tion between the TX-8011 and the other component.
The TX-8011 has a switched AC outlet on its rear panel
that can be used to connect the power cord of another
component that you intend to use with the TX-8011.
These components can then be left turned on so that they
turn on and off as and when the TX-8011 is turned on
and set to Standby.
Caution:
• Make sure that the capacity of the component that you
connect to the AC OUTLET does not exceed the stated
capacity (120 W).
Connecting Components
ANTENNA
AM
GND
FM 75
TAPE 1 TAPE 2CD
L
R
L
R
IN IN
OUT OUT
ININ
PHONO
REMOTE
CONTROL
AC OUTLET
AC 120V 60Hz
SWITCHED
120W 1AMAX.
SPEAKERS
A
B
A
B
LR
REMOTE
CONTROL
L
R
AUDIO
OUTPUT
L
R
AUDIO
OUTPUT
CD
IN
TAPE 1
IN
/
e.g., CD player
e.g., cassette recorder
Connecting the Power Cord of
Another Component
REMOTE
CONTROL
AC OUTLET
AC 120V 60Hz
SWITCHED
120W 1AMAX.
AC OUTLET
AC 120V 60Hz
SWITCHED
120W 1A MAX.


