


13
CAUTION
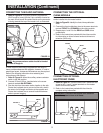
Never touch the lens of the CD player or damage
will result!
DIGITAL CLOCK
SETTING THE TIME
The proper clock setting procedure is arranged in 4
segments. Each segment must be completed in 5 seconds.
Follow the procedure below.
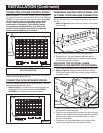
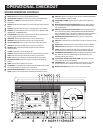
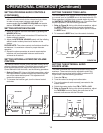
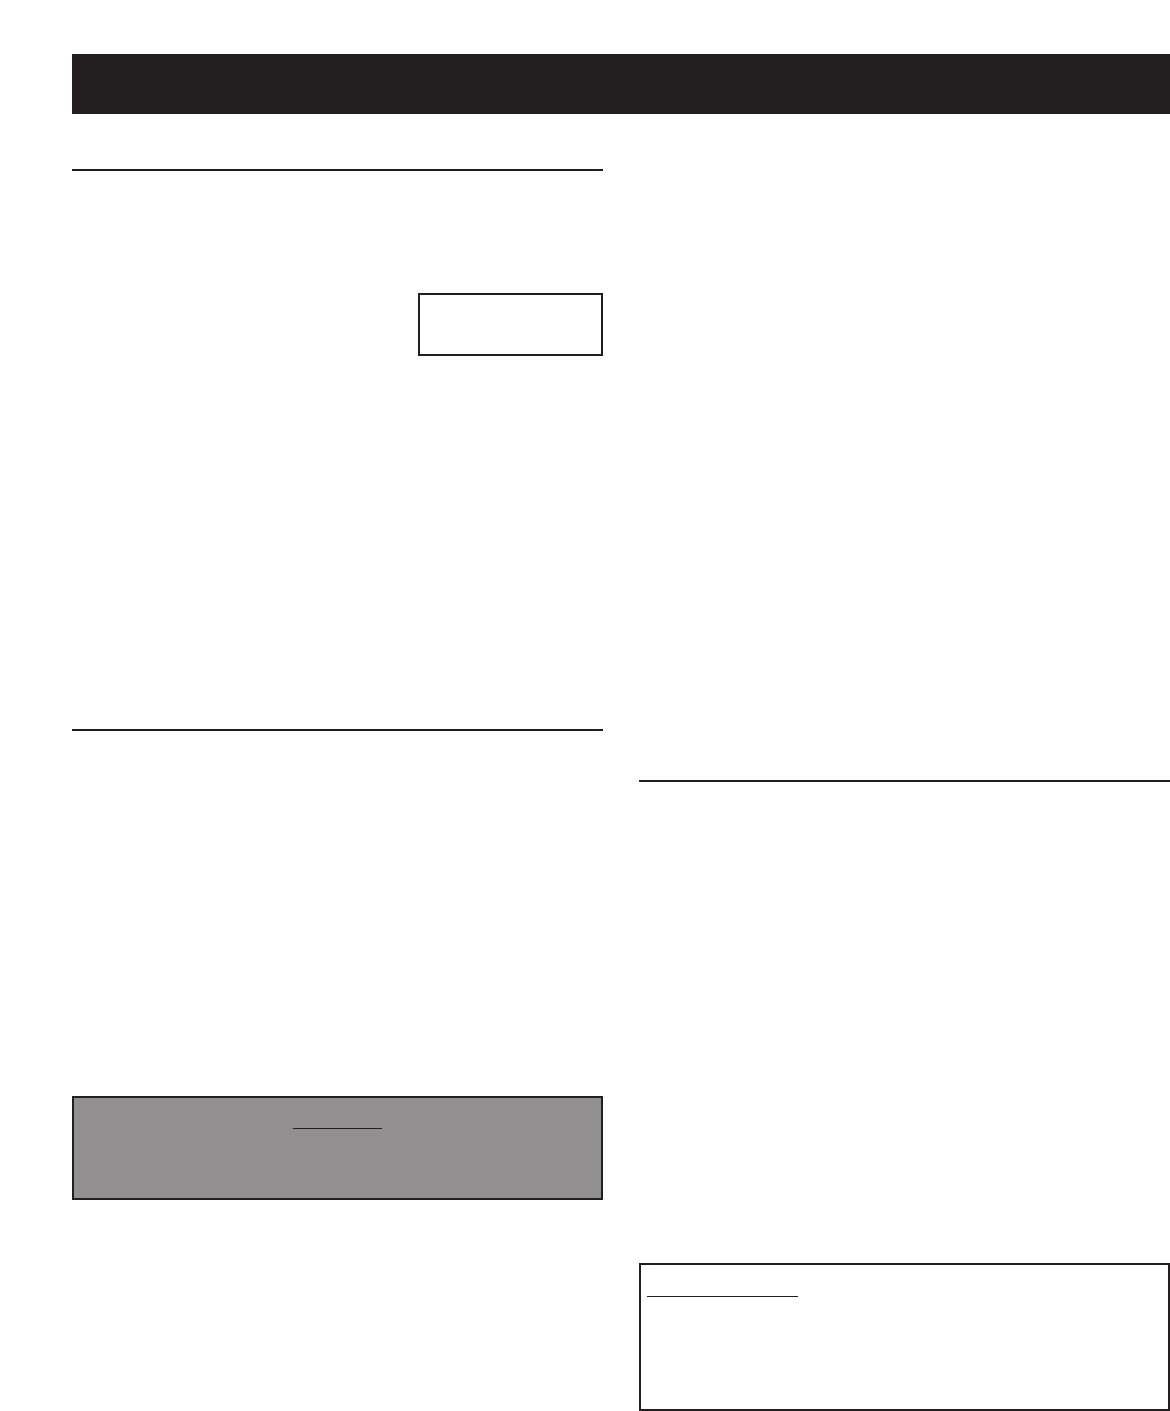
1. Press the TIME SET key one time.
The ‘Hours’ display will begin
flashing, and the words ‘Set Time’
will display.
2. Within 5 seconds, press the ▲ or ▼ key until the correct
Hour and AM/PM are displayed.
3. Within the next 5 seconds, press the TIME SET key
again. The ‘Minutes’ display will begin flashing.
4. Again, within 5 seconds, press the ▲ and ▼ keys until the
correct minute is displayed.
5. Release the keys after entering the correct time. The
display will stop flashing in 5 seconds, and the time will
be set.
NOTE: Pressing the ▲ or ▼ keys momentarily will cause the
time to advance or reverse one digit. Pressing the ▲ or ▼
keys continuously for more than 1⁄2 second will cause the
digits to advance or reverse at high speed.
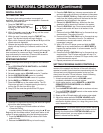
SYSTEM CHECKOUT
Set the following control settings and perform the indicated
tests.
1. Set all STATION STATUS SWITCHES to the RADIO
INTERCOM position.
2. Set the MASTER VOLUME control to
2
⁄3 position.
3. Set each remote station VOLUME control to
2
⁄3 position.
4. Set the SYSTEM VOLUME control to
1
⁄3
position.
5. Set the INTERCOM VOLUME control to
2
⁄3 position.
6. Set the BASS and TREBLE control to
1
⁄2 position.
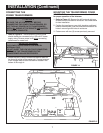
7. Press the OPEN key on the master station. The CD
Player door will open. Complete opening the door by
moving the CD door from left to right.
8. Snap a CD disc onto the spindle of the CD player.
SET TIME
PM
1
:
00
▲
▲
9. Close the CD player door by moving the door from right to
left until the door latches closed.
10. Tune in a strong local FM radio station as follows:
• Press the FM key.
• Locate a strong FM radio signal by using the ▲▼keys.
Beginning with the master station, check each station in the
system for proper operation using the following procedure.
1. Press the INSIDE/PATIO key to initiate a call. Radio
audio will mute.
2. Release the INSIDE/PATIO key to hear the reply.
3. Press the END CALL key. Intercom communication will
end and radio audio will return to all stations in the system.
4. Press the DOOR TALK key. Radio audio will mute and
audio from the initiating station will be heard at the door
speaker(s) and all stations in the system.
5. Release the DOOR TALK key. Audio from the door
speaker(s) will be heard at all stations in the system.
6. Press the END CALL key. Door communications will
end and radio audio will return to all stations in the
system.
7. Press and hold the END CALL key for 2 seconds at any
remote station. The radio will turn off.
8. Press and hold the END CALL key for 2 seconds at any
remote station. The radio will turn on. For additional
information on remote radio control, refer to the
homeowner’s manual.
9. With a CD in the CD player, press and hold the END
CALL key at any remote station until a BEEP BEEP is
heard at the remote station. In a few moments, the CD
will begin playing.
10. Press and hold the END CALL key for 2 seconds at any
remote station. The CD player and audio will stop. For
additional information on remote CD Player control, refer
to the homeowner’s manual.
11. Repeat procedure at all remote stations.
SETTING PROGRAM AUDIO CONTROLS
The volume levels required at each station may vary with the
location of the speaker and the size of the room where the
speaker is located. Spend some time experimenting with the
volume levels, and adjust each speaker so that you can
clearly hear the radio, CD and intercom. Use the following
procedures to set your system’s volume levels.
1. At each remote station, turn the VOLUME control
completely clockwise to maximum volume.
2. At the master station, set the REMOTE and MASTER
SPEAKER STATUS SWITCHES to the RADIO
INTERCOM position.
3. Turn the MASTER VOLUME control to maximum volume.
4. Turn the SYSTEM VOLUME control on the master station
to approximately
1
⁄3 volume.
5. Select an AM or FM radio station with a strong, clear signal.
6. Adjust the master station’s SYSTEM VOLUME control
until you have ample volume at the remote station that
requires the highest volume (i.e. a large living room, family
room, basement, etc.)
OPERATIONAL CHECKOUT (Continued)
PLEASE NOTE: The master station and all remote stations
(except door speakers) are equipped with volume controls.
Although the master station SYSTEM VOLUME sets the
system’s volume level, you may adjust an individual
speaker’s volume level as desired.