


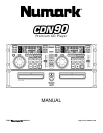


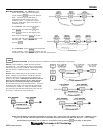
CDN90
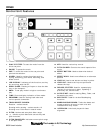
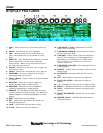
Main Unit Features
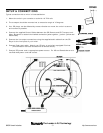
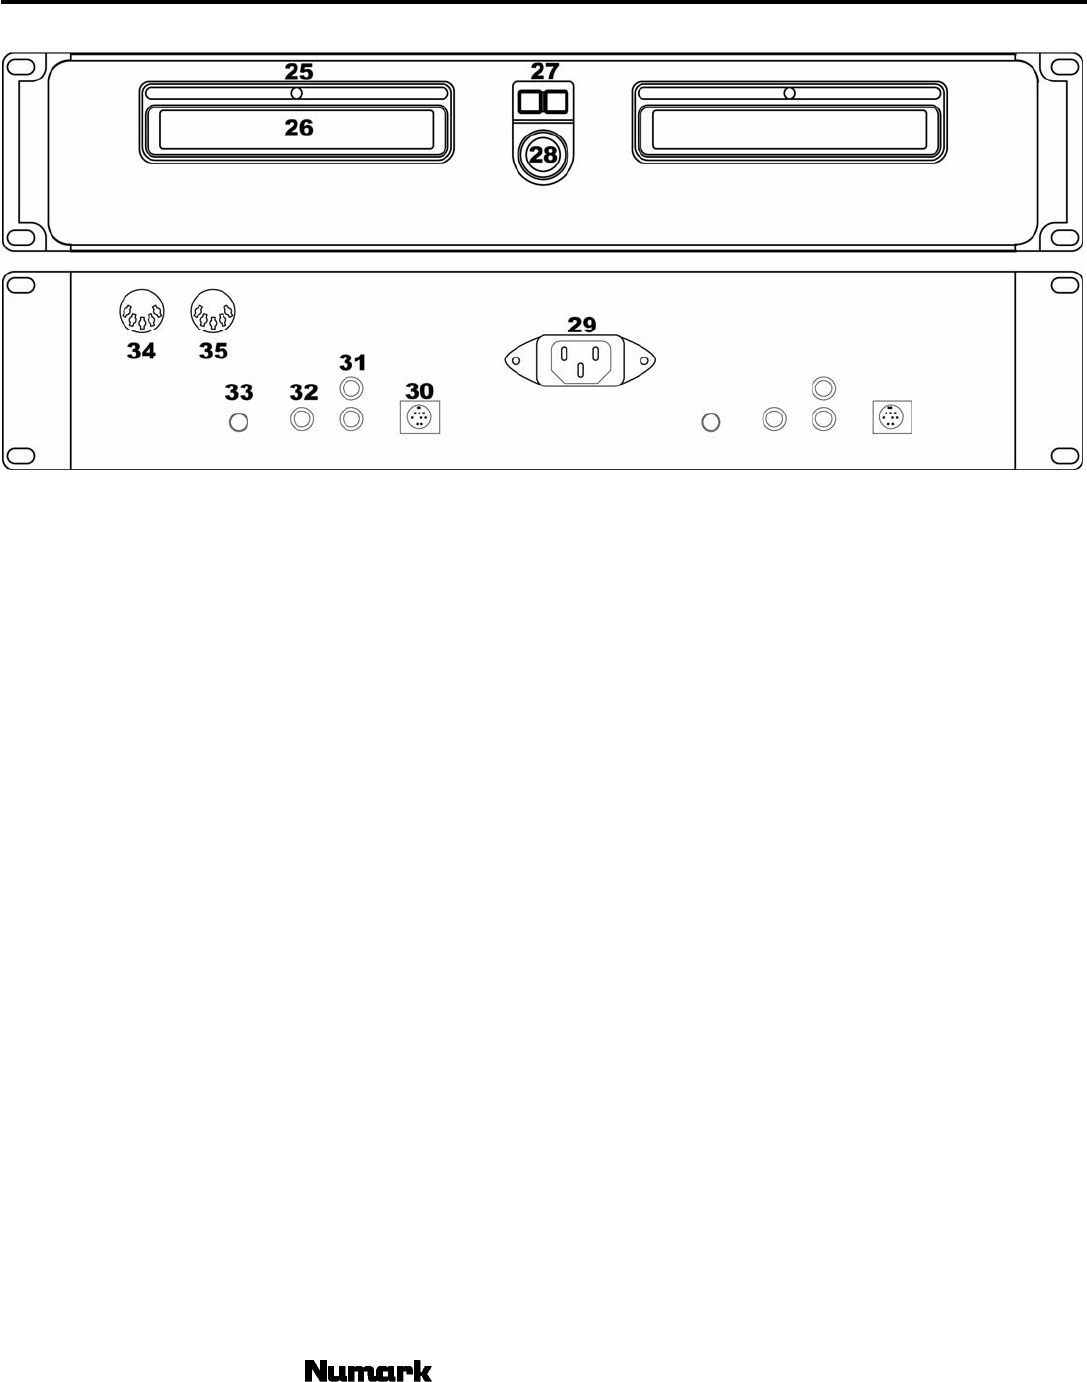
25. CD Illumination Light – lights up the CD drawer
and CD when open.
26. CD Drawer – Place your CDs you wish to play in
here. This unit is designed to play commercially
available CD and properly burned and finalized
CDR and CDRW formats. Due to variances on the
specification of certain CD burners and CDs some
discs home made CDs may not play properly.
27. OPEN/CLOSE- Pressing will open or close the disc
tray on the transport.
28. Power Switch- Turn on and turn off the machine
with this button. The unit should always be shut
down with this button first before any external
power is removed. Typically it is recommended
that the CD player is powered on before amplifiers
and off after amplifiers to avoid an audio spike to
be sent through your equipment.
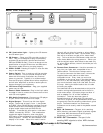
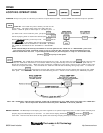
29. IEC Power Plug Connector - Plug your supplied
power cord in here.
30. Control Cable Connector- Plug in the 8-pin cable
included in here to connect the remote control and
main CD unit together
31. RCA Audio Connectors - Connect your CD player
to your mixer from this line level output.
32. Digital Output - This unit has full time digital
output. The format is type 2, form 1, also known
as S/PDIF (Sony/Phillips Digital Interface Format).
Some CDs also have information encoded in the
original audio output such as CDG CDs for
Karaoke. To access this information, hold down
“PROG” followed by “PITCH”. This combination
toggles the digital output to allow raw digital
information to be extracted from the CD for CDG
video purposes. “VIDEO” will be indicated in the
display in this mode. When this mode is active
the unit will not allow for looping or other effects
that would disrupt the video. In this mode, Prog +
Cue will turn autocue on and off for video mode
only. This is so that the CDG doesn't skip over the
video frame before the song comes in. When you
wish the digital output with effects to be used only
for other digital devices, the unit should be put into
“Audio” mode.
33. Remote Start Connector – Use this connector to
plug into your fader start compatible mixer or
remote switch. This function is always active.
To use this connector for fader start, connect the
supplied fader start cable to a fader start
compatible mixer. Every time you move the
crossfader on the mixer over to the side that the
unit is on, it will automatically start playing. When
you move the fader away from that side, the unit
will stop. Moving the fader back to the unit side
will start play again.
Foot switches can also be attached to this jack for
creative mixing techniques and can be found in
most music shops. Connector plugs are often ¼”
and an adapter to 1/8” will be needed for
connection. There are also two types of
footswitches that will work with this connector.
The first is a typical, on/off pushbutton switch and
are generally used for switching channels on guitar
amps. The second switch is a momentary
footswitch and is usually used for keyboard sustain
pedals.
34. MIDI IN Connector –The port is for receiving
MIDI (Musical Instrument Digital Interface) signals
from other MIDI devices such as CD players,
Keyboards, or Drum machines.
35. MIDI OUT Connector –The port is for
sending MIDI signals to other MIDI devices.
- The Leader in DJ Technology
©2002 Numark Industries - 7 - http://www.numark.com