


The following is an overview
of the installation of the
Music Anywhere! In-Ceiling
Kit. In some cases you
should refer to the specific
product manuals for addi-
tional information.
Positioning your
Speakers for the
Best Sound Quality
Decide on an appropriate
installation location for your
In-Ceiling Speakers. They
may be installed in any
standard ceiling of at least
a 3/8” thickness. Best results
are achieved by installing
the In-Ceiling Speakers an
equal distance from the
main listening position
whenever possible.
DO NOT MOUNT THE
SPEAKERS AT THIS TIME
Finding the Right
Spot to Install
the Wall-Mount
Volume Control
Decide on a location for the
Wall-Mount Volume Control
that is convenient for you
and where you believe the
Speaker Cable will easily
reach.
The Wall-Mount Volume
Control should be installed
indoors, in an interior wall
relatively close to the area
where the speakers will be
mounted. The VCS-2D-IM
Volume Control included
with the Music Anywhere!
In-Ceiling Kit is not water-
proof and is not suitable
for installation outdoors
without a Niles WDC-100
weatherproof cover.
(See Page 10)
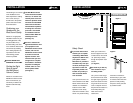
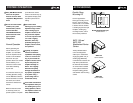
Be sure to measure the
approximate distance from
your equipment to the
Wall-Mount Volume Control
location, and from the
Wall-Mount Volume Control
to the first and second
Speaker locations. This
will ensure that you have
enough wire to complete
the installation. The Music
Anywhere! In-Ceiling Kit
includes 100 ft. of 4-con-
ductor Speaker Cable.
(See Figure 1)
3
!
!
!
INSTALLATION
4
FM
105.9
0 1 0 : 0 0
Figure 1
Volume
Control
In-Ceiling
Speakers
INSTALLATION
If you have doubts about
whether you are capable
of installing a Niles Music
Anywhere! In-Wall Kit into
your system, consult a
Niles dealer or profession-
al installer. They have spe-
cial tools, techniques, and
experience to make the
impossible possible. The
installer can provide you
with an estimate before
work is started.
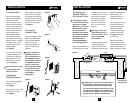
Once you have found a con-
venient location for the Wall-
Mount Volume Control and
decided on an installation
location for the In-Wall
Speakers, locate nearby
studs in the wall with a stud
sensor or by hand knocking.
When you’ve found loca-
tions that appear to be free
of obstructions, drill a small
1/8” pilot hole just barely
through the drywall in each
location.
(See Figure 2)
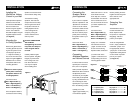
Be careful. If you feel any
extra resistance as you
are drilling. STOP!
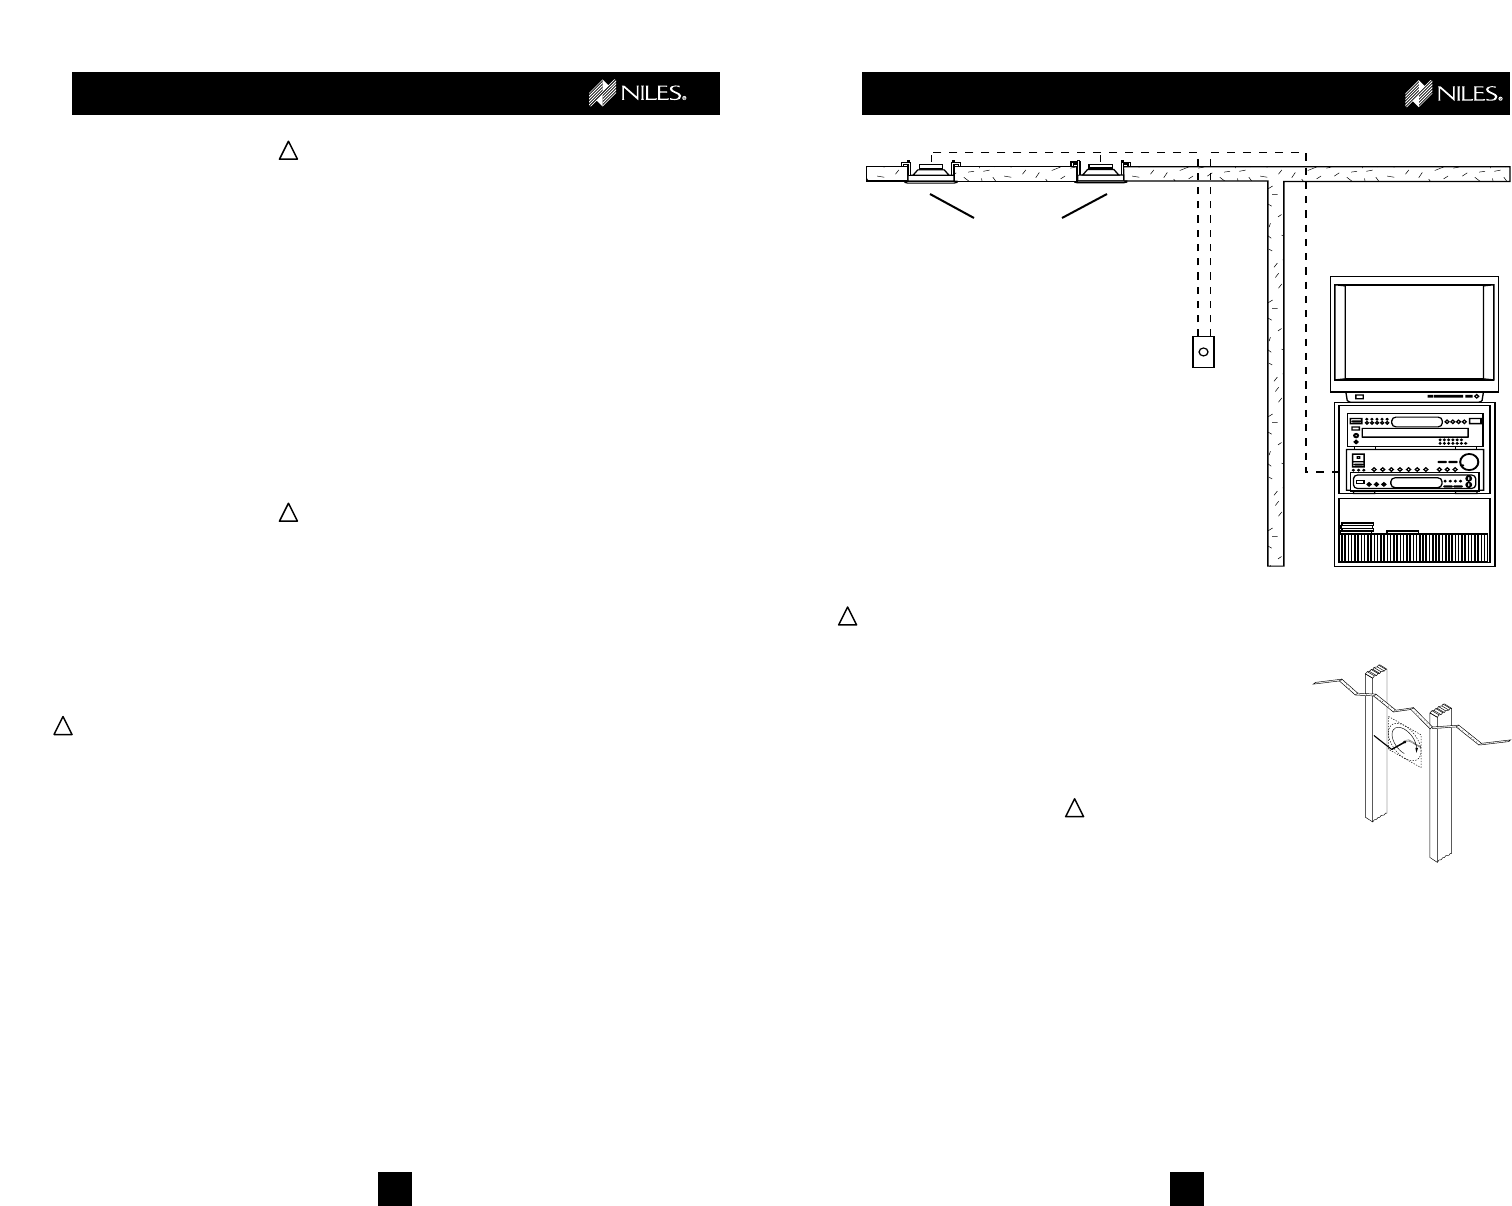
Cut a piece of coat hanger
and bend the wire to create
two right angles opposite of
each other about six inches
long. Poke the six inch end
of the “Z-shaped” wire into
the pilot hole and rotate in a
circle while probing the
inside of the wall for
obstructions.
If the wire’s movement is
obstructed by a pipe, cable
or wall stud, fill the hole with
spackle or other patching
compound, sand, paint and
try another location.
Figure 2
!
!
Safety Check