


7
© Monitor Audio Ltd 2001
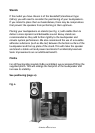
Assembly
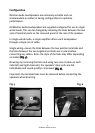
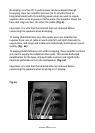
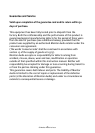
To attach the plinth, invert the speaker as shown (see Fig. 3), resting the
top on a non-abrasive protective sheet. Now locate the plinth, painted
side down, on the four fixing studs. Using the bolts supplied, screw the
plinth firmly to the bottom of the loudspeaker with the screwdriver
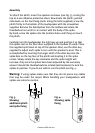
supplied. Remove the Gold Spikes from the toolbox and rotate the
thumbwheel nut until it is in contact with the body of the spike.
By hand, screw the spikes into the location holes until they just touch
the plinth.
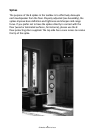
Carefully turn the loudspeaker the right way up and position it so that
the spikes rest on the floor discs supplied in the toolbox (if used). Place
the supplied spirit level on top of the speaker. Next, use the allen key
supplied to adjust each spike in turn until the speaker is level. This is
accomplished by inserting the longer shaft of the allen key into the
spike hole on the top face of the plinth and locating it in the spike
recess. Slowly rotate the key clockwise and the spike height will
increase. Only once the spikes have been adjusted by the necessary
amount should the thumbwheels be rotated (anticlockwise) to lock the
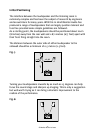
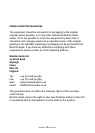
spikes in position. If you do not wish to use the plinth see Fig. 4.
Warning: If using spikes make sure that they do not pierce any cables
that may be under the carpet. When handling your loudspeakers with
spikes use extreme caution.
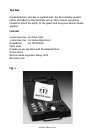
Fig. 4.
Showing spike
fixing
Fig. 3.
Showing
additional plinth
and spike fixing